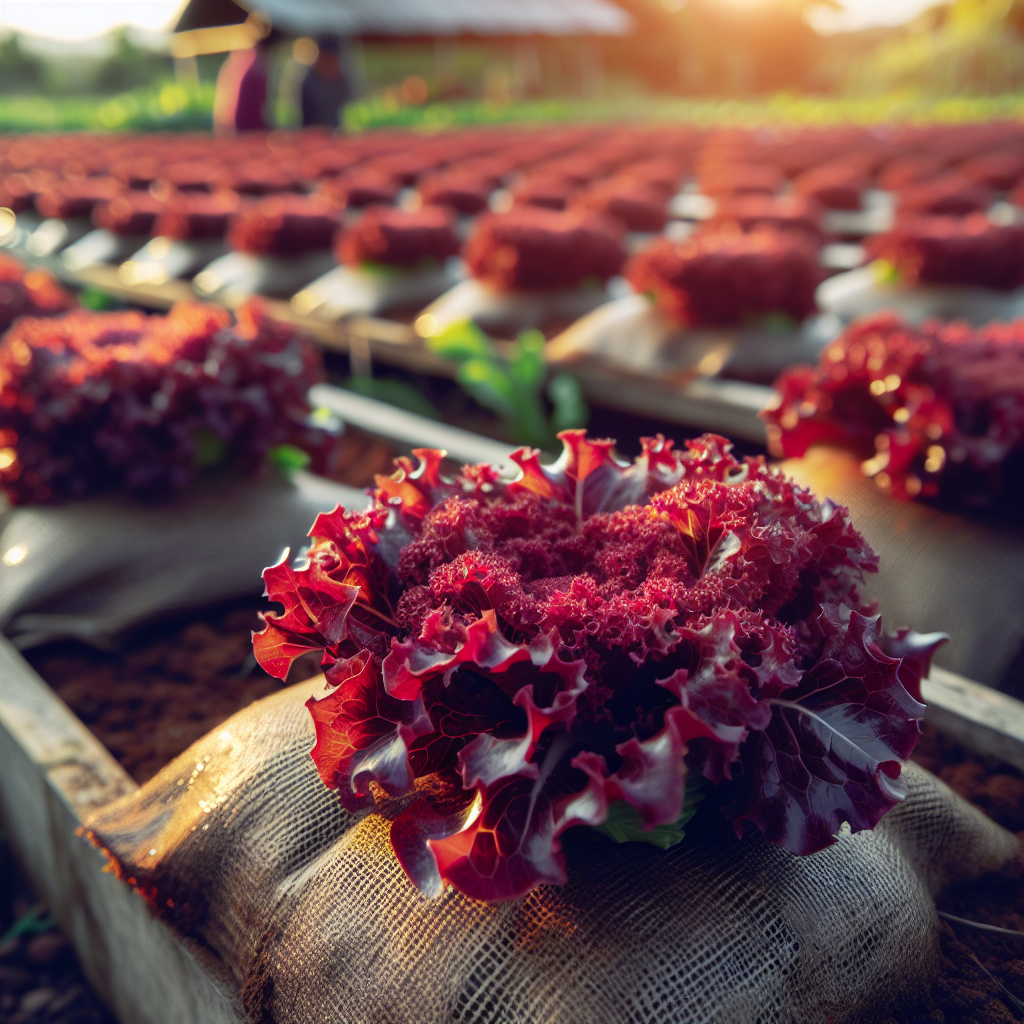
Introduction to Red Leaf Lettuce
A classic cool-season salad crop, this loose-leaf type is grown for open heads of frilled, soft leaves that range from green at the base to copper, maroon, or deep wine-red at the margins. The red pigmentation comes primarily from anthocyanins, and its intensity is strongly influenced by cultivar, light levels, cool nights, and balanced nutrition. Compared with romaine or iceberg, it matures quickly, is usually harvested young, and offers excellent cut-and-come-again potential.
Historically, leaf lettuces descend from centuries of selection from wild prickly lettuce relatives around the Mediterranean and Near East. Red forms became especially valued in market gardening because they added visual contrast to mixed salads while retaining the quick turnaround and low space demands of loose-leaf types. For growers, that combination means reliable succession planting, rapid harvest cycles, and strong appeal in fresh markets.
Red leaf lettuce is often considered easy, but producing premium leaves is more exacting than many beginners expect. Heat can trigger bitterness and bolting, erratic moisture can cause weak growth or tipburn, excessive nitrogen can dilute color and texture, and rough handling can collapse postharvest quality within days. The best crops are grown fast and steadily, under cool conditions, with even moisture and frequent harvests.
For growers wanting broader lettuce context, see our Lettuce guide.
Botanical Profile of Red Leaf Lettuce
This crop belongs to the Asteraceae family, the same family as sunflower, chicory, and endive. The species is Lactuca sativa, and red leaf types are generally classified within the loose-leaf group, often designated var. crispa. Unlike heading lettuces, it forms a rosette or loose bouquet rather than a dense head. Leaves are thin to moderately thick, broad, and ruffled, with a delicate midrib and flexible petiole attachment.
Growth is shallow-rooted, with the majority of active feeder roots concentrated in the top 15-20 cm of soil. That one fact explains much of its management: it requires frequent access to moisture, reacts quickly to drying, and performs best in fine-textured, well-prepared beds rich in organic matter. Because roots are not deep, a brief period of surface drying can stunt growth or lead to edge burn in rapidly expanding leaves.
Red color expression is not purely genetic; it is a genotype-by-environment trait. Strong light, cool temperatures, and moderate fertility promote anthocyanin accumulation. Very warm nights, excessive shading, or oversupply of readily available nitrogen often produce greener, looser plants with reduced red intensity. Many commercial red leaf cultivars are selected for bolt tolerance, uniform frill, and stronger color under spring and summer conditions, but even these perform best when daytime temperatures remain mild.
Morphologically, the crop passes through distinct stages: germination, cotyledon emergence, juvenile rosette expansion, harvestable leaf production, stem elongation, and flowering. Once bolting begins, the stem extends, leaves narrow and toughen, and flavor shifts from mild to bitter. In production terms, quality is highest before noticeable stem extension.
Soil, pH, and Climate Requirements for Red Leaf Lettuce
This crop thrives in fertile, well-drained, moisture-retentive soil with high biological activity and a fine crumb structure. Ideal textures are sandy loam to silt loam enriched with mature compost. Heavy clay can work if raised beds and organic matter improve aeration, but compacted or waterlogged soils sharply reduce growth and encourage root disease. On the other hand, very sandy soils warm quickly and support early crops, but they require tighter irrigation management because the shallow root zone dries rapidly.
The preferred soil pH is 6.0-7.0, with an optimum around 6.3-6.8. Below pH 5.8, nutrient availability becomes less favorable and root growth often slows. Above pH 7.2, micronutrient issues such as iron or manganese unavailability may appear, especially in high-calcium soils, resulting in pale young growth. A soil test before planting is strongly recommended. Lettuce does not need excessively rich fertility, but it responds to balanced available nitrogen, adequate potassium, calcium, and magnesium, and moderate phosphorus in deficient soils.
Temperature is the most important climate factor. Germination is best around 15-22°C, though seed can germinate at lower temperatures. Above roughly 27°C, germination percentage and uniformity may decline, and some seed lots may exhibit thermodormancy. Vegetative growth is highest quality at 10-20°C. Plants can tolerate light frost once established, and cool nights often improve sweetness, crispness, and red coloration. When temperatures consistently exceed 24-27°C, growth becomes stressed, leaves may become thinner and more bitter, and bolting risk increases sharply.
In practical terms, the crop is best for early spring, late summer, autumn, and mild winter production, depending on region. In hot climates, use shade cloth of 20-30% during warm spells, prioritize morning sun over reflected afternoon heat, and select heat-tolerant red cultivars. In cool maritime climates, protect from prolonged leaf wetness and ensure airflow to reduce downy mildew.
Soil moisture should remain consistently in the range of roughly 60-80% of field capacity in the active root zone. For most growers, that means the top 5-10 cm should feel evenly cool and lightly moist, never powder-dry and never sticky-saturated. If a squeezed handful forms a weak ball that breaks apart with a tap, moisture is usually near ideal. Overwatered beds feel heavy, smell sour, show algae or persistent surface wetness, and produce pale, soft, disease-prone plants. Underwatered beds produce slow, leathery leaves, midday wilting that persists into evening, and increased bitterness.
For a deeper foundation on building productive beds, see Soil health strategies.
Step-by-Step Planting & Propagation
Propagation is almost always from seed. Because lettuce seed is small and should not be buried deeply, success starts with careful seedbed preparation. Prepare a bed that is level, fine, and free of crust-forming clods. Incorporate well-finished compost, then rake smooth so seed can contact moist particles evenly.
For direct sowing, mark shallow drills 0.5-1 cm deep. Sow thinly, cover lightly with screened compost or fine soil, and water with a gentle rose or mist to avoid displacing seed. In cool, moist soil, emergence usually occurs in 5-10 days. In warmer conditions, pre-irrigating the bed and sowing in late afternoon can improve germination. Some professional growers use shade cloth or germination fabric for a few days to keep the seed zone cool and uniformly moist.
For transplants, sow into plug trays or soil blocks 3-4 weeks before field setting. Keep the medium evenly moist but not saturated; overly wet propagation media encourages damping-off and weak roots. Seedlings are ready for transplanting when they have 3-4 true leaves and sturdy crowns. Harden off for several days by reducing water slightly and exposing them to outdoor conditions gradually.
Spacing depends on harvest style. For baby leaf, sow densely in bands or broad beds and cut at 7-12 cm tall. For whole loose heads, space plants 20-30 cm apart in rows 25-35 cm apart. Closer spacing gives smaller, more upright plants; wider spacing improves airflow and leaf size. Many market growers prefer a 25 x 25 cm grid for balanced head size and efficient bed use.
A practical planting sequence is:
- Test soil moisture and irrigate the bed a day before sowing if dry.
- Prepare a fine seedbed and incorporate mature compost.
- Sow seed shallowly or transplant hardened seedlings in the cool part of the day.
- Water immediately after sowing or transplanting to settle soil around the seed or root ball.
- Protect with row cover if flea beetles, strong wind, or cold nights are expected.
- Thin direct-sown stands promptly once true leaves appear.
- Begin light, regular feeding only after active growth is visible.
Succession sowing every 7-14 days is the key to continuous harvest. In cool spring weather, intervals can be 10-14 days. In rapid summer growth windows or protected culture, every 7 days may be better. Because quality declines quickly in heat, avoid planting large blocks all at once unless you can harvest them promptly.
Care & Maintenance regimes for Red Leaf Lettuce
The goal is uninterrupted, stress-free growth. Lettuce that grows quickly and steadily develops tender texture, mild flavor, and rich color. Any pause from drought, crowding, nutrient shortage, or heat often shows up directly in quality.
Irrigation should be frequent and light-to-moderate rather than deep and infrequent. Since most roots occupy the upper soil layer, apply enough water to moisten the top 15-20 cm, then rewater before more than the upper few centimeters become dry. In cool weather on moisture-retentive soil, this may mean watering every 3-5 days; in sandy soils or warm winds, daily light irrigation may be necessary. Drip irrigation is ideal because it keeps foliage dry, reduces disease pressure, and delivers consistent root-zone moisture. If overhead irrigation is used, water early in the day so leaves dry quickly.
Signs of overwatering include yellowing lower leaves, sluggish growth despite wet soil, persistent wilt in saturated ground, surface fungus or algae, and a soft, weak crown. Signs of underwatering include dull leaf color, edge browning, daytime collapse, smaller leaves, stronger bitterness, and premature bolting. Repeated extremes between drought and saturation are especially damaging because they disrupt calcium movement and increase tipburn risk.
Nutrient management should be restrained but steady. Excess fertility, especially nitrogen, produces lush but weak leaves with reduced pigmentation and poorer storage life. A moderate preplant compost application, supplemented with a light side-dress of nitrogen once plants establish, is usually sufficient on average garden soils. On low-fertility ground, 30-60 kg/ha of available nitrogen equivalent during the crop cycle is often enough, split into preplant and early vegetative feeding. Calcium is critical for leaf edge integrity; uneven moisture often causes more calcium-related disorders than actual calcium deficiency in the soil.
Mulching with a thin layer of clean straw or compost can help moderate moisture fluctuations and reduce soil splash, but keep mulch from burying crowns. In cool spring soils, heavy mulch may delay warming, so use it judiciously. Row covers can accelerate early growth and protect from wind, but vent them in warm weather because excess heat under cover can trigger elongation and bolting.
Weed control matters most in the first few weeks. Lettuce is a poor competitor because of its shallow roots and low canopy height. Weed early using shallow hoeing or hand cultivation, staying close to the surface to avoid root disturbance. Once the bed fills, dense canopy growth helps suppress later weeds.
In protected cultivation, maintain ventilation and avoid humidity accumulation overnight. High humidity with poor airflow encourages foliar disease and soft growth. In outdoor production, orient rows to optimize airflow, especially in humid climates.
Pests, Diseases & Organic Management
The most common insect pests are aphids, slugs, snails, flea beetles, leafminers, and occasionally cutworms. aphids often hide deep in the leaf folds and can make marketable heads unacceptable even before visible damage becomes severe. They multiply rapidly under mild, sheltered conditions. Encourage beneficial insects, avoid excessive nitrogen, and inspect inner leaves frequently. A firm water spray can reduce early populations, while insecticidal soaps may help if applied thoroughly and during cool periods.
slugs and snails are major threats in damp beds, mulched systems, and dense spring plantings. They chew irregular holes and contaminate leaves with slime. Use boards or traps to monitor, reduce hiding places, irrigate in the morning rather than late evening, and apply iron phosphate baits where pressure is serious.
flea beetles usually produce small shot holes in young leaves. Damage is most serious at the seedling stage. Floating row covers are one of the best organic defenses until plants are established. cutworms sever transplants at soil level; collars and evening scouting help reduce losses.
Among diseases, downy mildew is one of the most significant, especially in cool, humid conditions. It often appears as angular pale patches on the upper leaf surface with fuzzy growth beneath under moist conditions. Prevention depends on airflow, resistant cultivars where available, avoiding prolonged leaf wetness, and crop rotation. bottom rot caused by Rhizoctonia and drop caused by Sclerotinia are favored by wet soil, crowding, and poor sanitation. damping-off affects seedlings in propagation trays or cold, saturated seedbeds.
Physiological disorders are also important. Tipburn, which shows as browning on leaf edges or inner expanding leaves, is often linked to rapid growth combined with inconsistent moisture and impaired calcium transport. Bitter flavor and elongated stems signal heat stress and the start of bolting. Sunscald may occur on previously shaded leaves after sudden canopy opening or intense heat.
Organic management works best as an integrated system:
- Rotate away from lettuce and related composites for at least 2-3 seasons where disease is persistent.
- Use clean seed, sanitized trays, and fresh propagation media.
- Maintain even spacing and airflow.
- Irrigate to support steady growth, not lush excess.
- Remove crop residues promptly after harvest.
- Scout twice weekly, especially under leaves and in crowns.
- Use row covers early to exclude insects.
- Favor biodiversity with flowering insectary plants such as Nasturtium, while keeping pest reservoirs monitored.
Harvesting, Curing & Optimal Storage
This crop is not cured in the way onions or garlic are cured; instead, quality depends on rapid, cool, careful handling immediately after harvest. Timing is everything. Leaves are best harvested when fully colored, crisp, and tender but before plants show stem elongation. Whole heads are commonly cut 45-70 days from sowing depending on season and cultivar, while baby leaves may be ready in 25-35 days.
For cut-and-come-again harvest, use a sharp knife to cut outer or upper leaves 2-4 cm above the crown, leaving the growing point intact. This method works best when plants are vigorous, cool-grown, and harvested before maturity becomes too advanced. For whole-plant harvest, cut at the base just above the soil line in the cool of morning after leaves are fully hydrated but surface moisture has dried.
Do not harvest during the hottest part of the day unless absolutely necessary. Warm lettuce respires rapidly, loses turgor, and deteriorates quickly. Field heat should be removed as soon as possible. Commercially, hydro-cooling or forced-air cooling is ideal. At small scale, move harvest into shade immediately, rinse if appropriate with clean cold water, spin or drain thoroughly, and refrigerate without delay.
Handle gently. Red leaf lettuce bruises easily, and damaged tissue darkens quickly, especially along the leaf margins. Avoid compressing leaves in deep bins. Use shallow crates or harvest totes and keep them covered from sun and wind.
Optimal storage conditions are 0-2°C with 95-100% relative humidity. Under these conditions, high-quality heads may store for 7-14 days depending on cultivar and handling. Warmer storage drastically shortens life. At household refrigerator temperatures of 3-5°C, expect closer to 5-7 days of good quality if leaves were harvested and dried properly. Too little humidity causes wilting; free water on leaves encourages decay. The ideal balance is cold, humid air with leaves dry on the surface.
Before marketing or use, remove damaged outer leaves and rehydrate slightly wilted heads by placing cut ends in cold water briefly, but avoid prolonged soaking because it can increase microbial spoilage. Premium quality is defined by crisp texture, bright red coloration, clean unblemished leaves, and a sweet, mild flavor with only a slight pleasant bitterness.
Companion Planting for Red Leaf Lettuce
This crop benefits most from companions that either repel pests, occupy different root zones, or provide modest microclimate buffering without excessive shade. Allium companions are especially useful because their scent may help confuse aphids and other pests, while lettuce itself occupies shallow soil layers and can fit neatly between slower or more upright crops.
Carrot is a strong companion because it roots deeply while lettuce feeds shallowly, allowing efficient bed sharing. Carrots also help diversify canopy structure and make excellent use of space in cool-season plantings. Onion and Garlic are classic partners in mixed beds, contributing odor-based pest disruption and making efficient use of vertical and root-zone separation. Radish is another useful quick companion, often acting as an early harvested intercrop that opens space before lettuce reaches full spread.
Avoid pairing with aggressive, sprawling crops that quickly overtake light and airflow. Also avoid dense brassica blocks if local humidity and disease pressure are already high, since mixed canopies can trap moisture if spacing is too tight. The best companion strategy is not just pest reduction but spatial efficiency: combine shallow, fast lettuce with deeper-rooted or upright crops that do not compete heavily for surface moisture.
When planning mixed cool-season beds, prioritize easy access for harvest and inspection. Companion crops should never make it difficult to spot aphids in the heart, maintain airflow, or irrigate evenly. In professional systems, the most effective pairings are those that preserve lettuce quality first and offer secondary pest or space benefits second.