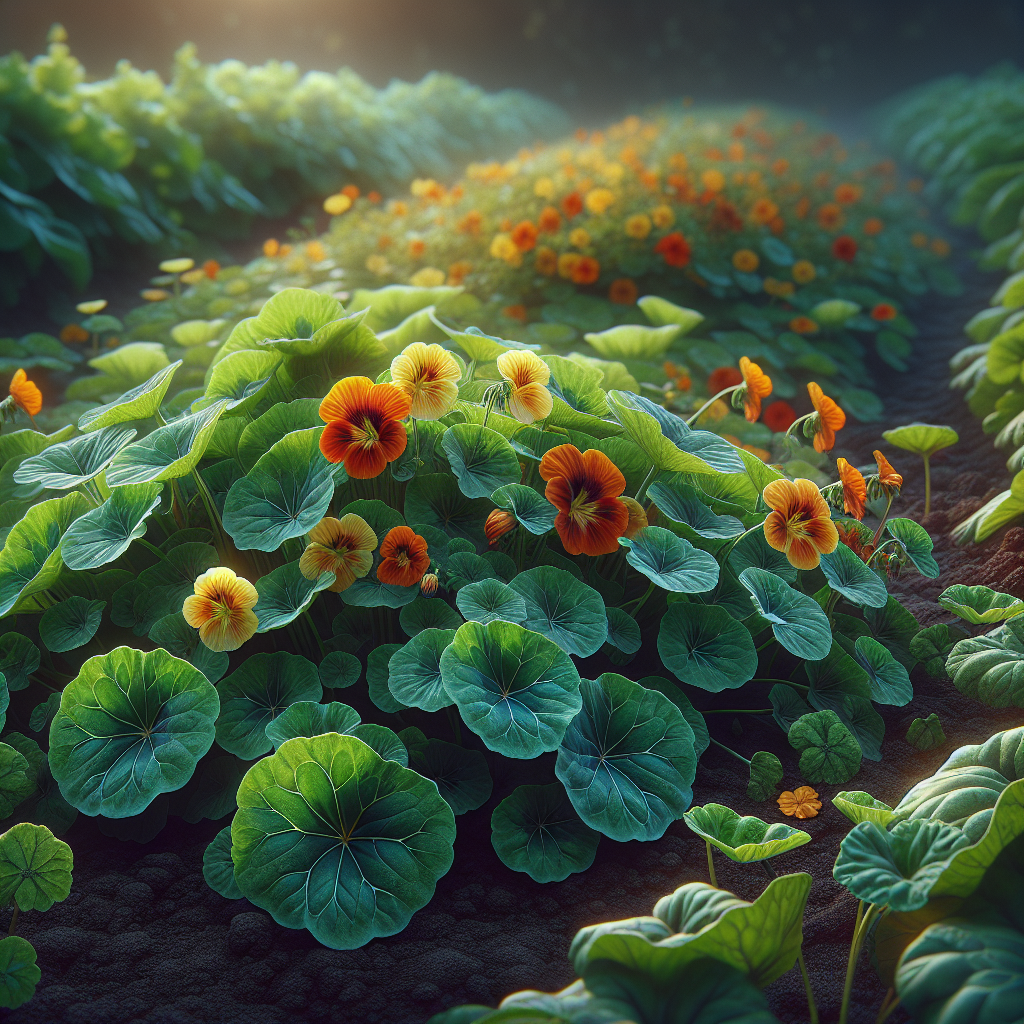
Introduction to Nasturtium
Native to South America, especially the Andean regions of Peru and surrounding areas, this colorful annual became popular in European gardens in the 16th and 17th centuries before spreading worldwide as both an ornamental and edible plant. Its round leaves, vivid flowers, and characteristic peppery flavor have made it a staple in kitchen gardens, cottage plantings, and market bouquets. In practical horticulture, it is unusually versatile: the leaves, flowers, and immature seeds are edible; the plant attracts pollinators; and it is widely used to distract Aphids, Flea beetles, and some brassica pests away from nearby crops.
Growers usually encounter two main habits: trailing/climbing forms and compact bush forms. Trailing types can spill 1.5-3 m across beds or over retaining walls, while dwarf bedding cultivars may stay 20-35 cm tall and wide. Flower colors range from cream and yellow to orange, red, and deep mahogany, with many modern cultivars showing bicolors, splashes, or dark foliage. Unlike many flowering annuals that demand rich soil and constant feeding, this crop often flowers best when fertility is moderate to low. Excess nitrogen frequently produces lush foliage at the expense of blooms.
For food production, nasturtium deserves more respect than it often receives. The foliage contains vitamin C and glucosinolate-like pungent compounds that give the leaves and petals a watercress-like bite. Flowers can be sold as garnish, leaves harvested young for mixed salads, and green seed pods pickled as a caper substitute. From a systems perspective, it is especially valuable in diversified beds with Tomato, cucurbits, brassicas, or orchard understories. For broader planning ideas, see companion planting basics.
Botanical Profile of Nasturtium
This species belongs to the family Tropaeolaceae, with Tropaeolum majus being the principal cultivated garden type. Although several Tropaeolum species exist, most edible garden forms sold as nasturtium are selections or hybrids based on T. majus, sometimes with influence from T. minus or T. peltophorum. The plant is generally grown as a warm-season annual, though it may behave as a short-lived perennial in frost-free, mild highland climates.
Morphologically, it is recognized by peltate leaves, meaning the petiole attaches near the center of the leaf blade rather than at the margin. The leaves are nearly circular, often 3-10 cm across, with radiating veins and a waxy surface that sheds water in beads. This hydrophobic effect is botanically notable and contributes to its attractive appearance after dew or rain. Flowers are zygomorphic, usually 4-6 cm wide, with five petals and a long nectar spur behind the bloom. That spur attracts bees, hummingbirds in some regions, and long-tongued pollinators.
Stems are fleshy but not truly succulent, and they bruise easily when overhandled. Root systems are relatively shallow and dislike severe disturbance once active growth begins, which is one reason direct sowing is often more reliable than transplanting. Seeds are large, wrinkled, and beige to tan when mature. Germination is usually rapid in warm soil, but the hard seed coat benefits from pre-soaking in room-temperature water for 8-12 hours if sowing conditions are marginal.
Cultivar performance differs more than many growers realize. Dwarf types such as 'Empress of India' tend to flower early and stay compact, making them ideal for edging and intensive beds. Trailing types like 'Jewel Mix' or climbing heirloom strains are better for living mulch, cascading containers, and interplanting along bed edges. Dark-leaved cultivars can be slightly slower in early growth but offer stronger ornamental value for fresh-market edible flower sales.
Soil, pH, and Climate Requirements for Nasturtium
This plant performs best in well-drained soil with modest fertility. Ideal texture is sandy loam to loam, though it will tolerate poorer ground better than heavy, wet clay. In clay soils, the biggest risk is prolonged saturation around the crown and feeder roots, which can lead to Damping-off in seedlings or root decline in mature plants. If soil forms a sticky ribbon when squeezed and remains waterlogged for more than 24-36 hours after rain, drainage improvement is needed before planting.
A practical target soil pH is 6.1-7.3. It tolerates slightly more acidic or alkaline conditions, but growth is most balanced in the mildly acidic to neutral range. Below pH 5.8, overall vigor may drop and nutrient balance can become less predictable. Above pH 7.5, iron chlorosis can occur, especially in containers or calcareous soils, showing as pale young leaves with greener veins. Correct by avoiding overliming and incorporating balanced compost only sparingly rather than applying strong synthetic feed.
Fertility management is counterintuitive. Rich, manure-heavy beds commonly produce oversized leaves and long runners with disappointing bloom density. For ornamental and edible flower production, moderate organic matter is enough. A soil with 2-4% organic matter and no recent heavy nitrogen application is often ideal. If a pre-plant fertilizer is used at all, keep it low in nitrogen; an approximate analysis like 3-5-5 or 4-6-4 is more suitable than high-nitrogen lawn or leafy-green blends.
Climatically, nasturtium prefers cool to mild warm conditions rather than extreme heat. Optimal daytime temperatures are about 15-24°C, with night temperatures of 8-16°C. Germination is strongest when soil temperatures remain near 13-21°C. Once daytime temperatures regularly exceed 29-32°C, especially with warm nights, plants may reduce flowering, develop smaller leaves, or become more susceptible to Spider mites and stress wilt. In hot summer regions, best performance often comes from spring planting for early summer bloom or late-summer sowing for autumn production.
It is frost-sensitive. Light frost can blacken leaves and flowers quickly, and a hard freeze kills plants outright. In maritime or Mediterranean climates, however, it may persist longer into autumn than many bedding annuals. Full sun is ideal in cool climates, but in hot inland areas, 4-6 hours of direct morning sun plus afternoon shade often produces better flowers and less stress than all-day exposure.
Step-by-Step Planting & Propagation
Direct sowing is the standard professional method because seedlings resent root disturbance. Choose a site with good drainage, moderate fertility, and open airflow. Prepare the bed by loosening the top 15-20 cm of soil and removing perennial weeds. Do not over-enrich the bed. If the soil is extremely poor, mix in a light dressing of mature compost at about 1-2 cm over the surface, then incorporate gently.
Sow after all danger of frost has passed and soil has warmed to at least 10-13°C. For cool-season scheduling in mild climates, sow 2-4 weeks before the final frost under cloches or row cover only if the soil drains well and freezing is unlikely. Soak seed 8-12 hours before sowing if seed is old or conditions are cool. Do not soak longer than 24 hours, as oxygen deprivation can reduce viability.
Plant seeds 1.5-2.5 cm deep. In lighter sandy soil, the deeper end of that range is acceptable; in heavier soil, stay nearer 1.5 cm. Space bush types 20-30 cm apart and trailing types 30-45 cm apart. For dense edible flower strips, rows may be spaced 30-45 cm apart, thinning plants to final spacing once true leaves emerge. Germination usually occurs in 7-14 days, but cooler soil can stretch this to nearly 20 days.
If starting indoors, use deep modules or biodegradable pots to minimize transplant shock. Sow 2-3 weeks before transplanting, not earlier, because seedlings elongate quickly and dislike becoming root-bound. Harden off for 5-7 days before setting out. Transplant when seedlings have 2-3 true leaves, disturbing the root ball as little as possible.
Propagation from seed is overwhelmingly preferred. Vegetative propagation is possible from soft cuttings in warm, humid conditions, but it is seldom used outside specialty breeding or preservation work. For self-seeding stands, allow some seed pods to mature on the plant until they dry and loosen. In mild climates, volunteer seedlings may appear the next season, though they can revert in mixed cultivar plantings.
For containers, use a free-draining mix with modest fertility. A blend containing composted bark, coir or peat, and perlite works well. Avoid heavily fertilized potting media intended for petunias or hungry annuals. One trailing plant per 25-30 cm hanging basket or 2-3 bush plants per 30 cm pot is usually sufficient.
Care & Maintenance regimes for Nasturtium
Watering should be moderate and deliberate rather than constant. The ideal root zone is lightly moist but never saturated. In practical terms, the top 2-3 cm of soil should be allowed to dry before watering again, while the soil below remains faintly cool and slightly damp. In containers, water when the pot feels noticeably lighter and the surface is dry to the touch, but before leaves lose turgor in the morning.
Signs of underwatering include midday droop that does not recover by evening, reduced flower size, shorter flowering stems, and leaves that feel thin rather than full. Signs of overwatering include persistent yellowing lower leaves, soft stems near the crown, slowed growth despite wet soil, fungus gnats in containers, and a sour smell in poorly drained media. If overwatering is suspected, reduce frequency immediately and improve drainage or airflow. Repeated shallow watering is less effective than occasional deep irrigation that moistens the top 10-15 cm of soil and then allows slight drying.
Mulching can help stabilize moisture, but keep mulch thin around the crown. A 2-3 cm layer of fine straw or leaf mold is enough. Thick mulch piled against stems can trap humidity and encourage rot. In field beds, drip irrigation is preferable to overhead watering because it reduces leaf wetness duration and lowers disease pressure.
Fertilization should be restrained. If plants are pale and genuinely nutrient-deficient, apply a diluted balanced liquid feed at one-quarter to one-half strength no more than every 2-3 weeks. If the plant is deep green and producing lots of leaf but few flowers, stop feeding entirely. Too much fertility, especially soluble nitrogen, is one of the most common causes of disappointing results.
Training depends on habit. Bush forms need little intervention beyond deadheading. Trailing forms can be directed along bed edges, tied loosely to netting, or allowed to scramble as a living mulch. If used near trellised crops such as Cucumber, avoid letting vines smother the base of the main crop; keep a 15-20 cm buffer around stems for air movement and irrigation access.
Deadheading increases ornamental performance and can prolong flowering, though it is less critical if leaves and flowers are being harvested regularly. Remove spent blooms before seed set if you want maximum floral display. If harvesting seed for pickling or saving, leave selected flowers in place and mark those stems.
In warm climates, rejuvenation pruning can extend the season. If plants become leggy, sparse, or heat-stressed, cut trailing stems back by one-third to one-half, water deeply once, and wait for cooler weather. A fresh flush often follows if roots remain healthy.
Pests, Diseases & Organic Management
Aphids are the pest most commonly associated with nasturtium. In fact, the plant is frequently used as a sacrificial trap crop because Black bean aphids and Green peach aphids may colonize it heavily while leaving nearby vegetables less affected. Monitor the undersides of leaves and stem tips twice weekly. If colonies remain localized, pinch off infested tips or hose them off early in the day. In severe cases, apply insecticidal soap, ensuring full contact with the insects. Because leaves are tender, spray a small area first to test for phytotoxicity.
Flea beetles may chew characteristic shot holes in leaves, especially in warm dry periods. Young seedlings are most vulnerable. Floating row cover during establishment can protect direct-sown stands, but remove covers at flowering if pollination or ornamental display is desired. Maintaining even moisture and avoiding stressed seedlings reduces damage.
Cabbage white butterflies may lay eggs on nasturtium, especially where brassicas are nearby. Hand-removal of eggs and small larvae is often sufficient on modest plantings. This is one reason the crop is useful near cabbage-family vegetables: it can attract pest attention away from the main crop while making scouting easier.
Spider mites become problematic under hot, dusty, dry conditions. Symptoms include stippling, bronzing, and fine webbing under leaves. Increase humidity around the planting only through better irrigation timing and dust reduction, not by soaking foliage late in the day. A strong water spray on leaf undersides can suppress early infestations.
Disease pressure is usually low in well-managed beds, but several issues can occur. Damping-off affects emerging seedlings in cold, wet, compacted soil. Prevention relies on warm soil, good drainage, and avoiding overwatering. Bacterial leaf spots and Fungal leaf spots can appear during extended humid weather or under overhead irrigation. Remove infected leaves promptly and improve spacing. Powdery mildew may occur late in the season, especially where air circulation is poor and days are warm with cool nights. This often signals the planting is aging rather than a catastrophic problem.
Root and crown rots are the most serious cultural issue. Plants collapse, yellow, or fail to regrow after irrigation even though soil is wet. Prevention is far more effective than treatment: plant in raised beds if drainage is questionable, do not bury crowns deeply, and avoid thick organic mulches pressed against stems. Crop rotation helps if disease has been recurrent.
Organic management works best through integration rather than rescue sprays alone: moderate fertility, proper spacing, dry foliage overnight, steady but not excessive moisture, and regular scouting. Because nasturtium is edible, always use food-safe organic controls according to label directions and wash harvests thoroughly.
Harvesting, Curing & Optimal Storage
Leaves, flowers, green seed pods, and mature seeds can all be harvested, but each requires a different stage and handling method. For salad leaves, pick young leaves 4-6 cm across when they are tender and brightly colored. Older leaves remain edible but can become stronger in flavor and slightly coarse, especially in heat. Harvest in the cool morning after dew has dried.
Flowers are best cut the day they fully open, before petals develop bruising or sun scorch. Use shallow, clean containers and avoid stacking deeply, as petals crush easily. If selling or plating, keep flowers out of direct sun immediately after harvest. Short stems are acceptable for garnish, but handle by the stem rather than the petal face.
Immature seed pods for pickling should be collected when they are still green, plump, and tender, usually shortly after petals drop. Pods that have begun to yellow or harden are less suitable. Rinse, dry briefly, and pickle promptly in a vinegar brine if using as “poor man’s capers.”
For seed saving, allow pods to mature on the plant until they become dry enough to detach easily and shift from green toward tan. Collect before prolonged rain if possible. Dry further in a shaded, ventilated space for 1-2 weeks, then clean and store in a paper envelope or airtight jar once fully dry. Properly dried seed stored cool and dark remains viable for about 4-5 years.
Fresh leaves store poorly compared with hardy greens. Hold them at 2-5°C with high humidity and use within 2-4 days for best quality. Flowers are even more perishable and are best used within 24-48 hours. Store blossoms in a single layer or with minimal layering in a sealed container lined lightly with absorbent paper. Seed pods for pickling can be refrigerated for 1-2 days before processing, but quality declines quickly.
There is no true curing stage for the edible fresh parts. The closest equivalent is postharvest conditioning: rapid cooling, gentle handling, and moisture retention without free water on petals or leaves. Washed flowers should be dried very carefully before packing; trapped moisture causes collapse and decay.
Companion Planting for Nasturtium
This crop is one of the classic companion plants because it can function as a visual attractant, edible border, pollinator resource, and trap crop all at once. Its strongest value is not magical pest elimination but strategic pest concentration and biodiversity support. It works best when intentionally placed, monitored, and managed.
Tomato benefits from nearby nasturtium because Aphids may colonize the companion first, and the flowers draw beneficial insects into the planting. Place nasturtium at row ends or bed corners rather than directly under dense tomato canopies, where airflow is poor and harvest access becomes difficult.
Cucumber is another strong partner. Nasturtium can occupy bed margins, soften the base of trellises, and attract pollinators. Keep enough spacing to prevent excessive humidity around cucumber crowns, especially in climates already prone to mildew.
Radish pairs well in mixed kitchen gardens because both crops establish quickly, and nasturtium can help distribute pollinator and beneficial insect activity around the bed. It also creates a living edge that shades soil lightly without competing heavily when spaced correctly.
Thyme is a useful aromatic neighbor in ornamental-edible systems. The low, woody herb occupies different root and canopy space, and together the planting provides a long flowering window for beneficial insects. This pairing works especially well in raised beds, herb spirals, and drought-conscious borders where fertility is kept modest.
Avoid placing nasturtium in the richest vegetable beds reserved for heavy feeders, because surplus nitrogen reduces its flowering and can turn it into a sprawling foliage mass. Also avoid crowding it into dense brassica plantings without a scouting plan; while it may distract pests, it can also serve as a reservoir if neglected. The best companion strategy is to use it deliberately at edges, intervals, and sacrificial points where you can inspect it regularly and intervene early.