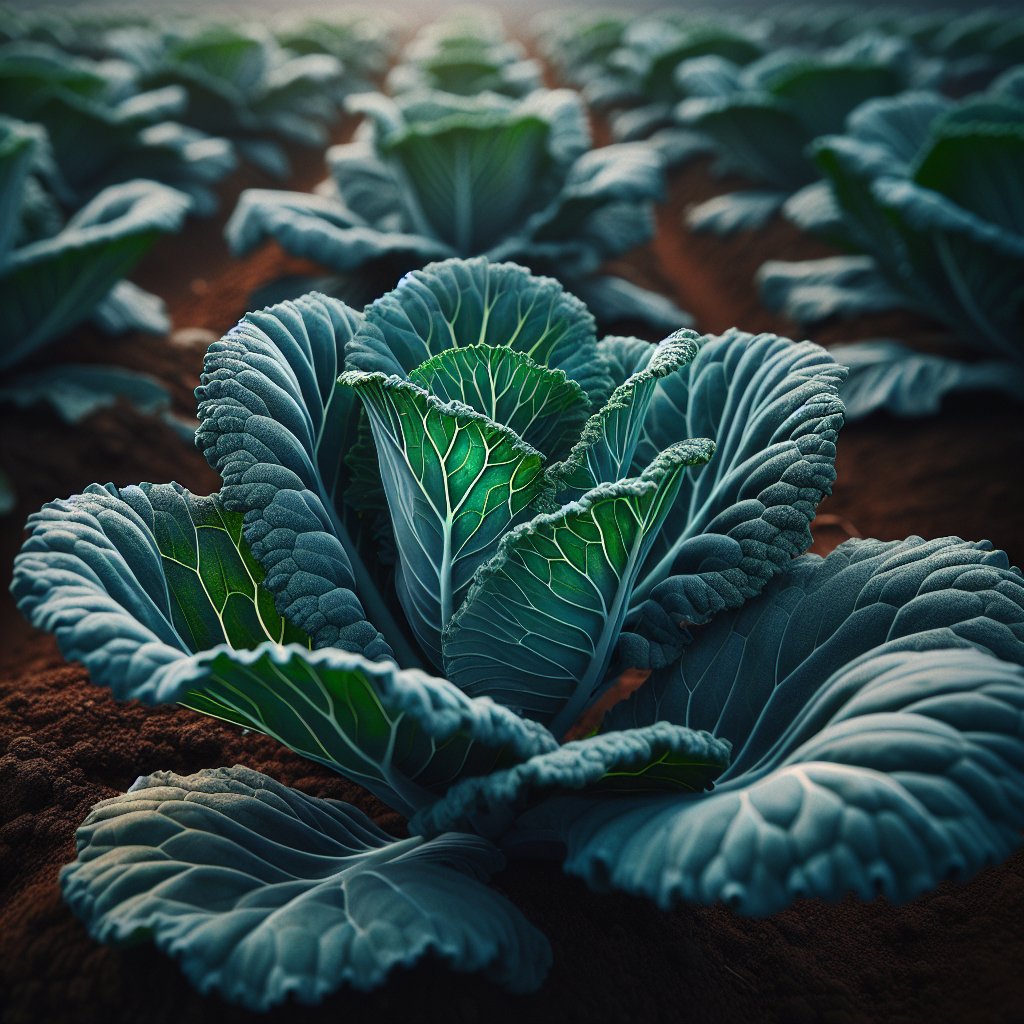
Introduction to Portuguese Kale
Often called couve portuguesa or tronchuda-type kale depending on regional usage, this crop belongs to the leafy brassicas and is prized for its large, supple leaves and mild flavor rather than the frilled texture associated with curly types. In traditional Portuguese cooking, it is famous as the signature green in caldo verde, where the leaves are sliced into very fine ribbons. That culinary role explains one of its most useful agronomic traits: the foliage stays comparatively tender when harvested young to mid-mature, making it suitable for repeated cut-and-come-again picking.
Unlike heading cabbage, Portuguese kale remains open and leafy, forming a robust central stem surrounded by broad leaves. In favorable cool conditions, it can produce for months, and in frost-prone climates the flavor often becomes sweeter after light cold exposure as the plant accumulates soluble sugars. For growers, it offers a productive bridge crop between summer heat and winter dormancy, and in mild maritime regions it can be nearly year-round.
For broader species-level context, see our Kale guide. If you are planning mixed beds for fall and winter production, the fall companion planting guide is also useful.
Botanical Profile of Portuguese Kale
This plant sits within the highly variable Brassica oleracea complex, the same species that includes cabbage, broccoli, cauliflower, Brussels sprouts, and collards. Portuguese kale is usually grouped within the acephala, or non-heading, lineage. “Acephala” literally means “without a head,” which describes its growth habit well: instead of forming a dense terminal head, it keeps producing separate leaves from an elongating stem.
Morphologically, Portuguese kale tends to have:
- broad, flat to slightly puckered leaves
- smooth or lightly savoyed surfaces rather than heavily curled margins
- distinct pale midribs and thick petioles
- a more cabbage-like silhouette than curly kale, but without full heading
- vigorous lower-leaf production suitable for sequential harvest
Plants typically reach 45-90 cm tall, though in long seasons they may exceed this. Spread is often 45-75 cm, depending on fertility and spacing. Leaf color ranges from medium green to blue-green. Compared with Lacinato or curly types, the leaves are usually softer and easier to shred finely.
As a cool-season biennial usually grown as an annual, it completes most vegetative growth in its first season. If overwintered successfully, it can bolt in the second year, sending up a flowering stalk with yellow crucifer flowers. Once bolting begins, leaf quality declines quickly because tissue becomes more fibrous and flavor shifts from sweet-green to sharper and more sulfurous.
Portuguese kale also has a noteworthy root pattern: a moderate taproot with a broad network of feeder roots concentrated in the top 20-30 cm of soil. That means the crop responds very strongly to shallow fertility, consistent soil moisture, and mulch. It also means compaction in the upper profile can significantly reduce vigor even when deeper drainage is acceptable.
Soil, pH, and Climate Requirements for Portuguese Kale
This crop performs best in fertile, moisture-retentive but well-drained soil with high biological activity. Ideal texture is a loam or sandy loam enriched with mature compost. Heavy clay can work if drainage is improved and beds are raised; very sandy soil can work if organic matter is increased so the root zone does not swing rapidly from wet to dry.
The optimal soil pH is 6.2-7.0, with the sweet spot around 6.5-6.8. Below pH 6.0, nutrient availability becomes less balanced and brassicas become more vulnerable to clubroot, especially in soils with a history of crucifer crops. If pH is under 6.2, agricultural lime is usually warranted several weeks to months before planting. In established organic systems, finely ground calcitic lime is commonly chosen when magnesium is already sufficient; dolomitic lime is better where magnesium is low.
Before planting, aim for:
- organic matter above 4% if possible
- phosphorus and potassium in the medium to high range on a soil test
- steady nitrogen availability, but not excessive soluble nitrogen
- boron in an adequate range, because deficiency can distort growing tips in brassicas
Portuguese kale is notably responsive to nitrogen, but oversupplying it creates soft, overly lush growth that attracts aphids and increases susceptibility to some foliar diseases. A professional approach is to front-load moderate fertility, then side-dress lightly after establishment and again after heavy harvest cycles.
Temperature strongly shapes quality. Best vegetative growth occurs at roughly 10-21°C. Seed germination is strongest around 18-24°C, though seeds can sprout outside that band. Mature plants tolerate light frosts and often improve in flavor after them. In prolonged heat above 27-30°C, growth slows, leaves become tougher, and pest pressure from cabbage worms, flea beetles, and aphids usually intensifies.
In terms of climate, Portuguese kale is ideally suited to temperate and Mediterranean conditions, especially where summers are not extreme and autumns are long. It thrives in full sun in cool seasons, but in hot regions it benefits from light afternoon shade. Six or more hours of direct sun is the minimum for solid growth; 8-10 hours gives the strongest leaf production in cool weather.
Moisture management is crucial. The crop prefers evenly moist soil in the main root zone, roughly equivalent to about 60-80% of field capacity in practical terms. In the field, that means the soil should feel cool and lightly moist at 5-8 cm depth, forming a weak ball in the hand but not oozing water or smearing into a sticky paste. Drought stress causes leaves to become smaller, thicker, and more pungent. Overwatering causes yellowing lower leaves, slowed growth, a sour soil smell, edema-like blistering, and in severe cases root decline.
Step-by-Step Planting & Propagation
Portuguese kale is almost always propagated by seed. Direct sowing works in mild conditions, but transplanting is usually more reliable because it shortens field occupancy, improves spacing precision, and gives seedlings a head start against weeds and flea beetles.
Schedule planting around cool weather. For spring crops, start seed 4-6 weeks before the last expected frost and transplant 2-3 weeks before or around the frost date depending on local severity. For autumn and winter crops, sow 8-12 weeks before the first expected frost so plants reach good size before day length and temperatures drop.
Prepare a fertile seed-starting medium. Use a fine-textured, well-drained mix. Sow seed 0.6-1.2 cm deep. Brassica seed should be kept evenly moist, not saturated. At good germination temperatures, emergence typically occurs in 4-10 days.
Provide strong light and airflow. Seedlings grown too warm or too dim become elongated and weak. After germination, keep daytime temperatures around 15-18°C if possible and provide bright light for stocky growth.
Harden off transplants gradually. Over 5-7 days, expose seedlings to increasing outdoor conditions. Avoid setting out tender greenhouse-grown seedlings directly into intense sun or wind.
Set plants at proper spacing. For large leaf harvest, space 40-60 cm apart in rows 60-75 cm apart. For baby-leaf or close-cut production, spacing can be tighter, but air circulation decreases and disease pressure may increase. Wider spacing is especially useful in humid climates.
Plant deeply but not excessively. Set transplants so the root ball is fully covered and the stem is buried only slightly above nursery level. Firm the soil around roots to eliminate air pockets.
Water immediately after transplanting. Apply enough water to fully settle the root zone. A good transplant irrigation wets the top 10-15 cm of soil rather than just the surface crust.
Mulch after establishment. Once plants are growing, apply 3-5 cm of straw, shredded leaves, or composted mulch, keeping it a few centimeters away from the stem to prevent crown rot.
Direct seeding is possible where soil is warm enough and pest pressure is manageable. Sow in shallow drills, thin to final spacing when plants have 2-3 true leaves, and protect young seedlings with insect netting if flea beetles are common.
Care & Maintenance regimes for Portuguese Kale
Once established, Portuguese kale is a relatively steady crop, but professional quality depends on consistency. Uneven water, erratic feeding, and delayed harvest all reduce tenderness and market value.
Watering should be deep and regular rather than frequent and shallow. A typical target is 2.5-4 cm of water per week from rainfall plus irrigation, adjusted for soil type and temperature. Sandy beds may need smaller, more frequent applications; loam can be irrigated more deeply and less often. The best practice is to irrigate when the top 3-5 cm begins to dry but before the root zone dries out. Plants under mild drought first appear slightly dull rather than glossy, then leaves may droop during the hotter part of the day and recover slowly in the evening. If that pattern becomes routine, leaf toughness increases.
Drip irrigation is preferable to overhead watering because it keeps foliage drier and reduces disease spread. If overhead irrigation is used, water early enough that leaves dry quickly after sunrise.
For fertility, a workable program is:
- incorporate finished compost before planting
- apply a balanced organic fertilizer at transplanting if soil tests indicate need
- side-dress with nitrogen when plants are actively producing leaves, especially after the first major harvest
- avoid high late-season nitrogen in cold, wet conditions, which can encourage soft growth
Visible nutrient clues matter. Pale overall foliage often indicates nitrogen shortage. Marginal scorching on older leaves may suggest potassium imbalance or drought-related uptake issues. Hollow stems or deformed young growth in brassicas can sometimes point to boron deficiency, particularly in alkaline or droughty soils.
Weed control is most important in the first month after transplanting. Portuguese kale can eventually shade the soil, but early competition reduces leaf size and delays establishment. Shallow cultivation is safest because feeder roots are near the surface. Mulch is especially effective because it suppresses weeds while buffering soil moisture.
Leaf management should follow the plant’s natural upward growth. Harvest lower outer leaves first and leave the central crown intact. This prolongs productivity and keeps the plant balanced. Remove damaged, yellow, or diseased leaves promptly, but do not over-strip the plant; maintaining enough leaf area is essential for continued regrowth.
In colder climates, floating row cover can accelerate early growth and provide frost buffering. In very warm periods, lightweight shade cloth can reduce stress and maintain tenderness.
Rotation is essential. Do not plant Portuguese kale after other brassicas for at least 2-3 years where possible. That rotation helps break pest and disease cycles, especially for clubroot, aphids, and brassica-specific caterpillars.
Pests, Diseases & Organic Management
As a brassica, Portuguese kale attracts a predictable group of pests. The best management system is preventive and layered rather than reactive.
Common insect pests include cabbage worms, imported cabbage white larvae, cabbage loopers, diamondback moth larvae, flea beetles, aphids, and sometimes slugs. Young plants are most vulnerable to flea beetles and transplant shock-related damage; mature plants often face caterpillars and aphid colonies on leaf undersides.
Organic management works best through:
- insect exclusion netting or floating row cover immediately after transplanting
- regular scouting at least 2 times per week
- hand removal of eggs and larvae in small plantings
- Bacillus thuringiensis var. kurstaki for caterpillars when larvae are small
- insecticidal soap for aphids, applied with thorough undersurface coverage
- habitat support for beneficial insects using nearby flowering strips
- strict weed management, especially of wild mustard-family hosts
If Onion or Thyme are used nearby as companions, they may help diversify the planting and make pest colonization less straightforward, though they should not be seen as a standalone control strategy.
slugs are a frequent issue in damp mulched beds. Look for irregular holes and slime trails, especially on lower leaves. Reduce excess moisture, water in the morning, remove heavy hiding places near crowns, and use iron phosphate baits where pressure is severe.
Disease risks include clubroot, downy mildew, Alternaria leaf spot, black rot, damping-off in seedlings, and bacterial soft rots after harvest. clubroot is particularly serious because the pathogen persists in soil for years. Infected plants wilt despite moist soil, grow poorly, and show swollen, distorted roots. The best defenses are crop rotation, clean transplants, high sanitation, and maintaining pH closer to neutral.
downy mildew is favored by cool, humid conditions and poor airflow. Symptoms often begin as pale angular patches on upper leaf surfaces with grayish growth beneath. Alternaria causes circular dark lesions, sometimes with concentric rings. These foliar diseases are reduced by spacing plants properly, watering at the base, removing infected leaves, and avoiding prolonged leaf wetness.
black rot, a bacterial disease, can show V-shaped yellow lesions moving inward from leaf edges and blackened veins. Because it spreads in seed, splashing water, and crop residue, sanitation is critical. Use clean seed sources, avoid working among wet plants, disinfect tools when necessary, and destroy infected residues rather than composting them cold.
Harvesting, Curing & Optimal Storage
This crop is harvested for leaves, so “curing” is minimal compared with bulbs or tubers. The primary postharvest goal is to remove field heat quickly and preserve turgidity.
Harvest usually begins once plants have produced several sizable outer leaves, often 50-75 days from sowing depending on temperature and variety expression. For the most tender product, harvest leaves when they are fully expanded but still flexible, before midribs become excessively thick. If growing for caldo verde-style slicing, leaves should be broad and healthy but not coarse.
Use a clean knife or snap leaves downward from the base, taking the oldest outer leaves first. Never damage the central growing point unless the crop is intended for one-time whole-plant harvest. Repeated selective harvest can continue for weeks or months.
Best harvest timing is early morning, when leaves are fully hydrated and cool. Avoid harvesting during hot afternoon periods because respiration is higher and wilting begins faster. Keep harvested leaves shaded immediately.
Field handling standards:
- remove yellowed or insect-damaged leaves
- avoid crushing leaf blades and thick midribs
- keep containers shallow enough to prevent compression
- rinse only with clean, cold water if washing is necessary
- dry surface moisture before packing to reduce decay
Storage conditions are ideally 0-2°C with very high relative humidity, around 95-100%. Under proper refrigeration, leaves may remain marketable for 1-2 weeks, though best flavor and texture are usually within the first several days. Store away from ethylene-producing fruits where possible, as senescence can accelerate.
For short-term home storage, wrap leaves loosely in a perforated plastic bag or breathable container in the refrigerator crisper. If leaves begin to soften slightly, a brief soak in cold water can restore some crispness, but repeated dehydration lowers quality.
Frost can improve sweetness in the field, but hard freezes that rupture leaf tissue reduce storage life. If severe cold is forecast, harvest market-ready leaves beforehand unless plants are protected.
Companion Planting for Portuguese Kale
The most useful companions are those that either improve spatial efficiency, reduce pest pressure indirectly, or occupy a different rooting and canopy niche. The best companions for Portuguese kale are Onion, Garlic, Thyme, and Nasturtium.
Alliums such as onion and garlic are especially practical because they remain relatively upright and shallow-rooted while kale expands into a larger leaf canopy. They can help diversify scent and structure in the bed, and they do not strongly compete if spacing is sensible. Plant them along bed edges or in alternating rows with enough room for airflow.
Thyme works well as a low-growing border plant. It does not fix brassica pest problems by itself, but it supports beneficial insects when allowed to flower and occupies space that might otherwise host weeds. Its drought tolerance means it should be placed where irrigation is not excessive.
Nasturtium is useful as an insect-diversity companion and can sometimes draw aphids away from the crop. It also attracts pollinators and beneficial insects. Because it sprawls, it is best positioned at corners or outer edges rather than woven tightly through dense kale rows.
Avoid close association with other heavy-feeding brassicas such as cabbage, broccoli, and cauliflower when possible, because they compete for similar nutrients and amplify shared pest and disease pressures. Good companions should create contrast in architecture, aroma, and rooting pattern rather than forming a monoculture by another name.
For market gardeners and intensive growers, the best companion strategy is often bed design rather than folklore: pair Portuguese kale with non-brassica border species, maintain strong rotation, preserve airflow, and use insect netting early. When these principles are combined with steady fertility and harvest discipline, Portuguese kale becomes one of the most reliable cool-season leaf crops available.