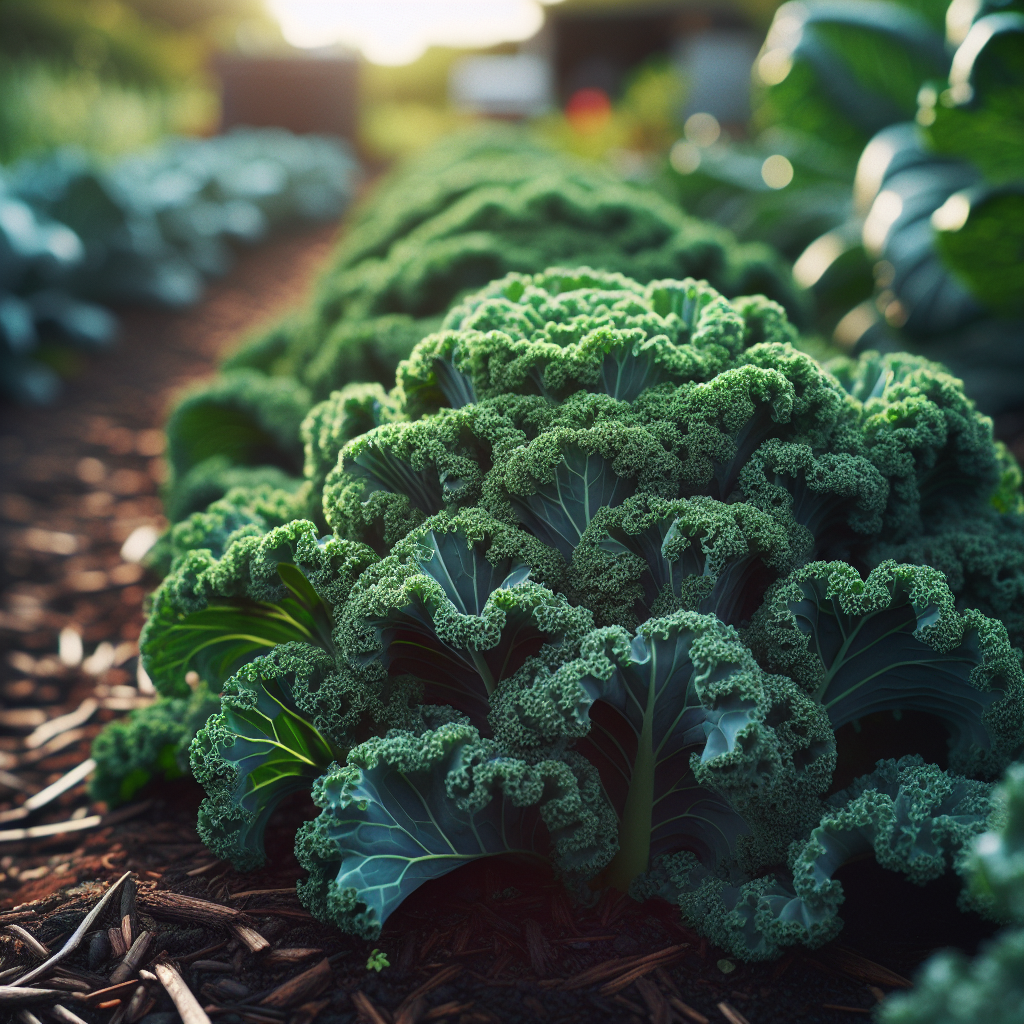
Introduction to Curly Kale
A classic leafy brassica with densely frilled, blue-green to deep green leaves, this crop has been cultivated for centuries as one of the oldest forms of non-heading cabbage. Unlike heading brassicas, it produces an open rosette of harvestable foliage over an extended season, making it especially valuable for cut-and-come-again production, succession planting, and cool-season marketing.
Its eating quality improves dramatically in cool weather. As temperatures drop, plants convert starches to sugars as part of their cold-acclimation response, often producing sweeter, more complex leaves after light frosts. This is why fall and winter-grown plants are generally more tender and less assertively sulfurous than those grown under summer heat.
Curly kale is popular in both kitchen gardens and commercial diversified vegetable systems because it tolerates frost, withstands repeated leaf harvest, and offers a long field-holding period. In temperate regions, it often bridges the gap between late summer crops and winter storage vegetables. Growers familiar with other brassicas such as cabbage will recognize many similar nutrient and pest considerations, but curly kale is typically more forgiving and less prone to splitting or head quality losses.
For growers interested in broader seasonal planning and mixed-bed systems, this crop fits especially well into cool-season rotations; practical layout concepts are discussed in this fall companion planting guide.
Botanical Profile of Curly Kale
Belonging to the Brassicaceae family, curly kale is classified botanically as Brassica oleracea var. sabellica. It is the same species as cabbage, broccoli, cauliflower, Brussels sprouts, and kohlrabi, but selected for leaf production rather than heads, flower buds, or swollen stems. Its morphology is defined by a non-heading growth habit and highly blistered or frilled lamina margins.
Plants usually form a central stem that elongates gradually over time, especially if lower leaves are harvested regularly. Depending on cultivar, height ranges from about 30 cm to over 90 cm. Leaves may be finely curled or heavily crimped, with petioles of moderate length and a waxy bloom that contributes to drought buffering and some insect resistance.
Common curly kale cultivars include 'Winterbor', known for strong cold tolerance and uniformity; 'Scotch' types, valued for deeply curled leaves and robust flavor; and dwarf selections that suit containers and small raised beds. Compared with flat-leaf or strap-leaf kales such as Lacinato Kale (Dino Kale), curly types often have more leaf volume per plant but can trap moisture more readily within dense canopies, which has implications for disease prevention and post-harvest washing.
Like many brassicas, it is biennial in life cycle: it produces vegetative leaves in the first season, then flowers and sets seed after exposure to winter chilling followed by lengthening days. For edible leaf production, growers generally manage it as an annual. If overwintered for seed production, plants bolt in spring, producing yellow four-petaled flowers typical of the mustard family.
Nutritionally, the leaves are rich in vitamins K, A, and C, as well as calcium, carotenoids, and glucosinolates. These sulfur-containing compounds contribute to both health-promoting properties and the crop's distinctive flavor profile. Environmental stress, fertility imbalance, and maturity stage all influence glucosinolate intensity.
Soil, pH, and Climate Requirements for Curly Kale
This crop performs best in fertile, well-drained, moisture-retentive loam with high organic matter and strong biological activity. An ideal soil texture is a friable sandy loam to silty loam that drains after rain but does not become droughty within 24 hours of sun and wind exposure. Heavy clay can work if deeply amended and never compacted, but persistent saturation increases risk of root stress, edema-like leaf symptoms, and clubroot in infested ground.
The ideal pH range is 6.2 to 7.0, with 6.5 to 6.8 especially favorable for nutrient availability and brassica health. Below pH 6.0, calcium and boron uptake become less efficient and clubroot pressure can worsen. If pH is low, apply agricultural lime well ahead of planting, preferably several weeks to a few months in advance. Avoid over-liming alkaline soils, as micronutrient lockout can result, particularly manganese and boron deficiencies.
Curly kale is a cool-season crop with optimal growth generally between 10 and 24°C. It will germinate in soils as cool as about 7°C, though emergence is slower. Ideal germination is usually around 18 to 24°C. Mature plants can tolerate substantial frost, often to -6°C or lower depending on acclimation, cultivar, wind exposure, and soil moisture. In many climates, leaves remain harvestable through repeated light freezes.
Heat is a greater problem than cold. Sustained temperatures above 27 to 29°C often reduce tenderness, intensify bitterness, and accelerate pest pressure from aphids and caterpillars. In hot climates, prioritize late summer to autumn establishment, winter production, and partial afternoon shade if daytime highs remain elevated. In maritime or highland climates, spring and summer production can be excellent if moisture remains steady.
Moisture management is critical. The root zone should stay evenly moist but aerated, roughly comparable to a squeezed sponge that feels damp without releasing water. In practical terms, the top 2 to 3 cm of soil may dry slightly between irrigations, but the zone from 5 to 15 cm deep should remain consistently moist during active growth. Water stress causes tough, smaller leaves and stronger flavor; prolonged saturation causes yellowing lower leaves, slowed growth, and increased susceptibility to root diseases.
Step-by-Step Planting & Propagation
Propagation is almost always by seed. Direct sowing works well in mild seasons and fine-textured seedbeds, while transplanting is preferred for early spring, late summer, and commercial scheduling because it improves spacing precision, stand uniformity, and weed competitiveness.
Choose the season carefully. For spring crops, sow indoors 4 to 6 weeks before the last expected frost and transplant 2 to 3 weeks before that frost date if plants are hardened. For fall crops, sow 6 to 10 weeks before the first expected autumn frost, depending on local growing degree accumulation and desired plant size entering cool weather.
Prepare a clean, fertile bed. Incorporate mature compost at 2 to 5 cm over the bed surface or apply 2 to 4 kg per square meter if soil organic matter is modest. Work amendments into the top 15 to 20 cm. Avoid fresh manure immediately before planting, as it can stimulate excessive soft growth and nutrient imbalance.
Start seeds at the correct depth. Sow 0.6 to 1.2 cm deep. Kale seed is small but vigorous; deeper sowing in crusting soils may reduce emergence. In trays, use a fine, well-drained propagation mix and maintain steady moisture without waterlogging.
Manage germination conditions. Keep the medium consistently moist and ideally between 18 and 24°C. Seedlings usually emerge in 4 to 10 days. Provide strong light immediately after emergence to avoid legginess. If growing indoors, maintain cool air, good airflow, and high light intensity.
Thin or transplant to final spacing. For baby leaf, dense sowing is acceptable. For bunching or full-size leaf production, space plants 30 to 45 cm apart in rows 45 to 75 cm apart. Tighter spacing promotes upright growth and smaller leaves; wider spacing produces larger leaves and more side canopy but may increase weed pressure.
Harden off transplants. Reduce watering slightly, expose plants gradually to outdoor conditions for 5 to 7 days, and avoid setting out lush, tender seedlings directly into wind or strong sun. Transplants should have 3 to 5 true leaves and stout stems.
Mulch after establishment. Once plants are rooted in, apply straw, shredded leaves, or compost mulch to stabilize moisture, reduce splash-borne disease, and suppress weeds. Keep mulch slightly back from stems to prevent collar rot.
Direct sowing requires especially careful early weed control because kale seedlings are slow to dominate a bed during their first two weeks. Flame weeding before emergence or shallow stale-bed cultivation can improve success on larger plantings.
Care & Maintenance regimes for Curly Kale
Fertility should emphasize steady nitrogen availability without pushing over-soft tissue. Curly kale is a moderate to heavy feeder, especially when harvested repeatedly. A soil test is the best guide, but in general, plants respond well to pre-plant compost plus supplemental nitrogen after establishment. Side-dress 3 to 4 weeks after transplanting with composted poultry manure, blood meal, feather meal, fish-based fertilizer, or another balanced organic nitrogen source. For long-season harvest, repeat modest side-dressing every 3 to 5 weeks.
Watch leaf color and growth rate closely. Pale green leaves, slow expansion, and thin petioles often indicate insufficient nitrogen. However, very dark, lush, floppy growth can signal excess nitrogen, which may attract aphids and reduce texture quality. Boron and calcium deficiencies, though less common, can cause distorted new leaves, brittle tissues, or growing-point irregularities in soils with low organic matter or inconsistent pH.
Irrigation is best applied deeply and consistently. Aim for roughly 2.5 to 4 cm of water per week from rainfall plus irrigation, adjusted for temperature, wind, soil type, and plant size. Sandy soils may require more frequent watering, sometimes every 2 to 3 days in warm dry spells, while loams may hold adequate moisture for 4 to 6 days. Drip irrigation is ideal because it keeps foliage dry and reduces disease pressure.
Signs of under-watering include dull rather than slightly glossy leaves, slower new growth, midday wilting that persists into evening, increased bitterness, and thicker, tougher leaf texture. Signs of overwatering include persistent yellowing of lower leaves, a sour smell in the soil, stunted plants despite adequate fertility, and leaves that feel overly succulent yet fragile. If water stands longer than a few hours after irrigation or rain, drainage needs correction.
Weed control matters most early. Kale is reasonably competitive once canopies expand, but weeds during the first month can markedly reduce yield. Hand hoe shallowly to avoid root disturbance. Organic mulches are particularly useful in market gardens and home plots.
Temperature management is another quality lever. Floating row cover can speed early growth, exclude pests, and protect from wind, but remove or vent covers in warm spells to prevent overheating. In hot periods, 30% shade cloth can preserve tenderness in young plantings, though flavor is usually still best in cooler seasons.
Remove yellowing or insect-damaged lower leaves promptly. This improves airflow and reduces hiding places for aphids, slugs, and disease inoculum. If plants become tall and stemmy after repeated harvest, they remain productive, but leaf size and uniformity may decline; succession sowing every 3 to 5 weeks maintains consistent supply.
Pests, Diseases & Organic Management
As a brassica, this crop is highly attractive to several specialist pests. The most common are imported cabbageworm, cabbage looper, diamondback moth larvae, aphids, flea beetles, and slugs.
Caterpillars are often the most damaging because they chew holes directly into marketable leaves. Scout the undersides of leaves at least twice weekly, especially during warm weather. Look for eggs, frass, and windowpane feeding. Use insect exclusion netting or floating row cover immediately after planting where pest pressure is regular. If larvae appear, hand-pick small infestations or apply Bacillus thuringiensis var. kurstaki in the evening, targeting young larvae for best effect.
aphids cluster on leaf undersides, in curled leaf folds, and near growing points. They multiply rapidly under mild, dry conditions and in nitrogen-rich plantings. Strong water sprays can suppress light populations. Encourage beneficial insects by maintaining nearby floral diversity; insectary companions such as yarrow and nasturtium can help support predator and parasitoid activity in mixed plantings. Avoid letting heavily infested brassica residues remain standing.
flea beetles are usually worse on seedlings, causing small shot-holes and growth setbacks. Row cover is the most reliable organic defense during establishment. Vigorous growth and adequate moisture help plants outgrow mild feeding.
slugs are a frequent issue in damp mulched beds. Check at dusk or early morning. Reduce excess mulch against stems, irrigate in the morning rather than evening, and use traps or iron phosphate baits if necessary.
Disease pressures include black rot, downy mildew, Alternaria leaf spot, damping-off in seedlings, and clubroot. black rot often enters through hydathodes at leaf margins and produces yellow V-shaped lesions pointing inward toward the midrib. downy mildew is favored by cool, humid conditions and appears as pale patches with grayish growth on the underside. Alternaria often creates dark circular lesions with concentric rings.
Organic disease management depends on prevention:
- Rotate brassicas on a 3- to 4-year cycle where possible.
- Avoid overhead watering late in the day.
- Use pathogen-free seed and clean trays.
- Maintain spacing for airflow.
- Remove and destroy infected crop residues.
- Do not work among plants when foliage is wet.
clubroot deserves special attention. It is a persistent soilborne disease that causes swollen, distorted roots, midday wilting despite moist soil, and severe stunting. Prevention depends on long rotation, sanitation, excellent drainage, and maintaining pH closer to neutral in infested sites. Once established in soil, it is difficult to eliminate.
Harvesting, Curing & Optimal Storage
Harvest usually begins 50 to 75 days from sowing, depending on cultivar, season, spacing, and whether plants were transplanted. Baby leaf can be cut much earlier, often 25 to 35 days after sowing. For mature leaf harvest, begin when outer leaves reach usable size, typically 20 to 30 cm long.
Use the bottom-up harvest method: remove the oldest outer leaves first and leave the central growing point intact. This keeps the plant producing for weeks or months. Never strip too many leaves at once; leave at least 5 to 7 healthy inner leaves so photosynthesis remains strong. If harvesting for bunches, take uniform leaves from several plants rather than overcutting one plant.
The best harvest time is early morning after overnight cooling but after surface moisture has dried slightly. Leaves harvested in midday sun wilt faster and store less well. In freezing weather, avoid handling brittle frozen leaves until they thaw naturally, as tissue damage is more likely.
Unlike bulbs or fruiting crops, curly kale is not cured in the traditional sense. Instead, post-harvest handling focuses on rapid cooling, moisture retention, and cleanliness. Remove field heat as quickly as possible. Hydrocooling or washing in very cold, clean water is effective, but dry leaves thoroughly before packing to reduce decay. Because curly leaves trap grit easily, wash tanks may need two or three changes of water.
For storage, keep leaves at 0 to 2°C with 95% or higher relative humidity. Under these conditions, high-quality leaves may hold for 1 to 3 weeks depending on maturity and cleanliness. Perforated plastic bags or lined crates help maintain humidity while allowing some airflow. Excess free moisture on leaves encourages bacterial soft rot and fungal breakdown, so aim for cool, humid conditions rather than wet packaging.
Quality declines fastest when leaves are bruised, compressed, or stored warm. Yellowing, sulfurous odor, sliminess, and blackened petiole tissue indicate deterioration. Leaves intended for bunching should be graded to remove caterpillar damage, chlorosis, and torn margins.
Companion Planting for Curly Kale
The most useful companions are those that either confuse pests, improve space use, or support beneficial insects without competing too heavily for light and nutrients. Aromatic alliums are particularly valuable because their scent may help mask brassica odors and they occupy a different root niche. Onion and garlic are classic pairings in mixed beds.
Flowering support plants can also improve pest balance. Nasturtium may act as a trap or distraction plant for aphids and some chewing insects, while thyme can attract beneficial insects and remains low-growing enough not to shade the crop. In diversified systems, low, quick crops like lettuce can also be tucked between wider-spaced kale transplants early in the season before the canopy fills in.
Avoid crowding curly kale with large, fast-growing brassicas such as broccoli or cauliflower in the same tight bed, as they share the same pest complex and can create a dense humid canopy. Likewise, do not repeatedly interplant with heavy feeders unless fertility and spacing are increased accordingly.
A strong companion plan does not replace rotation, scouting, or row cover, but it can improve resilience and make pest pressure less severe over time. The best results come when companion plants are integrated into an overall system that also includes sanitation, succession planting, habitat for natural enemies, and careful irrigation management.