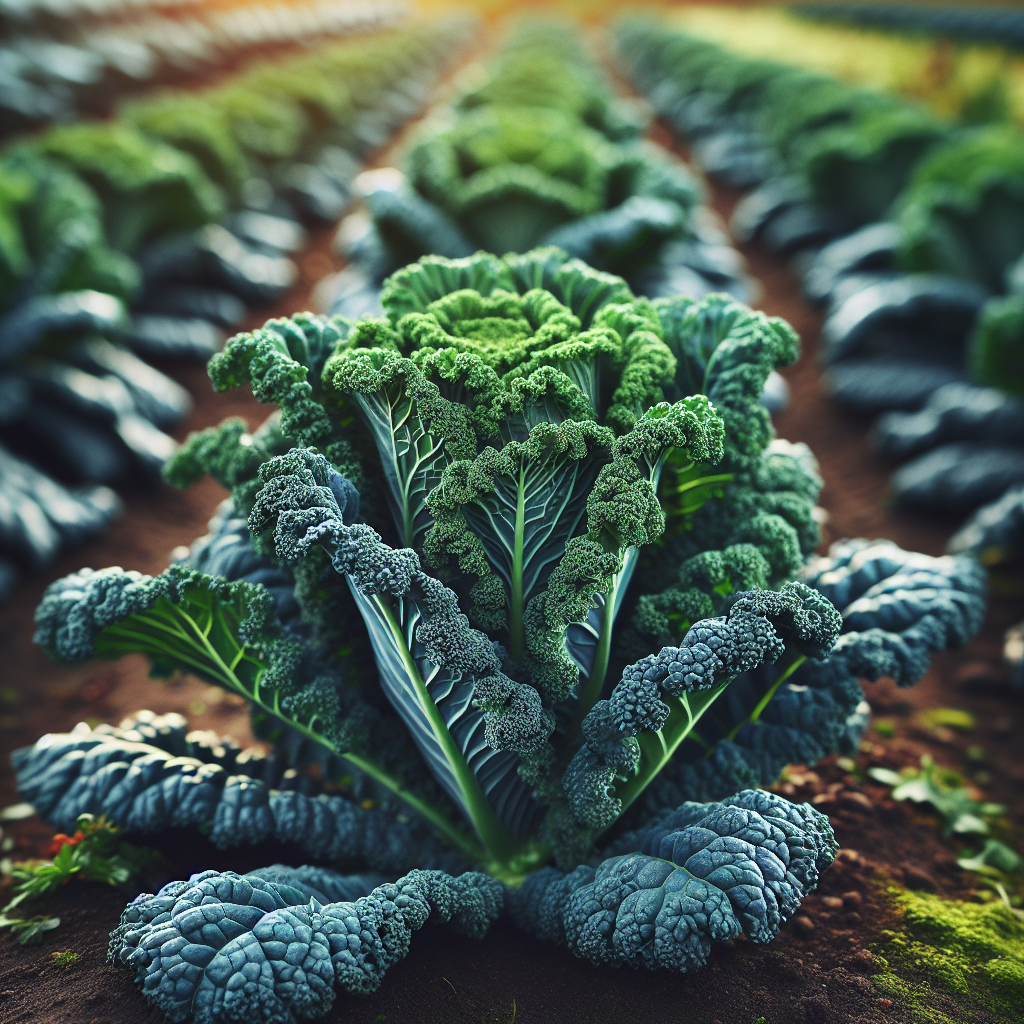
Introduction to Lacinato Kale (Dino Kale)
Known for its narrow, heavily blistered, blue-green leaves and elegant upright habit, this heirloom kale is one of the finest leafy greens for cool-season production. It is especially valued by market growers and home gardeners because it combines visual appeal, strong nutrient density, and a broad harvest window. Compared with curly kale, it has a flatter leaf profile, thicker texture, and a deeper, earthier flavor that becomes notably sweeter after exposure to cold nights.
This type originated in Italy, especially Tuscany, where it has been grown for centuries under names such as cavolo nero and Tuscan kale. It belongs to the acephala group of Brassica oleracea, the “headless cabbages,” meaning it does not form a central head like cabbage but instead produces a rosette or tower of harvestable leaves. Historically, it has been central to rustic soups, braises, and winter cookery because of its persistence in the field when many other greens decline.
For growers, one of its greatest strengths is flexibility. It can be direct-seeded or transplanted, harvested young for salad mixes or at full size for bunching, and grown in spring, fall, and even through mild winters. It is especially well suited to intensive vegetable systems where a continuous supply of leafy greens is needed. If you already grow other brassicas, many of the same principles apply; see our general Kale guide for broader species context.
Botanical Profile of Lacinato Kale (Dino Kale)
This crop is a biennial grown as an annual for its leaves. In its first season, it produces a tall central stem clothed in elongated leaves 10-24 inches long, depending on fertility, spacing, and harvest stage. Leaves are dark green to blue-black, with a strongly embossed or pebbled surface that gives the “dinosaur skin” appearance. Mature plants commonly reach 24-36 inches tall, and in fertile soil with overwintering they may grow even taller.
As a member of Brassicaceae, it shares close genetic relationship with cabbage, broccoli, cauliflower, and collards. Unlike heading brassicas, leaf production remains open and continuous when the central growing point remains vegetative. If exposed to prolonged cold followed by warming, especially after overwintering, it may bolt in the second season and send up yellow cruciform flowers. Once bolting begins, leaf quality declines quickly as fibers toughen and flavor sharpens.
The root system is fibrous but surprisingly effective in friable, organic-rich soils. Most active feeder roots occupy the upper 8-12 inches, which is why consistent moisture and surface mulching are so beneficial. The crop is moderately heavy-feeding, especially for nitrogen and sulfur, both of which directly influence leaf size, color intensity, and flavor compounds.
Lacinato typically has better leaf integrity and post-harvest texture than some frilled kales, making it attractive for bunching and kitchen use. Its leaf architecture also dries more slowly after rain or irrigation than very open-leaved greens, so airflow matters in humid climates. Flavor is influenced by temperature, fertility, and growth rate: fast, lush growth under cool conditions yields the most tender leaves, while heat, drought, or age produce stronger bitterness and more fibrous texture.
Soil, pH, and Climate Requirements for Lacinato Kale (Dino Kale)
This crop thrives in fertile, moisture-retentive, well-drained loam with high organic matter. The ideal soil texture is a crumbly loam or sandy loam enriched with compost, allowing steady moisture without prolonged saturation. Heavy clay can work if deeply amended and formed into raised beds, but waterlogged soil sharply increases the risk of root stress, yellowing, stunting, and secondary disease issues.
The preferred pH range is 6.2-7.0, with 6.5-6.8 being particularly favorable. Below pH 6.0, nutrient availability becomes less balanced, and brassicas are more vulnerable to problems such as poor calcium uptake and, in infested soils, Clubroot severity. If soil tests show acidity, apply agricultural lime well ahead of planting. In Clubroot-prone ground, aiming closer to neutral pH can significantly reduce disease pressure.
Nutrient demand is moderate to high. Before planting, incorporate 1-2 inches of finished compost plus a balanced organic fertilizer if soil test results indicate need. Nitrogen is the key driver of leafy growth, but excessive soluble nitrogen can create overly soft tissue that attracts Aphids and reduces stress resilience. A professional target is steady, not explosive, vegetative growth. Pale lower leaves, reduced leaf size, and slow regrowth after harvest usually indicate insufficient nitrogen. Purpling may indicate phosphorus stress in cold soils, while marginal scorching on older leaves can point to potassium imbalance or inconsistent moisture.
Climatically, this is a classic cool-season crop. Optimal growth occurs when daytime temperatures stay around 55-75°F (13-24°C), with nights in the 40s-50s°F (4-15°C). It tolerates light to moderate frost very well and often improves in eating quality after temperatures dip below freezing briefly. In many temperate regions it can survive winter with protection such as row cover or low tunnels. Heat above about 80°F (27°C), especially when combined with warm nights and dry soil, leads to bitterness, tougher texture, and higher bolting risk.
Full sun is ideal in cool seasons, meaning at least 6 hours of direct light, though in warm late-spring climates light afternoon shade can improve leaf tenderness. In hot regions, the best windows are late fall through early spring. Good air circulation is important, especially where dew persists, because dense foliage and humidity can support foliar disease.
Soil moisture should remain consistently in the moderate zone: not dusty dry and not swampy. Aim for soil that feels cool and slightly damp 2-3 inches below the surface. If squeezed, it should hold together lightly but not release free water. Chronic overwatering causes lower leaf yellowing, a sour soil smell, slowed growth, and sometimes blackened root tissue. Underwatering shows up as wilting during mild weather, dull leaf color, slowed expansion of new leaves, and increased bitterness.
For deeper fertility planning, practices such as compost addition, cover cropping, and reduced tillage are especially valuable; see soil health tips for broader soil-building strategies.
Step-by-Step Planting & Propagation
Propagation is almost always by seed. Start with fresh, high-quality seed because uniform germination matters for even stands and predictable harvest timing. Seeds usually germinate in 4-10 days under ideal conditions, with best emergence around 60-75°F (16-24°C).
For transplant production, sow seeds 1/4-1/2 inch deep in cell trays 4-6 weeks before field setting. Use a sterile, well-drained propagation mix and maintain even moisture without saturating the medium. Seedlings need strong light immediately after emergence to avoid stretching. Grow them cool rather than hot; stocky seedlings with thick stems transplant better than soft, leggy ones. Harden off for 5-7 days before planting out by gradually exposing them to wind, sun, and cooler nights.
For direct sowing, prepare a fine, firm seedbed free of crusting and large clods. Sow 1/4-1/2 inch deep in rows, then thin once seedlings have 2-3 true leaves. Direct seeding works especially well for baby leaf production or fall crops where soil temperatures are favorable.
Spacing depends on harvest style:
- Baby leaf: broadcast or tight bands, harvested young.
- Small bunching plants: 8-12 inches apart.
- Full-size repeated-harvest plants: 12-18 inches apart in rows 18-30 inches apart.
- Overwintered or premium market plants: 18 inches or more for airflow and easy picking.
Transplant in the evening or on cloudy days if possible. Water transplants thoroughly at planting to settle soil around roots. Set them at the same depth they grew in trays; burying too high can expose roots, while planting too deep can encourage stem issues in wet conditions.
A common professional schedule is:
- Spring crop: start indoors 4-6 weeks before last frost and transplant 2-4 weeks before last frost, depending on local conditions.
- Fall crop: sow or transplant 8-12 weeks before expected first hard frost so plants size up in cooling weather.
- Winter crop in mild climates: transplant in autumn under row cover or low tunnels.
Succession planting every 2-3 weeks creates steady supply. Because hot weather reduces quality, many growers skip midsummer production unless using shade cloth and careful irrigation.
Care & Maintenance regimes for Lacinato Kale (Dino Kale)
After establishment, focus on balanced fertility, consistent moisture, weed suppression, and regular harvest. The crop responds strongly to stable conditions; any sharp swings in water or nutrients show up quickly in leaf quality.
Irrigate deeply enough to moisten the root zone, generally the top 8-12 inches. In many soils, that means roughly 1-1.5 inches of water per week from rain or irrigation, adjusted for temperature, wind, and plant size. Sandy soils may need lighter, more frequent watering, while clay loams need less frequent but careful application. Drip irrigation is strongly preferred because it keeps foliage dry and reduces disease risk. Water early in the day if overhead irrigation is unavoidable.
Mulch with clean straw, shredded leaves, or compost once plants are established. A 1-2 inch mulch layer buffers soil temperature, reduces moisture swings, and suppresses weeds. Avoid piling mulch directly against stems in wet climates.
Side-dress nitrogen when plants are 8-10 inches tall or after the first significant harvest. Compost, feather meal, blood meal, fish-based fertilizers, or other approved nitrogen sources can be used according to soil test and system goals. A good sign that feeding is working is vigorous new central growth with dark, upright leaves. If plants become excessively lush and soft, reduce nitrogen and improve airflow.
Weed control is essential early because young kale competes poorly with fast annual weeds. Shallow cultivation is best to avoid damaging feeder roots. Once leaves expand and mulch is in place, weed pressure usually drops.
Harvest management doubles as crop maintenance. Remove the oldest, lowest leaves first, leaving the central crown and upper young leaves intact. This keeps the plant productive and improves airflow near the base. Do not strip too many leaves at once; leaving at least 5-7 healthy leaves helps sustain regrowth. Remove yellowing or damaged foliage promptly to reduce pest habitat.
In cold climates, floating row cover increases early growth, excludes some insect pests, and provides several degrees of frost protection. In severe winters, low tunnels or unheated hoop houses can keep leaves marketable far longer. In warm climates, 30-40% shade cloth can reduce stress during marginal heat.
Container growing is possible if using at least a 5-gallon pot per plant with rich potting mix and diligent feeding. However, field or raised-bed culture produces better leaf volume and steadier moisture.
Pests, Diseases & Organic Management
As a brassica, this crop attracts a predictable pest complex. The most common are Cabbage worms, Imported cabbageworm, Cabbage loopers, Aphids, Flea beetles, and Harlequin bugs in warmer regions. Slugs can also be serious in damp seasons.
Cabbage worms and loopers chew irregular holes and leave dark frass pellets. Young plants are especially vulnerable. Exclusion with insect netting or floating row cover is one of the most reliable organic methods. Hand-picking works in small plantings. Bacillus thuringiensis var. kurstaki (Bt) is highly effective when applied to young larvae and repeated after rain as needed.
Aphids often cluster on undersides of leaves and in the crown, especially during cool, lush growth or when nitrogen is excessive. Infestations distort leaves, leave sticky honeydew, and can reduce marketability fast. Strong water sprays, conservation of beneficial insects, and insecticidal soap are effective if coverage is thorough. Avoid drought stress followed by heavy nitrogen feeding, which often triggers explosive aphid buildup.
Flea beetles create tiny shot holes, mainly on young seedlings. Row cover at establishment is the best prevention. Fast growth through adequate fertility and moisture helps plants outgrow minor injury.
Harlequin bugs suck sap and cause pale stippling, wilting patches, and leaf decline. They are more problematic in warm southern climates and on late-season brassicas. Remove crop residues quickly, use trap crops cautiously, and hand-remove eggs and adults where feasible.
Disease issues include Downy mildew, Alternaria leaf spot, Black rot, Damping-off in seedlings, and Clubroot in contaminated soil. Most disease management begins with prevention:
- Rotate brassicas out of the same bed for at least 3 years, longer where disease pressure is high.
- Avoid overhead irrigation late in the day.
- Maintain spacing for airflow.
- Start with disease-free seed and clean trays.
- Remove infected residues promptly.
Downy mildew appears as yellow angular patches on upper leaf surfaces with grayish growth below in humid conditions. Alternaria causes dark target-like lesions. Black rot often begins as V-shaped yellow lesions from the leaf edge inward. Once bacterial Black rot is established, rogue infected plants and improve sanitation; avoid working in wet foliage.
Clubroot causes swollen, distorted roots, severe wilting in warm parts of the day, and stunting despite adequate moisture. It persists in soil for years, so prevention is critical: keep pH near neutral, improve drainage, rotate away from brassicas, and avoid moving contaminated soil on tools or transplants.
Organic management works best as an integrated system rather than a single treatment. Combine row covers, rotation, scouting twice weekly, prompt removal of infested leaves, and habitat for beneficial insects such as Nasturtium borders nearby to support ecological balance.
Harvesting, Curing & Optimal Storage
Leaves can be harvested at almost any stage, from baby greens to full mature leaves. For best eating quality, harvest when leaves are fully expanded but still supple, usually 8-14 inches long depending on market preference. In cool weather, mature leaves remain usable longer than many greens, but once midribs become excessively thick, texture turns fibrous.
The standard method is cut-and-come-again harvesting: remove the lowest outer leaves first and allow the crown to continue producing. Use a sharp knife or clean snap by hand, taking care not to tear the main stem. Harvest during the coolest part of the day, ideally morning after dew has dried but before field heat rises. Leaves picked when turgid store markedly better than heat-stressed afternoon harvests.
There is no curing in the true sense used for onions or garlic because this is a leafy vegetable. Instead, post-harvest handling should focus on rapid cooling and moisture retention. Immediately shade harvested leaves, then hydro-cool or refrigerate as soon as possible. Field heat removal is critical: warm leaves respire quickly and lose quality.
For bunching, strip damaged lower leaves, wash in cold clean water, and dry gently before packing. Excess surface moisture in storage encourages decay, but leaves should not be allowed to wilt. Ideal storage is at 32°F (0°C) with 95-100% relative humidity. Under those conditions, high-quality leaves can keep roughly 1-3 weeks depending on harvest maturity and sanitation. In home storage, sealed or perforated bags in the refrigerator crisper usually maintain quality for 5-10 days.
Do not store near ethylene-sensitive produce concerns are minor here, but avoid warm fruits that accelerate general deterioration through shared storage conditions. Frost-touched field plants often taste better, but leaves should still be harvested before repeated freeze-thaw cycles damage cell structure.
Companion Planting for Lacinato Kale (Dino Kale)
The best companion strategy combines pest disruption, root-zone complementarity, and efficient bed use rather than folklore. Strong companions are aromatic herbs, alliums, and nectar-producing flowers that help confuse pests or support beneficial insects.
Thyme is excellent along bed edges because its aroma may help mask brassica scent cues, and its flowers attract beneficial insects when allowed to bloom. Onion and Garlic fit well in nearby rows because their upright growth does not heavily shade kale, and their pungent foliage can contribute to pest confusion in mixed plantings. Nasturtium is valuable as a flowering companion that draws pollinators and beneficial insects while also acting as a visual and ecological diversifier in brassica beds.
Good companion planning also means avoiding close, repeated association with other heavy-feeding brassicas in the same small space, because they compete for similar nutrients and attract the same pest complex. Interplanting with shallow-rooted herbs or quick crops can improve space efficiency, but maintain airflow and access for scouting.
For practical layouts, place aromatic companions on borders, flowering companions at interval points for beneficial insect access, and alliums in adjacent lines rather than so densely that harvest becomes difficult. The goal is not magic protection but a measurable reduction in pest concentration and a more resilient planting system.