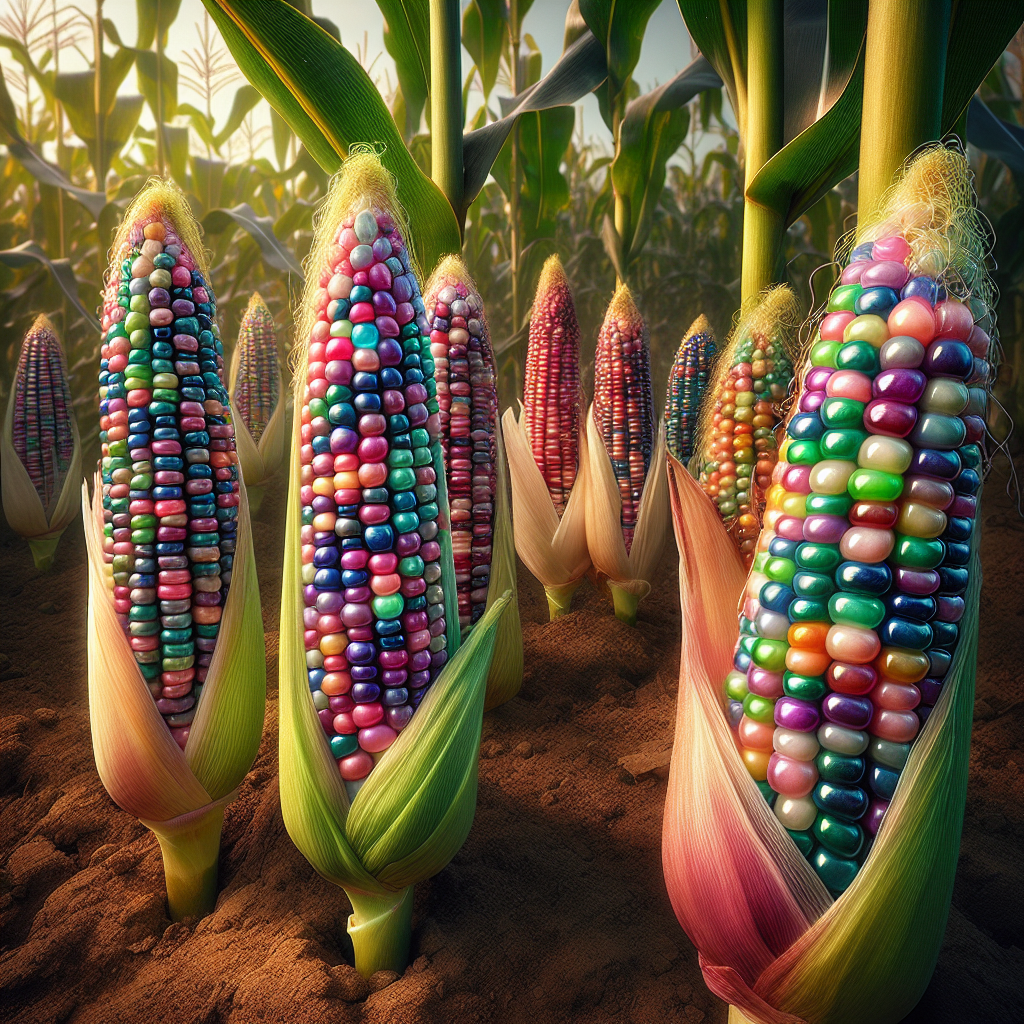
Introduction to Glass Gem Corn
Bred from carefully selected traditional flint corn lines, this striking heirloom became widely known through the seed work of Cherokee farmer Carl Barnes and later preservation efforts by seed stewards who recognized both its beauty and cultural importance. The ears display a remarkable range of kernel colors—amber, blue, violet, pink, green, red, smoky gray, and pearly white—with varying degrees of translucence that create the “glass gem” effect.
It is important to understand that this is not sweet corn. The kernels are hard and starchy at maturity, placing it in the flint corn group rather than the sugar-rich sweet corn types harvested fresh. Growers choose it for ornamental use, seed saving, dry grain, decorative market sales, and specialty milling. Like other traditional maize, it rewards attentive management of spacing, fertility, and pollination. For broader maize basics, see our Corn guide.
One of the most distinctive features of this variety is its genetic diversity. No two ears are exactly alike, and saved seed can continue to produce a wide spectrum of color combinations, especially if isolated from other corn. That diversity is part of its appeal, but it also means ear size, plant height, and maturity can vary somewhat from planting to planting. Expect plants generally in the 5 to 8 foot range, with ears commonly 3 to 8 inches long depending on strain, population density, fertility, and weather.
Because the stalks are wind-pollinated and the ear fill depends on abundant viable pollen during silking, Glass Gem Corn performs best when planted in blocks rather than single rows. A small decorative patch may still produce colorful ears, but serious growers seeking full kernels and strong seed quality should think in terms of field layout, pollen timing, and isolation distance.
Botanical Profile of Glass Gem Corn
This variety belongs to the grass family Poaceae and the species Zea mays. It is generally classified as a flint corn, meaning the kernels have a hard outer endosperm layer surrounding a softer center. That structure gives the seed its glossy, durable appearance and helps explain why mature ears dry well and store longer than sweet corn.
The plant is monoecious, bearing separate male and female flowers on the same plant. The tassel at the top releases pollen, while the developing ears emerge from leaf axils along the stalk. Each silk corresponds to a single kernel; successful pollination of each silk is necessary for complete ear fill. If drought, heat stress, nutrient deficiency, or poor pollination occurs during tasseling and silking, the result is patchy ears with missing kernels.
Glass Gem Corn typically has a strong fibrous root system with brace roots forming near the lower nodes, especially where soil is adequately moist and plants are hilled slightly. Leaves are long, strap-like, and arranged alternately along the culm. Stalk thickness is influenced by nitrogen availability, spacing, and wind exposure. In fertile soil, stalks become robust and capable of supporting one or occasionally two ears per plant.
As with many open-pollinated corns, kernel color is genetically complex and influenced by multiple pigment pathways, including anthocyanins and carotenoids. This is why ears can display transparent-looking blues beside opaque pinks or bronze kernels on the same cob. Seed savers often select ears for particular color palettes, but broad selection tends to preserve the signature rainbow effect.
Days to maturity usually fall around 100 to 120 days, though local conditions may shift that by 1 to 2 weeks. Cool spring soils delay emergence; cool late seasons delay dry-down. Because this is a dry grain corn, full maturity is reached when husks brown, kernels harden, and the black layer forms at the kernel base.
Soil, pH, and Climate Requirements for Glass Gem Corn
This crop performs best in full sun with at least 8 hours of direct light daily, though 10 or more hours is ideal for maximum vigor and ear development. It prefers warm-season conditions, with optimal daytime temperatures around 75 to 86°F (24 to 30°C). Germination slows significantly below 60°F (16°C), and seeds may rot in cold, wet soil. A practical planting threshold is a soil temperature of at least 60°F at 2 inches deep, with 65 to 70°F being better for uniform emergence.
Soil texture should be well-drained but moisture-retentive. Loam or sandy loam with good organic matter is ideal. Heavy clay can work if drainage is improved and the planting area is not compacted. Flint corns are somewhat resilient, but waterlogged conditions reduce root respiration, predispose seedlings to damping-off, and can cause stunting. If squeezed soil stays slick, dense, and airless after rain for several days, drainage is inadequate.
The preferred pH range is about 6.0 to 6.8, with 6.2 to 6.5 especially favorable for nutrient uptake. Below pH 5.8, phosphorus availability can decline and micronutrient imbalances may appear. Above pH 7.2, zinc deficiency becomes more likely, especially in cold soils. A pre-plant soil test is strongly recommended because corn is a relatively heavy feeder and responds clearly to balanced fertility.
Organic matter in the 3 to 6% range supports even moisture, steady nutrient release, and microbial activity. Prior incorporation of well-finished compost can improve tilth, but avoid excessive raw manure directly before planting because it may create overly lush vegetative growth, lodging risk, and uneven nutrient release.
For moisture, aim to keep the root zone consistently damp but never saturated. In practical terms, the top 1 inch of soil may dry slightly between irrigations, but the 2 to 6 inch zone should remain evenly moist through vegetative growth. During tasseling, silking, and kernel fill, avoid allowing more than the top inch to dry out. Severe drought stress at flowering is one of the fastest ways to reduce ear quality. Typical water demand is about 1 to 1.5 inches per week, increasing toward the higher end during hot, windy weather or on sandy soils.
Signs of underwatering include rolled leaves by mid-morning, slow growth, pale lower leaves, delayed silking, and lightweight ears. Signs of overwatering include persistently limp but not dry foliage, yellowing from the lower leaves upward, sour-smelling soil, algae or moss at the surface, and shallow rooting. If standing water remains longer than 24 hours after irrigation or rainfall, expect reduced vigor.
Wind exposure matters. Moderate airflow helps reduce foliar disease, but severe exposure in open fields can cause lodging or poor pollen shed during hot, dry spells. Shelterbelts or strategic placement help, provided they do not heavily shade the crop.
Step-by-Step Planting & Propagation
Propagation is by seed only. Direct sowing is strongly preferred because corn transplants often suffer root disturbance that delays growth and disrupts uniform pollination timing.
- Choose a site with full sun, fertile soil, and enough space for block planting.
- Test soil and amend as needed several weeks before sowing. Incorporate compost and any recommended phosphorus or potassium before planting.
- Wait until frost danger has passed and soil temperatures are reliably above 60°F.
- Form rows or a bed wide enough for multiple short rows rather than one long line. A minimum block of 4 rows greatly improves pollination.
- Sow seeds 1 to 1.5 inches deep in heavier soils and up to 2 inches deep in sandy soils.
- Space seeds 8 to 12 inches apart within rows. Space rows 24 to 36 inches apart depending on whether cultivation will be done by hand or mechanically.
- Water thoroughly after sowing so the seed zone is uniformly moist but not muddy.
- Thin weak doubles after emergence if plants are crowded, aiming for consistent stand density.
For small gardens, a 4 x 4 foot block can work, but larger blocks produce better kernel set. If growing for seed saving, isolate this planting from any other corn types. Cross-pollination can occur over long distances via wind. Home gardeners should aim for at least 250 feet of isolation if possible, but 1,000 feet or more is better for seed purity. Another useful approach is time isolation: plant so flowering does not overlap with nearby corn.
Many growers use the traditional Three Sisters pattern, pairing corn with climbing beans and squash. In that system, sow the corn first and let it reach 6 to 12 inches tall before introducing climbing beans so the young stalks are not overwhelmed. For soil-supportive intercropping principles, the article on soil health strategies offers useful context.
If bird pressure is severe, cover newly planted beds with lightweight row cover until emergence. Crows and jays may pull seedlings, especially when sprouts first break the surface.
Succession planting is possible but less common for ornamental dry corn because uniform curing is easier from one main sowing. In short-season climates, choose the warmest bed available and avoid late planting that pushes maturation into cold autumn weather.
Care & Maintenance regimes for Glass Gem Corn
Early growth should be steady and uninterrupted. Once seedlings emerge, maintain even moisture and keep the bed weed-free. Corn competes poorly with weeds during the first 4 to 6 weeks, and early weed pressure can permanently reduce ear size. Shallow hoeing is effective, but avoid damaging the feeder roots near the soil surface.
Nitrogen management is central to success. A rough professional approach is to apply about one-third of total nitrogen pre-plant and the rest as side-dressings at knee-high stage and just before tasseling, adjusting to soil test results and previous crop residue. In organically managed plots, blood meal, feather meal, fish-based fertilizers, or well-balanced granular blends are common options. Nitrogen deficiency first appears as pale green leaves and a yellow V-shaped pattern running from the tip down the midrib of older leaves.
Phosphorus supports root growth and early establishment, while potassium improves drought tolerance, stalk strength, and grain fill. Zinc may be needed in high-pH or cool soils where corn often shows striped young leaves and stunting.
Mulching can help conserve moisture, but apply it carefully once soil is warm and plants are established. A thin mulch of clean straw between rows is useful; keep the immediate stem zone open to prevent excess humidity and rodent shelter.
Irrigation should be deep rather than frequent and shallow. Aim to moisten the soil to at least 6 inches depth. In sandy soils, this may mean 2 to 3 lighter irrigations weekly; in loam, one deep irrigation may suffice depending on weather. The most critical period is from roughly 2 weeks before tasseling until 2 weeks after silking. If water is limited, prioritize this window above all others.
Watch for lodging as plants gain height. Hilling soil lightly around the base when plants are 12 to 18 inches tall can encourage brace root support, especially in windy areas. Avoid excessive nitrogen late in the season because it can produce tall, lush plants with weaker stalks.
Rogue off-type or diseased plants if growing for seed. Because this is an open-pollinated heirloom, selection matters. Choose vigorous, upright plants with well-filled ears and desirable kernel colors for future seed stock.
Pests, Diseases & Organic Management
Common insect pests include corn earworm, European corn borer, cutworms, flea beetles, aphids, and birds or raccoons near maturity. Local pressure varies widely.
cutworms clip seedlings at ground level, usually at night. Cardboard collars around transplants are common in vegetable crops, but since corn is direct-sown, weed control and soil disturbance before planting help reduce their habitat. Replant gaps promptly if stand loss is significant.
corn earworm enters the ear through the silk channel. In small plantings, applying a few drops of food-grade mineral oil to silks 5 to 7 days after silk emergence can reduce larval entry. Timely harvest also helps. Corn borers tunnel into stalks and weaken plants; crop residue destruction after harvest is one of the most effective cultural controls.
aphids may cluster on tassels or leaves, especially during dry conditions. Usually natural predators keep them in check, but excessive nitrogen can worsen outbreaks. Strong water sprays and conservation of beneficial insects are often enough.
raccoons can devastate a patch shortly before harvest, even though the corn is ornamental or dry-use. Electric fencing is often the most reliable protection in rural settings.
Diseases may include common rust, northern corn leaf blight, smut, damping-off, and various stalk rots. Organic management relies first on prevention: crop rotation, air circulation, balanced fertility, and residue management. Avoid planting corn in the same location year after year. A 2- to 3-year rotation away from other grasses or maize is preferable.
common rust appears as cinnamon-brown pustules on leaves. Mild infections rarely ruin the crop, but severe early infection reduces photosynthesis. northern corn leaf blight causes elongated gray-green lesions that expand under humid conditions. Spacing that encourages airflow and watering at soil level rather than overhead can reduce pressure.
Corn smut, though edible at a young stage in some culinary traditions, is undesirable if your goal is decorative dry ears. It causes swollen, silvery galls on ears, tassels, or stems. Remove galls before they rupture and dispose of them away from the field.
Seedling damping-off is most common in cold, wet soil. The best organic control is proper planting timing and well-drained conditions rather than treatment after symptoms appear.
Harvesting, Curing & Optimal Storage
For ornamental or grain use, harvest only after physiological maturity and substantial field drying. Husks should be papery and tan to brown, stalks beginning to dry, and kernels fully hard. When pressed with a fingernail, mature kernels resist indentation. If you harvest too early, colors may be less developed and kernels can shrivel during curing.
Cut ears with several inches of shank attached, or snap them cleanly from dry stalks on a dry day. Avoid harvesting during rain or heavy dew because added moisture raises mold risk during curing.
Peel back husks partially or fully and hang ears in bundles in a warm, airy, shaded place. Good curing conditions are around 60 to 75°F with low ambient humidity and strong ventilation. Direct harsh sun can fade some pigments, so filtered light or shade is better for preserving appearance. Cure for 2 to 4 weeks, longer in humid climates.
For long-term storage, target kernel moisture below about 13 to 14%. For seed saving, around 10 to 12% is safer if storage conditions are stable. If kernels feel cool or slightly tacky in a sealed container after 24 hours, they are still too moist. Properly dried ears sound hard and crisp when tapped, and kernels detach cleanly if shelled.
Store decorative ears in a dry area with relative humidity preferably below 60%. For shelled grain, use rodent-proof containers. For seed, keep only the healthiest, best-filled ears from strong plants and store them cool, dark, and dry. Label by year, location, and selected traits.
In culinary use, Glass Gem Corn is best treated like other flint corns: ground into meal, nixtamalized for hominy-style preparations, or used in specialty roasting and popping experiments. It is not suitable as a sweet corn substitute once mature.
Companion Planting for Glass Gem Corn
The most functional companion system is one that supports pollination, reduces exposed soil, and improves nutrient cycling without crowding the stalks. The classic pairing is with pole beans and sprawling squash. Pole beans climb after the corn is established and contribute biologically fixed nitrogen to the system over time, while squash acts as a living mulch that suppresses weeds and shades the soil.
If using beans, wait until the corn is sturdy before sowing them. Good options include Kentucky Wonder Pole Bean or other climbing types rather than heavy, overly aggressive vines. Plant beans a few inches away from the corn hill or row to reduce direct competition at the base. In fertile soil, too many bean plants per corn stalk can increase shading and airflow problems, so be conservative.
Squash should be planted where it can run outward without engulfing young corn. A vigorous but manageable type such as Butternut Squash works well. Its broad leaves help retain soil moisture and reduce weed pressure between rows.
Some growers also include Sunflower nearby as a pollinator-supportive border and wind-moderating element, though it should not be packed tightly into the corn block because competition for light and nutrients can increase. Avoid close interplanting with crops that strongly compete for nitrogen during corn’s rapid vegetative stage.
Good companions are ultimately those that complement the corn’s timing: deep summer warmth, open sun, and moderate fertility. Keep the central goal in mind—strong stalks, good pollen shed, full ear set, and clean dry-down—and choose companions that serve that objective rather than merely filling space.