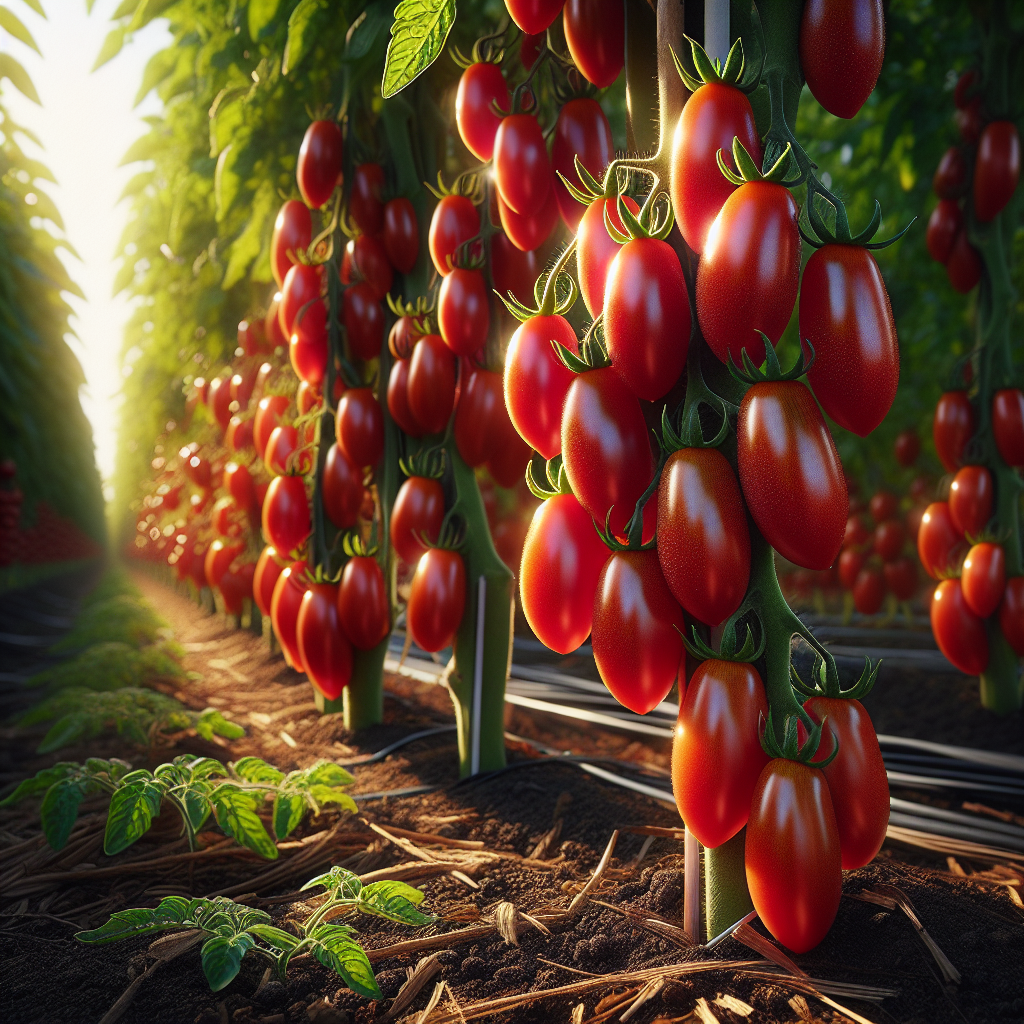
Introduction to San Marzano Tomato
Few tomato varieties carry the culinary reputation of this classic Italian paste type. Traditionally associated with the volcanic soils near Naples and widely used for premium sauces, San Marzano is valued less for raw snacking and more for processing quality: elongated fruits, relatively thick walls, meaty interior, modest juice content, and a flavor profile that combines sweetness with enough acidity to taste bright after cooking.
In the field, it behaves differently from round slicing tomatoes. Plants are typically vigorous and indeterminate, meaning they continue producing flowers and fruit over a long season rather than setting one concentrated flush. The fruit itself is usually cylindrical to slightly tapered, often with a pointed blossom end, and commonly 3 to 5 inches long under good fertility and warm conditions. Compared with many salad tomatoes, San Marzano is especially sensitive to irregular moisture during early fruit development, calcium imbalance, and crowding that traps humidity around foliage.
Growers choose it when the goal is high-quality paste, canning, drying, roasting, or market sales to chefs. If your main objective is fresh slicing, see our Tomato guide. For sauce production, however, this cultivar class is one of the benchmarks by which all others are judged.
Botanical Profile of San Marzano Tomato
This cultivar belongs to the nightshade family, Solanaceae, alongside peppers, eggplants, and potatoes. Botanically it is a domesticated form of Solanum lycopersicum, with San Marzano representing a cultivar group rather than a single universally identical seed line. Seed companies may offer selections under names such as San Marzano, San Marzano Redorta, or San Marzano type, and performance can differ substantially depending on whether the strain is open-pollinated, heirloom-selected, or hybridized for disease resistance.
Plants usually exhibit indeterminate growth, producing a central stem that can exceed 5 to 7 feet when staked in fertile soil. Leaves are compound, aromatic when bruised, and covered in glandular hairs. Yellow star-shaped flowers appear in clusters, most often every 2 to 3 nodes once reproductive growth begins. Pollination is usually self-fertile, but vibration from wind or insects improves pollen release and fruit set, especially in humid weather.
The fruit is technically a berry. San Marzano fruit structure tends toward fewer locules than slicing tomatoes, which helps explain its dense, fleshy texture and lower free water content. The skin is usually thin to medium, but the pericarp is substantial, which is desirable for processing. Typical days to maturity range from about 75 to 90 days from transplant depending on strain, temperature, and light intensity.
One important professional nuance: many gardeners expect every fruit labeled San Marzano to be uniformly perfect and distinctly pointed. In reality, fruit shape varies with genetics, pollination conditions, fertility, and temperature stress. Heat above 90°F (32°C) during flowering can reduce pollination quality, causing misshapen or partially filled fruit. Excess nitrogen can also push vegetative growth at the expense of fruit density and flavor.
Soil, pH, and Climate Requirements for San Marzano Tomato
This variety performs best in deep, friable, biologically active soil with strong drainage and high water-holding capacity. A sandy loam enriched with mature compost is excellent, but clay loam can also work if raised beds or ridging improve aeration. Root health is central to yield: compacted soil, standing water, or shallow hardpan commonly leads to stunting, blossom-end rot, and erratic fruit set.
The ideal soil pH is 6.2 to 6.8. It will tolerate about 6.0 to 7.2, but nutrient availability starts to become less predictable outside the preferred range. At pH below 6.0, calcium and magnesium uptake may become limiting and aluminum toxicity may begin to interfere with roots. At pH above 7.0, iron, manganese, and phosphorus often become less available, showing up as pale new leaves, slow growth, and reduced vigor.
Before planting, aim for organic matter in the 4% to 6% range if possible. Incorporating 1 to 2 inches of finished compost into the top 8 to 10 inches of soil improves structure, microbial activity, and buffering against moisture swings. Avoid fresh manure immediately before planting, as it can drive excessive vegetative growth, increase salt levels, and contribute to uneven ripening.
For fertility targets, moderate nitrogen with generous phosphorus and potassium is usually best for sauce tomatoes. A baseline pre-plant fertilizer in the approximate range of 5-10-10 or 4-6-8 often suits home and market gardens better than high-nitrogen blends. Calcium must be available consistently in the root zone, but blossom-end rot is more often caused by irregular water flow through the plant than by absolute absence of calcium in the soil.
Climatically, San Marzano prefers warm temperate to Mediterranean-style conditions with full sun and a long frost-free season. Ideal daytime temperatures are 70 to 85°F (21 to 29°C), with night temperatures 55 to 70°F (13 to 21°C). Fruit set often drops when daytime temperatures remain above 90°F (32°C) or nighttime temperatures stay above 75°F (24°C). In cool climates, choose the warmest, most protected location and use black mulch or low tunnels early in the season to warm the soil.
Tomatoes need at least 8 hours of direct sun for premium yields, but 10 or more hours is even better where heat is not excessive. Good airflow is essential because dense canopies and dew-heavy mornings encourage foliar disease. For deeper background on improving fertility and structure, see soil health strategies.
Step-by-Step Planting & Propagation
Start from seed indoors 6 to 8 weeks before the last expected frost. Use a sterile seed-starting mix rather than garden soil to reduce damping-off and improve aeration. Sow seeds about 1/4 inch deep, keep the medium at 75 to 85°F (24 to 29°C), and maintain even moisture without saturation. The medium should feel like a wrung-out sponge: moist throughout but never glistening or muddy.
Once seedlings emerge, provide very strong light immediately. Insufficient light causes elongated, weak stems that never fully recover. Keep day temperatures around 65 to 75°F (18 to 24°C) and nights a few degrees cooler. Pot up after the first true leaves appear, ideally into 3- to 4-inch containers, burying stems deeper to encourage adventitious root formation.
Harden plants off over 7 to 10 days before transplanting. Gradually increase exposure to wind, direct sun, and cooler temperatures. Do not transplant until danger of frost has passed and soil temperature is reliably above 60°F (16°C), with 65 to 70°F (18 to 21°C) being even better for rapid establishment.
Prepare planting holes deeply. Remove lower leaves and bury 1/2 to 2/3 of the stem if plants are leggy; tomatoes readily form roots along buried stems. Space plants 24 to 36 inches apart in rows 4 to 5 feet apart for staked culture. If using a Florida weave or trellis in production rows, 18 to 24 inches can work with disciplined pruning and nutrition. Wider spacing reduces disease pressure in humid regions.
Mix compost into the planting zone and water transplants in thoroughly. A starter solution with diluted fish emulsion or a low-salt transplant fertilizer can help establishment, but do not overdo nitrogen. Install supports at planting time, not later, to avoid root damage. Strong stakes, cattle panels, or heavy-duty cages are superior to flimsy cone cages because San Marzano can become top-heavy once clusters begin to size.
Direct seeding is possible only in very warm, long-season climates, but it is rarely preferred because transplanting gives better uniformity, earlier harvest, and stronger weed control.
Care & Maintenance regimes for San Marzano Tomato
Water management is the make-or-break factor for this variety. Aim for consistent root-zone moisture 6 to 8 inches deep rather than frequent shallow sprinkling. In practical terms, most established field-grown plants need about 1 to 1.5 inches of water per week, rising toward 2 inches in very hot, sandy, windy conditions when plants are carrying a heavy fruit load. Containers may require daily irrigation in midsummer.
Check moisture by hand, not by surface appearance alone. Soil should be slightly moist at root depth but not sticky or airless. If the top inch is dry while the zone below remains cool and lightly damp, that is usually acceptable. If the root zone feels soggy, smells sour, or stays saturated for more than 24 hours after irrigation, overwatering is likely. Symptoms include yellow lower leaves, edema, weak flavor, cracking, and increased susceptibility to root disease. Underwatering shows up as midday wilting that persists into evening, leaf curl, aborted blossoms, tough skin, and blossom-end rot on young fruit.
Mulch heavily once soil has warmed. Apply 2 to 3 inches of clean straw, shredded leaf mold, or composted mulch, keeping material slightly away from the stem base. Mulch reduces splash-borne disease, moderates soil temperature, and smooths out moisture fluctuations.
Pruning strategy depends on climate and support system. In dry climates, moderate pruning works well: remove suckers below the first flower cluster, then maintain 2 to 4 main stems. In humid climates, more aggressive pruning improves airflow and speeds foliage drying. However, avoid stripping too many leaves, because exposed fruit can sunscald during heat waves.
Tie plants every 7 to 10 days as they grow. Do not allow heavy fruit clusters to hang unsupported where stems can kink or split. For nutrition, side-dress lightly when the first fruits reach marble size and again after the first major harvest flush. Use compost, a balanced organic fruiting fertilizer, or a potassium-forward amendment. Excess nitrogen after flowering produces lush foliage, delayed ripening, and diluted flavor.
Monitor leaf color and growth rate. Deep green leaves and steady extension indicate adequate nutrition. Purple tints in cool soil may suggest transient phosphorus stress. Interveinal yellowing on older leaves can indicate magnesium deficiency, while pale new growth may point to iron issues, especially in alkaline soils.
Blossom-end rot deserves special emphasis. This disorder begins as a water-soaked patch on the blossom end of green fruit, enlarging into a leathery black area. It is most common on the first flush of elongated paste tomatoes. Prevent it with even irrigation, adequate calcium availability, moderate salinity, and avoiding root damage from deep cultivation.
Pests, Diseases & Organic Management
San Marzano is vulnerable to most standard tomato pests, and because it is often grown for premium sauce quality, cosmetic and disease damage can quickly reduce usable yield. The most common insect pests include Aphids, Whiteflies, Flea Beetles, Hornworms, Tomato Fruitworms, and Stink Bugs. Early scouting is critical. Check the undersides of leaves twice weekly, especially during warm, still weather.
Aphids and Whiteflies weaken plants and can vector viruses. Strong water sprays, reflective mulches early in the season, insecticidal soap, and encouraging beneficial insects help keep populations below damaging levels. Hornworms can strip foliage surprisingly fast; hand-picking is effective in small plantings. If you find Hornworms carrying white cocoons, leave them in place, as they are hosting beneficial parasitic wasps.
Flea Beetles are mainly a transplant-stage problem, peppering leaves with tiny holes and slowing establishment. Row covers used immediately after transplanting can protect young plants until flowering begins. Remove covers when pollination and airflow become priorities.
Disease pressure often matters more than insects. Early Blight causes target-like leaf lesions that begin on older foliage; Septoria creates many small circular spots with dark margins; Late Blight causes greasy, rapidly expanding lesions and can destroy a crop quickly in cool, wet weather. Mulch, lower-leaf pruning, drip irrigation, crop rotation, and wide spacing are foundational controls.
Bacterial Spot and speck cause leaf spotting and fruit blemishes, especially after overhead irrigation or storms. Avoid working plants when wet. Sanitize stakes and tools, and never save seed from diseased plants. Fusarium and Verticillium Wilts cause yellowing and one-sided decline; Root-Knot Nematodes stunt plants in warm sandy soils. Rotation away from other solanaceous crops for at least 3 years is ideal. Do not plant after tomatoes, peppers, eggplants, or Potato.
Organic sprays can support, but not replace, good cultural practices. Copper products may suppress bacterial disease and some fungal issues if applied preventively, though repeated use should be measured due to soil accumulation. Biological fungicides based on Bacillus species can help in lower-pressure situations. Neem is useful against some soft-bodied insects, but spray at dusk and avoid open flowers when pollinators are active.
The healthiest plants usually result from an integrated approach: resistant or reputable seed lines, clean transplants, rotation, mulching, morning drip irrigation, pruning for airflow, and immediate removal of infected lower leaves.
Harvesting, Curing & Optimal Storage
Harvest timing should reflect intended use. For fresh cooking and short storage, pick fruits at full red color when they feel firm but slightly yielding. For canning or sauce, many growers wait until fruits are fully colored and have developed peak solids, but they should still be sound and not overripe. Uniform ripening is encouraged by balanced potassium, steady moisture, and full sunlight.
Use clean pruners or twist fruit gently from the vine without tearing stems. Handle carefully; even paste tomatoes bruise, and small wounds become decay points. Sort immediately into sound, cracked, insect-damaged, and disease-suspect fruit. Do not mix compromised fruit with clean harvest lots.
Tomatoes do not require curing in the same way onions, garlic, or winter squash do, but a short conditioning period at room temperature can improve color completion and flavor consistency if fruit was picked at the breaker stage. Hold them in a single layer at about 60 to 70°F (16 to 21°C) out of direct sun for several days. Avoid refrigeration below 50°F (10°C) unless fruit is fully ripe and must be held briefly; chilling suppresses aroma and gives a mealy texture.
For best postharvest quality, store mature ripe fruits around 55 to 60°F (13 to 16°C) with moderate humidity and good airflow. Under those conditions, sound fruit may hold about 5 to 7 days, sometimes longer depending on harvest stage and disease pressure. If you have a glut, San Marzano is one of the best tomatoes for sauce, oven-drying, freezing, and canning because of its high flesh-to-juice ratio and relatively low seed content.
If processing for sauce, do so promptly after harvest. Fruit sugars and acidity are best preserved when tomatoes are not left piled in warm bins. For market gardeners, harvesting every 2 to 3 days maintains quality and reduces losses from splitting, bird damage, and overripening.
Companion Planting for San Marzano Tomato
Good companions support pest management, space efficiency, and pollinator activity, but they should never substitute for proper spacing and rotation. Thai Basil is one of the most practical partners because it occupies little space, attracts pollinators, and does not strongly compete with tomato roots when planted at bed edges. Garlic and Onion are also useful nearby because their pungent foliage may help confuse some pests and they make efficient use of shallow soil layers.
Low-growing, quick crops such as lettuce or radish can be used early between rows before tomato canopies close, but remove or thin them once airflow becomes restricted. Avoid heavy-feeding companions that crowd roots or shade the lower canopy. Also avoid planting near fennel, which is often considered incompatible in mixed vegetable systems.
The best companion strategy is functional rather than mystical: pair this tomato with crops that deter or distract pests, attract beneficial insects, or occupy a different root and canopy niche. Keep companions far enough away that the tomato row still dries quickly after rain or irrigation. In humid climates, disease prevention should always outweigh the desire to maximize intercrop density.