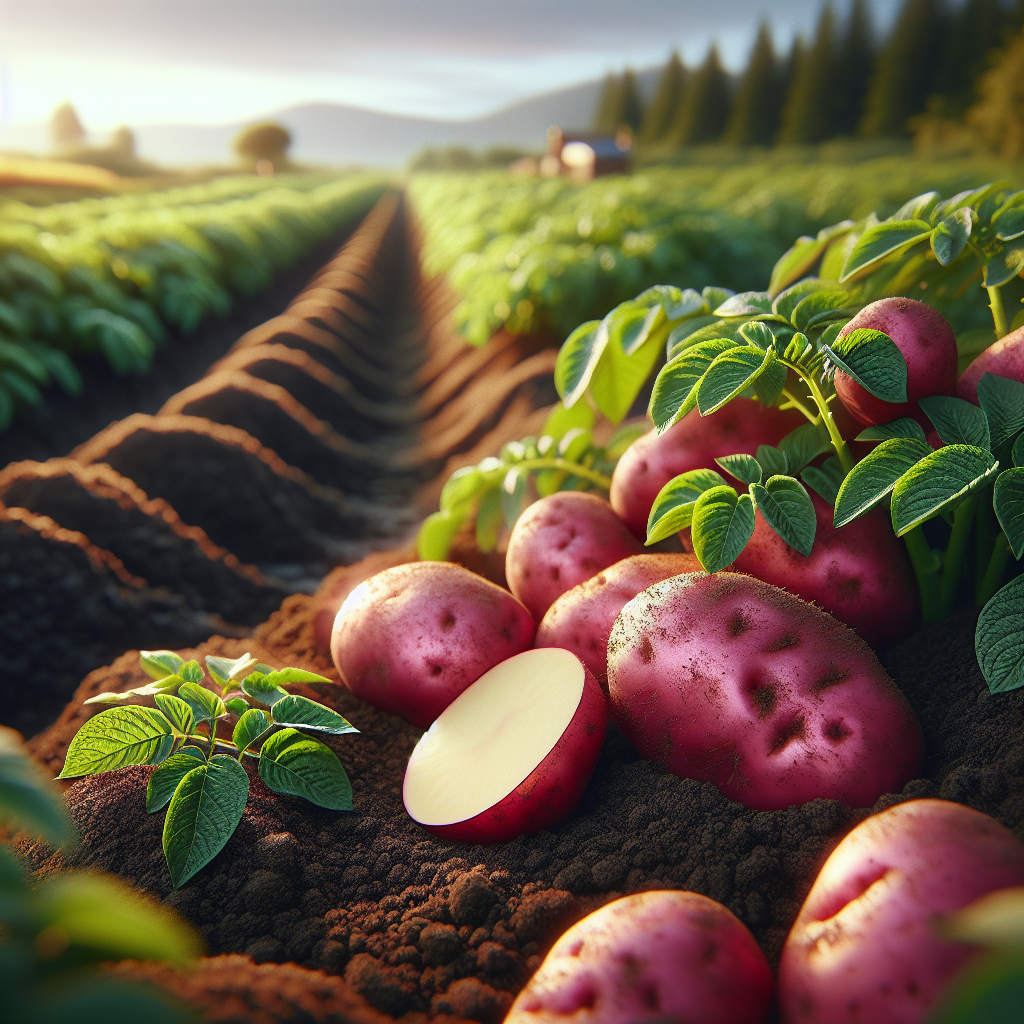
Introduction to Red Bliss Potato
An old-fashioned, market-favorite red potato, this cultivar is widely appreciated for its bright red skin, white flesh, moist texture, and dependable performance as an early to midseason crop. It belongs to the same species covered in our general potato guide, but its management should be tuned to its waxy culinary type and naturally earlier maturity.
Red-skinned potatoes like this one became especially important in fresh-market production because they offer visual appeal, thinner skin at harvest, and a firm texture that holds together after cooking. Red Bliss is typically grown for table use rather than long-term industrial storage. The tubers are usually round to slightly oblong, with shallow eyes that simplify washing and preparation.
For growers, the main strengths are earliness, attractive uniformity under good management, and strong consumer demand for “new potatoes.” The main weaknesses are moderate sensitivity to water imbalance, susceptibility to several common potato diseases under poor rotation, and somewhat shorter storage life than dense, late-maturing russet types. If your goal is premium fresh eating quality rather than maximum storage duration, Red Bliss is one of the most dependable choices.
Botanical Profile of Red Bliss Potato
This cultivar is a herbaceous annual grown from vegetative seed tubers, though biologically the potato plant is a perennial species. Taxonomically it sits in the nightshade family, Solanaceae, alongside tomatoes, peppers, and eggplants. Like other potatoes, it forms underground stolons; the swollen tips of those stolons become the edible tubers.
Key variety traits include red to deep rose skin, white flesh, shallow eyes, and a waxy to moderately firm texture caused by relatively lower dry matter than floury baking potatoes. That lower dry matter means the tubers are less likely to fall apart in soups or potato salads, making the variety especially desirable for boiling and steaming.
Plants generally produce a compact to moderately spreading canopy with green compound leaves. Flowering may occur, often with white to pale lavender blossoms depending on growing conditions, but flowers are not reliable indicators of harvest readiness. Tuber initiation is driven mainly by plant age, day length interactions, and healthy leaf area, not by bloom alone.
Like all potatoes, the green parts of the plant, including leaves, stems, flowers, berries, and any sun-exposed green tubers, contain glycoalkaloids such as solanine and should not be eaten. Tubers form best when soil temperatures remain cool, typically between 60 and 70°F (16 to 21°C). Once soil temperatures climb much beyond that range, tuber bulking slows, defects rise, and internal quality can decline.
Red Bliss is considered an early variety in many production regions, often reaching “new potato” harvest in about 70 to 90 days and more mature harvest in roughly 90 to 110 days, depending on climate and planting date. Because it bulks relatively early, it is useful where summers become hot quickly or where growers want to free a bed for a follow-up crop. For broader crop rotation and soil care principles, see soil health strategies.
Soil, pH, and Climate Requirements for Red Bliss Potato
This variety performs best in loose, deep, stone-free, well-drained loam or sandy loam with high organic matter and excellent tilth. The ideal texture is one that allows stolons to expand without obstruction while still holding steady moisture. Heavy clay can produce misshapen tubers, poor drainage, and higher disease pressure, especially Rhizoctonia and Soft rot. Very sandy soils can work well if irrigation and fertility are carefully managed, but they dry rapidly and may lead to scab or growth cracks if moisture swings are severe.
Target soil pH should be slightly acidic, ideally 5.2 to 6.2. This is a particularly important detail in potato culture. A pH above about 6.5 can increase Common scab pressure, while extremely low pH below about 5.0 can reduce nutrient availability and root efficiency. If liming is necessary, apply it well ahead of the potato crop, ideally to the previous rotation crop rather than immediately before planting.
Soil organic matter in the 3% to 6% range is highly beneficial. Potatoes respond well to biologically active soils rich in stable compost, but avoid fresh manure before planting. Fresh or partially decomposed manure often raises scab risk, causes excessive vine growth, and can create nutrient imbalance, especially excess available nitrogen.
Temperature matters at every stage. Seed pieces sprout best in soil at least 45°F (7°C), but emergence is more rapid and uniform around 50 to 60°F (10 to 16°C). Vegetative growth thrives under cool days and cool nights. Extended daytime heat above 85°F (29°C) reduces tuber set and can lead to heat stress, hollow heart, internal browning, and poor skin finish.
Aim for full sun, at least 6 to 8 hours daily, with strong air circulation. In humid regions, spacing and airflow are critical because lush canopies stay wet longer and Late blight risk rises sharply. In low-humidity regions, mulching and even irrigation become more important to prevent moisture stress.
Consistent soil moisture is essential, especially from stolon formation through tuber bulking. A good practical target is to maintain soil at roughly 65% to 80% of field capacity in the active root zone. In simpler terms, the soil should feel cool and slightly moist 3 to 4 inches deep, forming a weak ball in the hand but not smearing into mud. Overly dry soil during tuber initiation can reduce tuber numbers; alternating dry and wet conditions can cause growth cracks, knobby tubers, and internal disorders. Overwatering causes oxygen deprivation, yellowing lower leaves, slow growth, enlarged lenticels on tubers, and increased Soft rot risk.
Step-by-Step Planting & Propagation
Propagation is done from certified disease-free seed potatoes, not true seed. Certified seed is worth the extra cost because virus load, Blackleg bacteria, and seed-borne fungal issues dramatically affect yield and uniformity. Select small whole seed tubers or cut larger tubers into pieces weighing about 1.5 to 2 ounces (42 to 57 g), each piece with at least one to two strong eyes.
Prepare the bed 2 to 3 weeks before planting. Loosen soil to 10 to 12 inches deep and incorporate mature compost sparingly but evenly. Remove stones, clods, and undecomposed residues.
Pre-sprout if desired. Chitting seed tubers in bright, cool conditions for 2 to 4 weeks before planting can speed emergence. Ideal sprouts are short, thick, and greenish-purple, not long and brittle.
If cutting seed pieces, do so 1 to 2 days before planting in dry, well-ventilated conditions so cut surfaces suberize. This protective corky layer reduces rot. Dusting is usually unnecessary if sanitation is good and soil is warm enough.
Plant in early spring once soil is workable and consistently above 45°F (7°C). In colder regions, this is often 2 to 4 weeks before the last frost. Light frost may burn emerged shoots, but tubers in soil usually survive.
Open furrows 4 to 6 inches deep. Space seed pieces 10 to 12 inches apart in rows 30 to 36 inches apart. Closer spacing favors smaller, more uniform “new potato” sizes; wider spacing can increase average tuber size.
Place seed pieces cut-side down when possible, with eyes facing up. Cover initially with 3 to 4 inches of soil rather than the full furrow depth.
As shoots grow to 6 to 8 inches tall, begin hilling by pulling loose soil around the stems. Repeat every 1 to 2 weeks until hills are 8 to 12 inches high.
Hilling is not optional for premium quality. It protects developing tubers from sunlight, which causes greening and glycoalkaloid accumulation. It also increases the volume of loose soil where stolons can form and helps suppress weeds. In small-scale systems, straw mulch can supplement hilling, but the base hill of mineral soil remains important.
For container growing, use a vessel at least 18 inches deep and wide, with excellent drainage. Start with 4 to 6 inches of growing mix, then add more mix as stems elongate. Avoid black containers in very hot climates because root-zone overheating can sharply reduce tuber set.
Care & Maintenance regimes for Red Bliss Potato
Once emerged, the crop needs balanced nutrition, weed suppression, disciplined irrigation, and canopy monitoring. Nitrogen management is especially important. Too little nitrogen produces weak vines and low yield; too much delays tuberization, causes overly lush top growth, softens tissues, and can worsen Late blight susceptibility.
A practical fertility baseline for home and market gardens is a moderate preplant application of compost plus a fertilizer with lower nitrogen and relatively higher phosphorus and potassium, such as something in the range of 5-10-10, adjusted to soil test results. Commercially, potatoes often remove substantial potassium, and Red Bliss benefits from adequate potassium for skin finish, tuber size uniformity, and stress tolerance.
Apply most nutrients before planting or early in the growth cycle. Side-dress lightly when plants are 6 to 8 inches tall if growth is pale or slow, but avoid heavy nitrogen after tuber initiation. Once the crop begins forming tubers, excessive nitrogen tends to favor vines at the expense of marketable tubers.
Watering should be deep and consistent. Most plantings need about 1 to 1.5 inches of water per week from rain or irrigation, increasing slightly on sandy soils or during warm, windy periods. The critical windows are:
- Emergence to early vegetative growth: keep evenly moist but not saturated.
- Tuber initiation: never allow severe drying; this stage strongly determines tuber number.
- Tuber bulking: maintain the most consistent moisture of the season.
- Final 1 to 2 weeks before harvest of mature potatoes: reduce irrigation to help skins set and lower rot risk.
The best irrigation method is drip or furrow watering that keeps foliage dry. Overhead irrigation can work, but morning timing is preferable so leaves dry quickly. Soil that remains waterlogged for more than 24 to 48 hours in the root zone often triggers root stress, poor oxygen diffusion, and disease outbreaks.
Watch the foliage closely. Healthy plants should be medium to deep green, upright, and steadily expanding. Leaves curling upward with dull coloration may indicate moisture stress, root injury, or aphid-transmitted virus. Yellowing from the bottom can suggest aging, nitrogen deficiency, waterlogging, or early disease. Purpling on young plants may occur temporarily in cold soils because phosphorus uptake is reduced.
Weeds matter more than many growers realize. Potatoes are shallow-rooted compared with some field crops and do not compete strongly during establishment. Control weeds early, before canopy closure. Cultivate shallowly to avoid damaging stolons and feeder roots.
Mulch can help stabilize moisture and reduce soil splash, but apply only after soil has warmed somewhat and plants are established. Thick, damp mulch placed too early in cold spring conditions may slow growth and harbor slugs.
Pests, Diseases & Organic Management
The most important principle is prevention through certified seed, crop rotation, drainage, and sanitation. Avoid planting potatoes or related solanaceous crops in the same ground more than once every 3 to 4 years where disease history exists.
Colorado potato beetle is a primary pest. Adults are yellow-orange with black stripes; larvae are soft-bodied and red to orange with black spots. Hand-picking is effective in small plantings if started early. Floating row cover can protect young plants before flowering, provided it is installed before beetles arrive and edges are sealed. In heavier infestations, organic spinosad can be effective when timed to young larval stages.
Aphids may colonize leaf undersides and are especially concerning because they vector viruses such as Potato virus Y and Potato leafroll virus. Strong water sprays may suppress light populations, but encouraging beneficial insects is more sustainable. Planting [alyssum] is not an option from the provided list, so use habitat plants nearby and avoid over-fertilizing with nitrogen, which produces aphid-attractive soft growth.
Flea beetles create tiny shot holes in leaves and can be troublesome early. Row cover and rapid crop establishment help reduce injury. Wireworms attack tubers underground, causing narrow holes and making potatoes less marketable. Rotating away from sod, weedy grass cover, or recently broken pasture is important because those environments often harbor Wireworms.
Late blight is the most feared foliar disease in cool, wet weather. It causes water-soaked lesions that turn brown to black, often with pale green margins and white sporulation under humid conditions. It can spread explosively and infect tubers. Space plants for airflow, avoid overhead watering late in the day, and destroy infected debris promptly. Copper-based organic fungicides can provide some protective suppression, but they are preventive, not curative.
Early blight tends to appear later or under plant stress, causing brown lesions with concentric rings on older leaves. Good fertility balance, rotation, and sanitation reduce severity.
Common scab causes corky, rough lesions on tubers. It is strongly associated with higher soil pH, fresh manure, and dry conditions during tuber initiation. Keep pH moderately acidic and moisture even at the critical early tuber stage.
Black scurf and Stem canker caused by Rhizoctonia can lead to poor emergence and black crusty bodies on harvested tubers. Warm, well-drained planting conditions and healthy seed reduce this problem.
Soft rot and Blackleg are bacterial problems favored by injured seed, saturated soils, and warm conditions. Handle seed pieces gently, avoid planting into cold mud, and never store wet tubers.
Organic management works best as a system: certified seed, long rotation, balanced fertility, careful irrigation, hilling, prompt rogueing of suspect virus-infected plants, and complete removal of volunteer potatoes after harvest.
Harvesting, Curing & Optimal Storage
Harvest timing depends on intended use. For “new” potatoes, dig about 2 to 3 weeks after flowering begins, or once tubers are large enough to use. At this stage skins are thin and easily rubbed off, flavor is delicate, and storage life is short.
For mature storage harvest, wait until vines naturally yellow and begin to die back or until you intentionally cut vines and leave tubers in the ground 10 to 14 days for skin set. This waiting period helps the skins toughen and reduces bruising. Do not leave mature tubers in wet soil too long once vines are dead, especially in rainy weather, as rot risk increases.
Harvest on a dry day if possible. Loosen soil well outside the hill with a fork or undercutter to avoid stabbing tubers. Lift gently and keep tubers out of direct sun. Even a few hours of strong sunlight can green exposed potatoes.
Curing for Red Bliss is lighter than for long-storage russets because the skins are naturally thinner and the variety is often sold fresh. Still, a short healing period is beneficial. Hold tubers at about 55 to 60°F (13 to 16°C) with high humidity, around 85% to 95%, for 5 to 10 days in darkness with good ventilation. This allows minor abrasions to heal.
After curing, sort carefully. Remove cut, cracked, green, diseased, or badly bruised tubers. Do not wash potatoes intended for storage; brush off loose soil only.
For storage, aim for 40 to 45°F (4 to 7°C) and high relative humidity around 90% to 95% in darkness. Red-skinned table potatoes generally store best slightly warmer than processing potatoes to reduce sugar accumulation and flavor changes. Good airflow is essential, but avoid strong drafts that dehydrate tubers.
Watch for these storage problems:
- Shriveling: humidity too low or storage too warm.
- Sprouting: storage too warm or too bright.
- Sweet taste after cooking: storage too cold, causing starch conversion to sugar.
- Soft spots or odor: rot, often from bruising or wet storage conditions.
Under good conditions, Red Bliss stores moderately well for several months, but it is not the best choice for very long winter holding. Its premium window is usually from fresh harvest through medium-term storage.
Companion Planting for Red Bliss Potato
The most useful companions are those that either confuse pests, improve spatial efficiency without competing aggressively, or help diversify the planting. Nasturtium can function as a trap and distraction plant for some pest pressure while also attracting beneficial insects. Thyme is a compact aromatic herb that fits along bed edges and may help create a more diverse insect environment. Clover can be used nearby or in pathways as a living mulch in larger systems, though it should not be allowed to compete directly with young potato plants. Garlic is often paired in kitchen gardens because its upright habit occupies little horizontal space and its scent may help disrupt some pest movement patterns.
Use companion plants strategically, not romantically. Potatoes still require full sun, regular hilling, and unobstructed root-zone access. Keep companions on row shoulders, bed edges, or adjacent strips rather than inside the hill zone where they can interfere with cultivation and harvest.
Avoid close association with other heavy-feeding Solanaceae such as tomatoes, peppers, and eggplants because they share diseases and pests, especially blights and beetles. Also avoid aggressive sprawling crops that shade the canopy or make harvest difficult.
A practical layout is one or two border rows of low aromatic or flowering companions flanking the potato block, leaving the potato rows themselves clean and accessible. That approach preserves management efficiency while still capturing most of the ecological benefit.