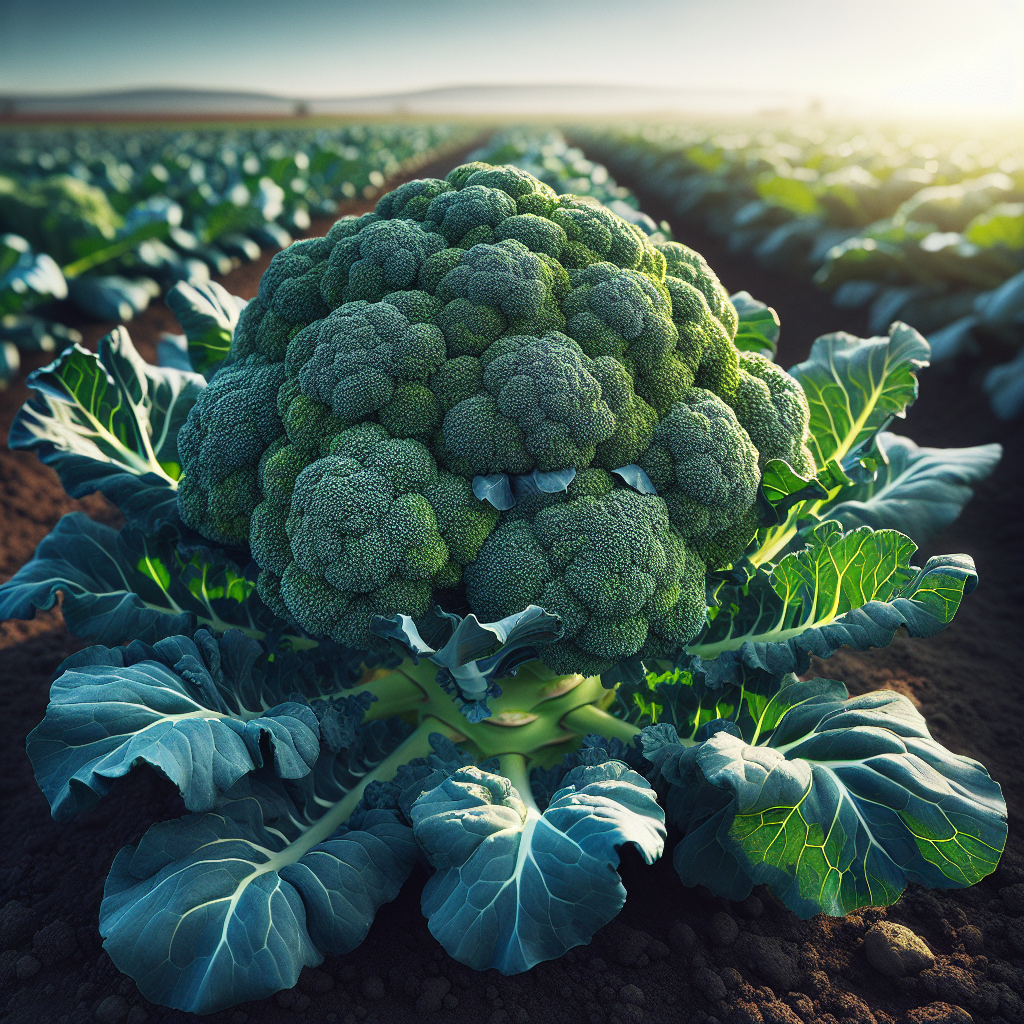
Introduction to Calabrese Broccoli
Originally associated with Calabria in southern Italy, this is the broccoli form that shaped the modern market standard: a broad, blue-green plant with a single prominent central head followed by smaller but valuable side shoots. In practical growing terms, it is a cool-season brassica prized for its adaptability in spring and autumn production, its high nutritional density, and its relatively forgiving harvest window compared with more heat-sensitive cauliflower.
Calabrese types differ from sprouting broccoli in habit and timing. They are selected for a substantial terminal head composed of compact, immature flower buds borne on a thick stalk, with lateral shoots emerging after the main cut. Flavor is best when growth is steady and uninterrupted; stress from drought, heat, or nutrient imbalance can make stems woody, heads loose, or buds uneven. For growers seeking a reliable brassica for market gardens, home plots, and cool-climate field production, this type remains one of the most important choices.
From a culinary standpoint, nearly the entire plant is useful. The florets are the obvious harvest, but the peeled stems are sweet and tender when grown well, and young leaves can be cooked like other brassica greens. This whole-plant utility makes it productive even in smaller gardens.
Botanical Profile of Calabrese Broccoli
This crop belongs to the Brassicaceae family, alongside cabbage, kale, mustard, and cauliflower. Botanically, the edible head is not a true fruit or leaf structure but a dense cluster of immature floral meristems. Harvest occurs before individual flower buds elongate and open. Once the plant senses age, heat, or reproductive readiness, those buds loosen and yellow petals begin to appear, a process growers call bolting or flowering out.
Calabrese broccoli typically forms a waxy, upright rosette of broad gray-green to blue-green leaves with pronounced midribs. The stem thickens beneath the central head and acts as a carbohydrate and water conduit, so stem quality reflects overall growing conditions. Plants often reach 45-90 cm tall depending on spacing, fertility, and cultivar vigor.
A key physiological trait is its preference for cool temperatures during curd initiation and head filling. While vegetative growth can occur across a fairly broad range, premium head quality is most likely when daytime temperatures stay roughly between 15-21°C and nights are cool. Extended warmth, especially above 24-27°C, increases the risk of loose bead structure, reduced head density, and premature flowering.
Rooting is moderately deep for a vegetable crop if soil is loose and well structured. A strong fibrous root system allows decent nutrient scavenging, but the crop is still shallow enough to suffer quickly in compacted or droughty soil. Like many brassicas, it is a substantial feeder, especially for nitrogen during vegetative growth, while boron, calcium, and sulfur are important for structural integrity and uniform development.
For broader context on brassica management principles, see our Broccoli guide.
Soil, pH, and Climate Requirements for Calabrese Broccoli
This crop performs best in fertile, moisture-retentive, well-drained loam rich in organic matter. Ideal texture is a crumbly loam or clay loam that can hold consistent moisture without becoming waterlogged. Sandy soils can work if amended heavily with compost and irrigated more frequently, but they often produce faster, more stress-prone growth and can lead to hollow stems or smaller heads if fertility is not maintained.
The preferred soil pH is 6.5-7.2. It will tolerate slightly more acidic conditions, but once pH drops below about 6.2, nutrient availability and root efficiency decline, and Clubroot risk becomes more serious. If brassicas have struggled previously, test soil before planting. Applying agricultural lime months in advance is far more effective than trying to correct acidity at planting time.
Organic matter should be high enough to buffer moisture fluctuations. A pre-plant incorporation of 2.5-5 cm of mature compost is usually beneficial, but avoid uncomposted manure immediately before planting because it can lead to overly lush top growth, nitrogen volatility, and disease pressure. The best soils for tight heads are those with continuous but not excessive nitrogen release.
Moisture consistency is critical. Aim for soil that stays evenly damp in the root zone, roughly comparable to a wrung-out sponge rather than wet mud or dry dust. In field terms, the top 2-3 cm may begin to dry slightly between irrigations, but below that the soil should remain cool and moist. Drought stress during head initiation often causes buttoning, where very small premature heads form on stunted plants. Excess water, by contrast, reduces root oxygen and may cause yellowing lower leaves, slowed growth, a sour smell in saturated beds, and increased susceptibility to root disease.
Climate-wise, Calabrese broccoli is a temperate crop. It tolerates light frost and often improves in flavor after cool nights because sugars accumulate and respiration slows. Seedlings can withstand mild frosts once hardened, while mature plants are usually more resilient than many warm-season vegetables. However, repeated hard freezes can damage heads, causing water-soaked tissue and later rot after thawing.
In hot climates, the crop is more successful as a fall-to-winter planting than a spring crop. In cool maritime or highland climates, both spring and autumn crops may be possible. Long periods of heat combined with dry winds are especially damaging because they accelerate transpiration, toughen tissue, and push the plant toward reproduction before the head reaches marketable size.
Good air circulation matters, but avoid overly exposed sites where constant wind causes mechanical stress and water loss. A location with full sun is ideal in cool seasons; in warm shoulder seasons, very light afternoon shade can help reduce heat stress without sacrificing too much photosynthesis.
For improving overall bed structure and fertility planning, growers often benefit from principles like those discussed in soil health strategies.
Step-by-Step Planting & Propagation
Propagation is almost always by seed. Direct sowing is possible, but transplanting is preferred for professional-quality stands because it improves spacing precision, reduces early weed competition, and shortens field occupancy.
Calculate timing first. Count backward from your expected heat or frost window. Most Calabrese types need about 55-90 days from transplant depending on cultivar and season. For spring crops, sow indoors 4-6 weeks before the last expected frost. For fall crops, sow 6-8 weeks before the desired transplanting date so that head development lands in cooling weather.
Start seeds in modules or trays. Sow 0.5-1 cm deep in a fine, sterile seed-starting mix. Germination is usually strongest at 18-24°C, often within 5-10 days. Keep the medium uniformly moist but never saturated. Waterlogged trays encourage damping-off; if algae forms on the surface or stems pinch at soil level, conditions are too wet or stagnant.
Provide strong light immediately after emergence. Leggy seedlings struggle later and are more likely to suffer transplant shock. Maintain cooler conditions after germination, ideally around 13-18°C, to produce stout stems and compact growth.
Harden off gradually. Over 7-10 days, expose seedlings to outdoor conditions with increasing sun, wind, and cooler nights. Hardened plants should have 4-6 true leaves, short internodes, and a root ball that holds together without circling excessively.
Prepare the bed deeply. Loosen soil to at least 20-25 cm if possible. Remove perennial weeds, incorporate finished compost, and apply base fertility according to soil test. If soil boron is low, correct it cautiously because deficiency reduces head quality, but excess boron is toxic.
Transplant at the correct spacing. For large main heads, space plants 45-60 cm apart in rows 60-75 cm apart. Closer spacing increases competition and can reduce head size, though it may be acceptable for small-market heads. Plant seedlings at the same depth they were growing in the tray, firm the soil around roots, and water in thoroughly to settle air pockets.
Use row cover early if pest pressure is predictable. Floating insect netting or lightweight row cover can prevent cabbage butterflies and Flea beetles from colonizing young plants. It should be installed immediately after transplanting and secured well.
Direct sowing, if used, should place seeds about 1-1.5 cm deep in moist soil. Thin seedlings early to final spacing. Delay in thinning causes root disturbance and competition that may trigger uneven maturity.
Care & Maintenance regimes for Calabrese Broccoli
The central principle is uninterrupted growth. Every check in growth leaves a signature: button heads, purpling, coarse stems, reduced side shoots, or poor flavor.
Water management: Supply roughly 2.5-4 cm of water per week from rain or irrigation, adjusted for soil type and temperature. In sandy soils during warm weather, smaller and more frequent irrigations are better than occasional soaking. In heavier soils, deeper irrigation with longer intervals works if drainage is good. The root zone should remain consistently moist to about 15-20 cm deep. Signs of underwatering include dull, slightly bluish foliage, midday wilting that persists into evening, slow leaf expansion, and heads that stop sizing. Signs of overwatering include yellow lower leaves, constantly wet soil, reduced vigor despite adequate fertility, and a tendency for roots to brown rather than remain cream-colored and fibrous.
Mulching: Apply organic mulch once soil has warmed slightly and plants are established. Straw or shredded leaf mulch helps moderate moisture swings, suppress weeds, and reduce soil splash. Keep mulch a few centimeters away from the stem to avoid crown rot and slug shelter right at the base.
Feeding: This crop is a moderate-to-heavy feeder. If soil is fertile and compost-rich, one pre-plant application may suffice. In lower fertility soils, side-dress with nitrogen when plants are established and again when rapid leaf growth begins, before head initiation. Avoid excessive late nitrogen, which can create coarse growth and delay maturity. Sulfur supports brassica flavor compounds and healthy growth, while calcium helps prevent tissue collapse under stress.
Weed control: Early competition is especially damaging. Keep the bed weed-free for the first 4-6 weeks after transplant. Hoe shallowly because roots near the surface are easily damaged. Once the canopy broadens, the crop becomes more competitive.
Temperature buffering: In hot spells, irrigate in the morning and ensure plants never go into midday stress. In cold periods, fleece or row cover can protect head quality and sustain growth. Uneven temperature swings are often less damaging than the combination of heat plus water stress.
Plant observation: Watch the growing point carefully. Healthy head formation begins as a tightening, domed cluster in the center. If the developing head looks sparse or elongated, heat or nutrient imbalance is likely involved. If leaves develop purplish tints, cool weather may be harmlessly increasing anthocyanin expression, but persistent purple combined with stunting may also indicate phosphorus uptake problems in cold soils.
After the main cut: Leave the plant in place if healthy. Calabrese types often send out useful side shoots from axillary buds. A light side-dressing and continued watering can significantly extend the harvest period.
Pests, Diseases & Organic Management
As a brassica, this crop attracts a predictable set of pests. Prevention is usually more effective than rescue treatment.
Cabbage white butterflies and Imported cabbageworms: The larvae chew irregular holes in leaves and contaminate heads with frass. Exclusion netting is the best first line of defense. Hand-picking works in small plantings. Bacillus thuringiensis var. kurstaki (Bt) is effective on young caterpillars and should be applied before severe infestations develop.
Cabbage loopers and Diamondback moth larvae: These can skeletonize foliage quickly and burrow into the head area. Monitor undersides of leaves weekly. Bt and spinosad are commonly used organic-compatible controls, but rotate tactics and spray in evening to protect beneficial insects.
Aphids: Colonies often gather in leaf folds and around developing heads, especially in cool, lush conditions. Strong water sprays can suppress early populations. Encourage beneficial insects and avoid overfertilizing with nitrogen, which makes tissue more attractive.
Flea beetles: More damaging to seedlings than mature plants. Fine mesh exclusion, rapid early growth, and weed control around the bed reduce pressure.
Slugs and Snails: These thrive in damp mulches and cool weather, rasping holes in leaves and hiding near crowns. Reduce hiding places, water in the morning rather than evening, and use iron phosphate baits if necessary.
Clubroot: A serious soilborne disease causing swollen roots, wilting in warm parts of the day, and chronically stunted plants despite adequate moisture. Rotate out of brassicas for several years, maintain pH above 7 where feasible, improve drainage, and avoid moving infected soil on tools or transplants.
Downy mildew and Alternaria leaf spot: Favored by prolonged leaf wetness and crowding. Space adequately, water at soil level where possible, and remove heavily infected debris. Crop rotation and sanitation are essential.
Black rot: Causes V-shaped yellow lesions from leaf edges inward and darkened veins. Use clean seed, avoid overhead irrigation when conditions are warm and humid, and remove infected plants promptly.
Physiological disorders: Buttoning results from stress on young plants, especially cold checks, root binding, transplant shock, or nutrient shortage. Hollow stem is linked to rapid growth, low boron, or uneven moisture. Brown bead can develop in hot weather or under nutritional stress, making flower buds discolored and less marketable.
Organic management works best as a system: long rotation, insect exclusion, balanced fertility, prompt residue cleanup, and constant scouting. Brassica pests can go from minor to severe within a few days in mild weather.
Harvesting, Curing & Optimal Storage
Harvest the main head when it is fully formed, firm, and deep green, but before individual buds begin to swell or show yellow color. The surface should look tight and even, not loose or fuzzy. Waiting too long reduces tenderness and shelf life rapidly.
Use a sharp knife and cut 10-15 cm below the head, taking a length of tender stem. Make the cut at a slight angle if rain is expected, which may reduce water sitting on the remaining stump. For fresh market quality, harvest in the cool morning when field heat is lowest and tissue is fully hydrated.
After the central head is removed, continue irrigating and feeding lightly if the plants are healthy. Side shoots can be harvested repeatedly once they reach usable size. Frequent cutting encourages additional shoot production.
Unlike onions, garlic, or winter squash, this crop is not cured in the traditional dry-storage sense. Instead, it should be cooled immediately. Hydro-cooling or rapid refrigeration is ideal. The goal is to remove field heat fast because respiration remains high after harvest and quality declines quickly at room temperature.
For short-term storage, keep heads at 0-4°C with very high relative humidity, ideally 95-100%. In practical terms, perforated plastic bags or high-humidity crisper storage works well if condensation is not excessive. Under ideal cold storage, quality may hold for 1-2 weeks, though sweetness and firmness are best in the first several days. Ethylene exposure from ripening fruit should be minimized because it can accelerate yellowing.
Do not wash extensively before cold storage unless you can dry surface moisture quickly. Free water in warm conditions invites bacterial soft rot. If washing is necessary, use clean cold water and chill promptly afterward.
Quality indicators at harvest include compact dome shape, fine bead size, dark green color, crisp stem tissue, and no hollow or pithy center when cut. Overmature heads become loose, lighter in color, and may show scattered yellow petals.
Companion Planting for Calabrese Broccoli
The most useful companions are those that either repel key pests, improve the micro-ecosystem around the crop, or use space without competing aggressively for the same nutrients and canopy layer.
Onion and Garlic are classic partners because their strong scent may help confuse pest insects, and their upright habit occupies relatively little horizontal space. They are especially useful on bed edges or interplanted in modest numbers rather than packed densely enough to compete.
Thyme is another strong companion, particularly near borders, where its flowers can support beneficial insects while its low growth does not shade the brassicas. Aromatic herbs around brassica blocks often function less as magical repellents and more as biodiversity tools that make pest outbreaks less explosive.
Nasturtium can act as a trap or distraction plant for Aphids and certain chewing insects while also attracting pollinators and predatory insects. Place it nearby rather than allowing it to overwhelm young transplants.
Avoid pairing with heavy-feeding, large-canopy neighbors that shade plants or compete for root space during the head-building phase. Also avoid planting brassicas repeatedly in the same ground, even with companions, because rotation remains more important than any companion effect.
Best companion systems are intentional: aromatic border plants, good airflow, and enough spacing that companions support ecology without reducing head size or delaying maturity.