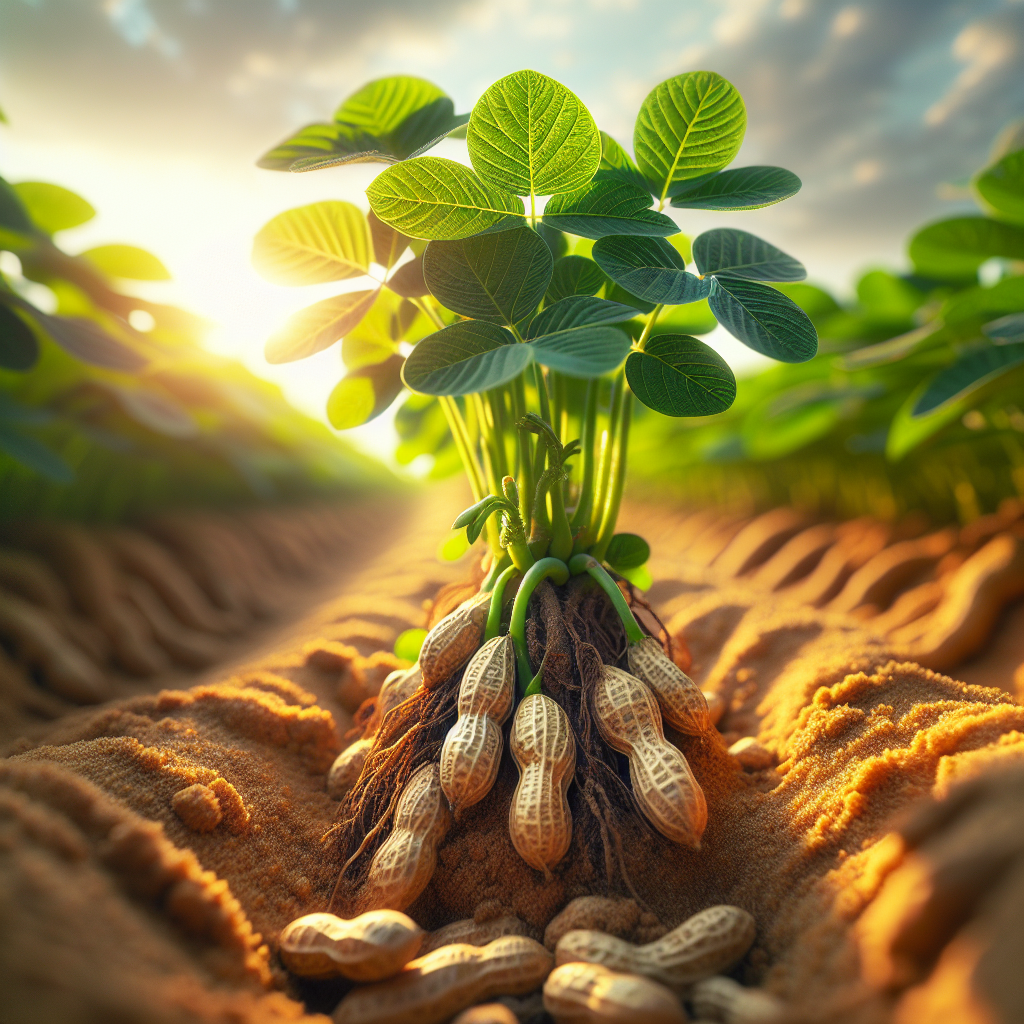
Introduction to Peanuts
Cultivated peanuts are one of the most distinctive field and garden crops because they flower above ground but develop their pods below the soil surface. Native to South America and domesticated thousands of years ago, peanuts spread through trade routes into Africa, Asia, and eventually North America, where they became both a staple oilseed and an important rotation crop. Botanically, they are legumes rather than true nuts, and that distinction matters in the field: peanuts can form symbiotic relationships with rhizobia bacteria, helping them fix atmospheric nitrogen and reduce fertilizer dependence when properly inoculated and managed.
For growers, peanuts reward precision. They are not difficult in the way of highly disease-prone greenhouse crops, but they are unforgiving of heavy, compacted soils, waterlogging, and poorly timed harvests. Their unusual fruiting habit means that loose topsoil, careful weed control, and a dry harvest window are critical. In areas with warm summers and at least 110 to 150 frost-free days, peanuts can be highly productive at both home-garden and commercial scale. They are especially valuable in diversified systems because they fit well into legume-grain rotations; growers planning broader rotations may compare their soil-building role with other pulses such as Soybeans.
Peanut market classes include Runner, Virginia, Spanish, and Valencia types. Runner peanuts are widely used for peanut butter because of their uniform kernel size and consistent roasting quality. Virginia peanuts produce larger pods and are preferred for in-shell roasting. Spanish types tend to have smaller kernels, higher oil content, and upright growth, while Valencia types often have sweeter kernels and are popular for fresh-boiled peanuts. Maturity length, disease tolerance, seed size, and canopy architecture differ among these classes, so cultivar choice should be tied to climate, intended end use, and harvest equipment.
Botanical Profile of Peanuts
Peanuts belong to the Fabaceae family and are annual herbaceous legumes. Unlike climbing beans or vining peas, most peanut varieties grow as low, bushy, spreading plants 30 to 60 cm tall, though canopy width can exceed plant height depending on type. Leaves are opposite, pinnate, and composed of four leaflets. Flowers are small, yellow to orange-yellow, papilionaceous, and typically self-pollinating.
The most important botanical feature is geocarpy, the process by which the fertilized ovary forms a peg, or gynophore, that elongates and bends downward into the soil. Once the peg penetrates loose soil, the pod enlarges underground. This means successful pod set depends not only on healthy flowering but also on friable surface soil that allows peg penetration. If the soil crusts after rain or irrigation, flowers may fertilize normally but pegs fail to enter the soil, directly lowering yield.
The root system consists of a central taproot with lateral branching, usually concentrated in the upper 15 to 30 cm of soil, though roots can extend deeper in sandy profiles. Nodulation is most active where compatible rhizobia are present. Effective nodules are pink to reddish inside when cut open, indicating active nitrogen fixation. White or greenish nodules may be immature or ineffective.
Growth stages generally follow emergence, vegetative branching, flowering, pegging, pod initiation, seed filling, and physiological maturity. Flowering may begin 25 to 40 days after planting depending on temperature and cultivar. Unlike many crops with a narrow bloom period, peanuts continue flowering over an extended window, which is why harvest maturity can be uneven if growing conditions fluctuate.
Cultivar class influences morphology. Runner types usually have a decumbent or prostrate habit and often mature in 130 to 150 days. Virginia types tend to be larger and later, sometimes requiring similar or slightly longer maturity windows. Spanish and Valencia types are often more upright and earlier, with some maturing in 100 to 120 days under warm conditions. This difference matters for northern growers trying to finish the crop before cool weather.
Soil, pH, and Climate Requirements for Peanuts
Peanuts perform best in light, loose, well-drained sandy loam or loamy sand with excellent tilth. The ideal soil profile is one that warms quickly in spring, resists crusting, and allows pegs to penetrate easily. Heavy clay is the most common reason for poor results in small-scale plantings: it compacts, stays cold, holds excess water, and makes harvest difficult because pods may remain stuck in the soil or rot before lifting.
Optimal soil pH is generally 5.8 to 6.5, with acceptable performance extending to about 7.0 if micronutrient balance is maintained. Below pH 5.5, nodulation can decline, calcium and molybdenum availability may become limiting, and aluminum or manganese toxicity may suppress root growth. Above pH 7.2, iron, zinc, and manganese deficiencies become more likely, especially on calcareous soils. A full soil test before planting is strongly recommended.
Temperature is decisive. Peanuts are a true warm-season crop and germinate best when soil temperatures at 5 cm depth are consistently above 18°C, with 20 to 30°C ideal for rapid emergence. Air temperatures of 24 to 32°C promote vigorous growth. Below 15°C, development slows significantly; frost kills plants. Most varieties need 110 to 150 frost-free days depending on class and local heat accumulation.
Rainfall or irrigation requirements are moderate but must be distributed well. Total seasonal water need is commonly around 500 to 700 mm, though soil type and evaporative demand influence actual use. The most moisture-sensitive phases are flowering, pegging, and pod filling. During these stages, the crop prefers evenly moist soil in the top 15 to 20 cm without saturation. In practical terms, soil should feel slightly moist and cohesive when squeezed but should crumble apart with light pressure. If the root zone remains muddy, gray, sour-smelling, or leaves show yellowing despite adequate nutrients, overwatering or poor drainage is likely.
Drought stress at flowering reduces flower retention and peg formation. Drought during pod fill leads to shriveled kernels and empty pods. Excess moisture, however, is equally damaging: it promotes southern stem rot, Aspergillus infection, pod rot, poor root aeration, and excessive vegetative growth at the expense of pod set. Avoid fields with standing water after rain longer than 24 hours.
Calcium is unusually important for peanuts because developing pods absorb much of it directly from the surrounding soil, not just from the root stream. Even where soil calcium tests adequate overall, the pegging zone may be deficient if calcium is not present near the surface. This is why gypsum is often applied at early flowering, especially for large-seeded Virginia and Runner types. If pod-zone calcium is low, symptoms include unfilled pods, darkened embryo tips, and poor seed quality.
Step-by-Step Planting & Propagation
Propagation is almost always by seed peanuts, meaning raw, untreated kernels intended for planting rather than roasted food-grade nuts. Seed must be viable, disease-free, and preferably purchased as certified planting stock. Shelled seed can be damaged easily, so handle gently and plant soon after shelling. In many systems, seed is left in-shell until shortly before sowing to preserve viability.
Start by selecting a site with full sun, at least 8 hours daily, and a history free from recent peanut or related legume disease pressure. Avoid planting after peanuts in the same ground for at least 3 years if possible. Good rotational predecessors include small grains and many vegetables. Fields coming out of sod or very weedy cover may require extra cultivation to create a fine, level seedbed.
Prepare the soil to a loose, crumbly structure. Deep compaction should be corrected before planting with subsoiling or broadforking where appropriate, but avoid creating clods in the upper layer. Final seedbed texture should allow uniform seed placement at 3 to 5 cm depth. Raised beds can improve drainage in heavier soils.
If peanuts have not been grown in the field before, inoculate seed with the correct rhizobium strain for peanuts. This is especially important in virgin ground or where legumes have not been cultivated recently. Mix inoculant onto slightly moistened seed in the shade and plant promptly. Do not expose inoculated seed to direct sun or high heat.
Plant only after danger of frost has passed and soil is thoroughly warm. Space rows 60 to 90 cm apart depending on cultivar and cultivation method. Within rows, place seeds 10 to 15 cm apart for most garden and small-farm production. Planting density can be increased somewhat for Spanish and Valencia types with more upright growth. A target stand of roughly 8 to 12 plants per square meter works well in many systems.
Depth should be 3 to 5 cm in moist soil. In very sandy or drying conditions, sow slightly deeper, but avoid planting beyond 6 cm because emergence slows and seed rot risk increases in cool ground. After sowing, firm the soil lightly to improve seed-soil contact without creating crust.
Emergence usually occurs in 7 to 14 days under warm conditions. If surface crusting is likely after irrigation or rain, use very light irrigation cycles rather than heavy applications that seal the soil. Some growers use organic mulches only after plants are well established; applying mulch too early can keep the soil too cool and hinder early growth. Because peanuts need open soil for pegs to enter, keep mulch thin or pulled back from the crown during flowering.
Transplanting is generally not recommended. Peanuts dislike root disturbance, and transplanted seedlings often show delayed establishment and reduced pegging. Direct seeding remains the standard practice.
For growers refining soil structure and fertility before sowing, this practical resource on soil health can help guide pre-plant preparation.
Care & Maintenance regimes for Peanuts
Weed control is most important during the first 6 to 8 weeks, before the canopy closes and before extensive pegging begins. Early weed pressure reduces yield by competing for light, water, and nutrients, and later cultivation can damage pegs or developing pods. Use shallow hoeing or mechanical cultivation while plants are small, keeping disturbance confined to the upper few centimeters of soil. Once flowering begins, avoid throwing heavy soil onto the crown or disturbing the row zone aggressively.
Irrigation should be scheduled according to soil type and crop stage rather than by calendar alone. In sandy soils, frequent lighter irrigations are preferable because water drains rapidly below the root zone. In loamier soils, deeper but less frequent irrigations may work better. A practical target is to maintain 50 to 70% of available water in the upper root zone during vegetative growth, increasing to 60 to 80% during flowering and pod fill. In field terms, if the top 10 cm becomes powdery dry and plants show midday wilting that does not recover by evening, stress is becoming yield-limiting. If leaves remain pale, growth is lush but soft, and lower stems sit in persistently wet soil, irrigation is too heavy.
Critical irrigation windows are from first bloom through full pod fill. Water stress in this period can reduce peg entry, pod number, and kernel size. Toward maturity, gradually reduce irrigation to improve harvest conditions and reduce disease risk, but do not cut water too early or kernels may remain immature. In many climates, irrigation is stopped 7 to 14 days before digging, depending on soil moisture and forecasted rainfall.
Nutrient management should begin with soil testing. Because peanuts fix nitrogen, large nitrogen applications are usually unnecessary and can be counterproductive, encouraging excessive vegetative growth and delayed maturity. A small starter amount may be used in very low-fertility soils, but avoid heavy preplant N. Phosphorus and potassium should be applied according to test results, as both are important for rooting, flowering, and pod development.
Calcium deserves special emphasis. Apply gypsum at early bloom if the pegging zone is low in calcium or when growing large-seeded types. Typical field rates are often in the range of 500 to 1,500 kg/ha, but actual needs depend on soil analysis. Gypsum supplies calcium without sharply increasing pH. Boron may also be needed in small amounts where deficient, but overapplication is toxic, so use only according to test recommendations.
A modest hilling effect from cultivation is acceptable early, but peanuts are not managed like potatoes. Excessive soil movement around plants can bury lower branches and complicate pegging patterns. The ideal surface is fine, level, loose, and free of hard crusts.
Leaf color and canopy structure offer useful diagnostic clues. Healthy peanuts are medium green with steady lateral spread. Nitrogen deficiency appears as generalized pale foliage and stunted growth, though true N deficiency often indicates poor nodulation rather than lack of fertilizer. Iron deficiency presents as interveinal chlorosis on younger leaves, especially in alkaline soils. Potassium deficiency may show as marginal scorch or weak drought tolerance.
Pests, Diseases & Organic Management
Peanuts face a mix of soilborne, foliar, and pod-feeding problems. The best organic management is preventive: rotation, clean seed, drainage, airflow, and timely scouting. Once pods are underground, rescue options are limited.
Common insect pests include thrips, aphids, cutworms, armyworms, wireworms, white grubs, and lesser cornstalk borers in dry sandy soils. thrips can scar young foliage and may vector viral diseases. aphids may colonize tender growth, causing curling and sticky honeydew. wireworms and grubs are particularly serious because they feed underground on roots and pods, reducing marketable yield without obvious early symptoms.
Organic control starts with habitat and timing. Rotate away from grass-heavy sod before peanuts to reduce wireworm and grub pressure. Avoid excessively dry, weedy field edges that favor lesser cornstalk borer. Encourage beneficial insects by maintaining flowering borders nearby, but keep the crop area itself clean enough to reduce alternate hosts. Lightweight row cover can protect very young plantings from early insect pressure in garden settings, though it must be removed before flowering intensifies.
Foliar diseases are among the most economically important problems. early leaf spot and late leaf spot cause dark lesions on leaves, defoliation, and reduced pod fill. rust can also be severe in humid climates. Organic management relies on long rotation intervals, resistant cultivars where available, good spacing, morning irrigation rather than evening wetting, and sanitation of crop residues. Copper-based products and biological fungicides may suppress disease when applied preventively, but they work best as part of an integrated system rather than as curative measures.
Soilborne diseases include southern stem rot, Rhizoctonia limb rot, Sclerotinia blight in some regions, and pod rots. These are favored by poor drainage, dense canopies, high humidity near the soil surface, and short rotations. Symptoms can include sudden wilting of individual branches, white fungal growth at the crown, tan lesions on stems, or blackened, decaying pods at harvest. Keep irrigation balanced, avoid excess nitrogen, and remove infected debris after harvest.
Aflatoxin contamination, caused by Aspergillus flavus and related fungi, is a critical quality issue in peanuts. Drought stress followed by heat and insect damage can raise risk, especially near maturity. Pods infected with Aspergillus may appear normal externally, so prevention is crucial: maintain even moisture during pod fill, minimize pod injury, harvest promptly at maturity, and dry peanuts quickly after lifting.
nematodes can also reduce vigor, causing patchy growth and poor root development. In infested soils, roots may be stunted and plants remain pale even with adequate fertility. Crop rotation with non-host species and the use of resistant varieties where available are the best long-term measures.
Harvesting, Curing & Optimal Storage
Harvest timing is one of the most technical parts of peanut production. Pull too early and kernels are immature, with lower oil content, poor flavor, and reduced yield. Wait too long and pods may detach in the soil, sprout, or suffer disease and quality losses. General maturity ranges are about 100 to 120 days for many Spanish or Valencia types and 130 to 150 days for many Runner and Virginia cultivars, but weather and variety strongly influence actual timing.
Signs of maturity include yellowing lower leaves, darkened inner pod walls, and kernels that nearly fill the shell. A more reliable method is to dig several sample plants and inspect pod mesocarp color. As peanuts mature, the inside of the shell darkens from white to yellow, orange, brown, and black in a progression tied to maturity. When the majority of pods reach the cultivar-appropriate mature color classes, digging should begin.
To harvest, loosen soil beneath the row with a fork, digger blade, or undercutter and lift the whole plant carefully. Shake off excess soil without tearing pods free. In dry, loose soils, hand-pulling may work; in heavier ground, lifting tools are essential. Traditional curing starts by inverting plants so pods are elevated and partially shaded by foliage, allowing slow drying in the field for 2 to 4 days if weather is warm and dry. In humid or rainy conditions, move plants promptly to a protected, well-ventilated curing area.
For best quality, reduce pod moisture gradually to around 8 to 10% for unshelled storage. If storing shelled kernels, moisture should usually be closer to 7 to 8%. Pods that are stored too wet are highly vulnerable to mold, rancidity, and aflatoxin development. A simple grower check is to shell a few pods after curing: kernels should be firm, seed coats papery rather than rubbery, and cotyledons crisp enough to break cleanly rather than compress.
Cure peanuts in a single layer or in mesh sacks with strong airflow, never in deep piles that trap heat. Optimal curing temperatures are warm but not scorching; roughly 25 to 35°C with active ventilation works well. Avoid direct intense sun for extended periods, which can overdry outer shells while leaving internal moisture uneven.
For storage, keep peanuts cool, dry, and protected from rodents and insects. Unshelled peanuts generally store longer than shelled kernels because the shell provides physical protection. Ideal storage conditions are below 10 to 15°C with relative humidity around 60 to 65% or lower, provided kernels are properly dried. In warm climates, airtight containers in a cool room are helpful, but only if moisture content is already safe. Refrigeration or freezing greatly extends shelf life for shelled peanuts intended for eating or seed preservation.
Seed peanuts for next season should be selected from healthy, true-to-type plants and stored unshelled as long as possible under cool, dry conditions. Avoid saving seed from fields with significant leaf spot, mold, or off-type plants.
Companion Planting for Peanuts
Peanuts can fit usefully into mixed plantings, but companion strategy should respect their low growth habit, underground pod set, and need for open, friable soil. The best companions are crops that do not cast heavy shade, do not require aggressive root disturbance late in the season, and help diversify pest pressure.
Good companions include upright, warm-season crops planted with enough distance to avoid shading, such as certain sorghums, okra, or widely spaced sweet corn. Corn can provide light structural diversity in larger plots, though row orientation and spacing matter to prevent excessive afternoon shade; if considering this pairing, use lessons from a Corn guide to manage spacing and fertility competition appropriately. Low-growing herbs with moderate water demand may also work on bed edges, provided they do not interfere with harvest.
Avoid pairing peanuts with sprawling cucurbits like pumpkins or squash in the same bed because their dense vines quickly overrun the canopy, impede airflow, and make digging difficult. Very tall, densely planted crops can suppress flowering by reducing light interception. Root crops that need repeated soil disturbance, such as frequent hilling or deep hoeing, are also poor companions once peanut pegging begins.
As a legume, peanuts can contribute some residual nitrogen to the following crop, though most fixed nitrogen remains in plant biomass until residues decompose. They are therefore especially useful as a rotation or relay component before cereals or leafy vegetables rather than as a direct heavy nitrogen donor during the same season. Interplanting with flowering insectary strips nearby, rather than directly in the row, is often the best compromise between biodiversity and field access.
In small gardens, a practical layout is to dedicate a sunny block to peanuts bordered by pollinator-friendly flowers and compact herbs, while keeping the interior rows unobstructed for weeding, pegging, and harvest. This preserves the agronomic needs of the crop while still capturing many of the ecological benefits associated with companion planting.