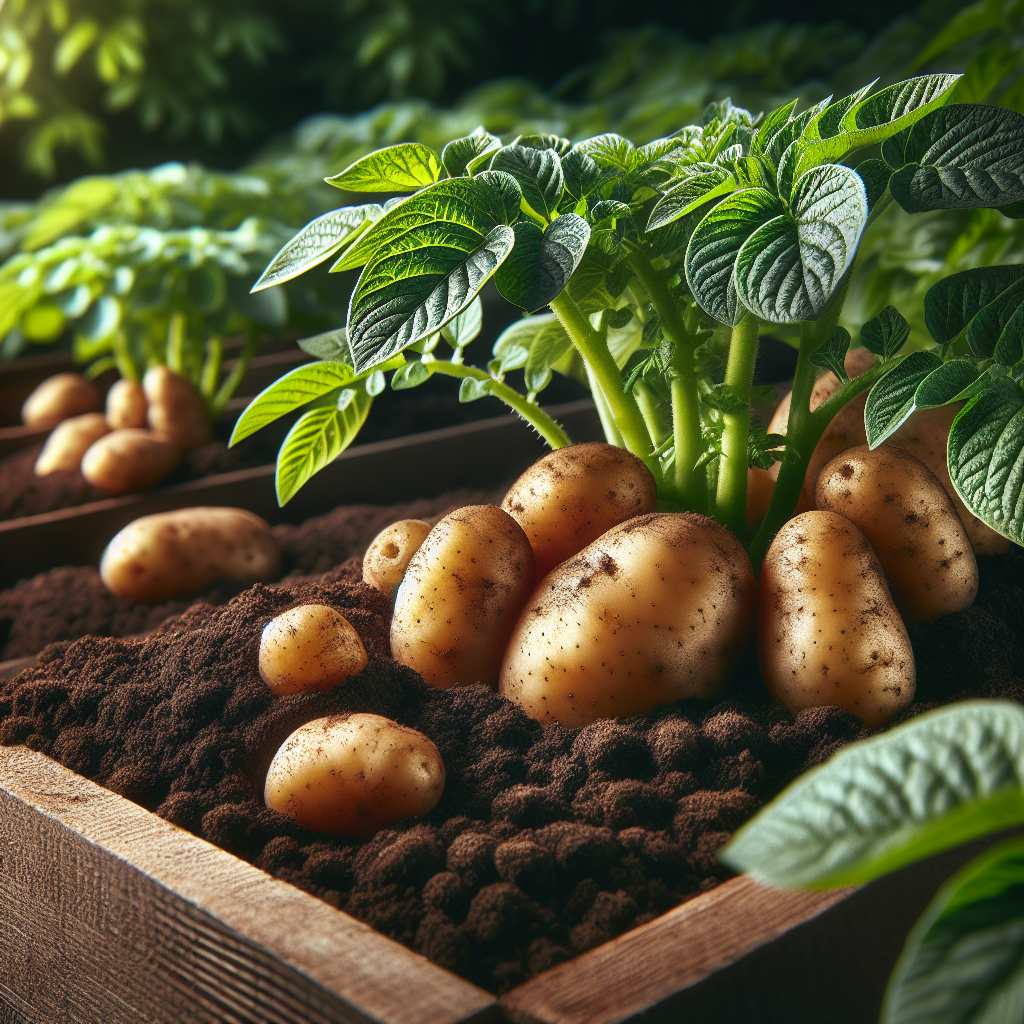
Introduction to Fingerling Potato
Unlike blocky storage potatoes bred mainly for bulk yield, fingerlings are selected for shape, culinary quality, and texture. Their tubers are long, narrow, often slightly curved, and typically harvested smaller than standard table potatoes. Many growers value them because they command premium prices in fresh markets, chefs prefer their nutty flavor and waxy-to-firm flesh, and home gardeners appreciate that they roast whole beautifully.
The term “fingerling” refers more to tuber form than to a single strict genetic line. Well-known cultivars include Russian Banana, French Fingerling, Rose Finn Apple, La Ratte, Amarosa, and Purple Peruvian fingerling types. Skin colors range from tan and yellow to rose-red and deep purple; flesh may be yellow, cream, pink, or marbled. Most fingerlings are considered specialty or gourmet potatoes and generally produce lower total tonnage than large russet types, but they often compensate through market value and culinary appeal.
Historically, many fingerling types trace their culinary prestige to older European and Andean potato selections, where flavor and texture were prioritized before modern breeding focused heavily on uniformity, mechanized harvest, and long storage. In the field, they behave similarly to other potatoes, but their tubers are more likely to become misshapen in compacted soil and more susceptible to cosmetic blemishes if moisture fluctuates sharply.
For broader potato production principles, see the general Potato guide. If you want to improve bed fertility and aggregation before planting, practical soil-building strategies are outlined in this soil health article.
Botanical Profile of Fingerling Potato
Fingerling potatoes belong to the nightshade family, Solanaceae, the same family as tomato, pepper, and eggplant. Botanically, the crop is a herbaceous perennial grown as an annual. The edible tuber is not a root but a swollen underground stem formed at the ends of stolons. Eyes on the tuber are nodes capable of sprouting new shoots.
Plants generally form a moderately upright to sprawling canopy 30-70 cm tall, depending on cultivar, fertility, and temperature. Leaves are compound, soft, and medium to dark green. Flowers may be white, pink, lavender, or purple; some cultivars flower heavily while others produce few blossoms. Berries can form after flowering, but they are not edible and should not be confused with tubers.
Fingerlings are usually classified as waxy or all-purpose rather than mealy. This means they often have relatively lower dry matter than baking potatoes, hold shape well after cooking, and are excellent for roasting, steaming, pan-frying, and warm salads. Their skin is frequently thinner and more delicate than that of large storage potatoes, making them especially vulnerable to skinning injury during harvest.
Maturity varies by cultivar, but many fingerlings take about 90-120 days from planting to full-size harvest, with “new potato” harvest possible much earlier, often around 70-85 days when tubers are still small and tender. Because they tend to set multiple narrow tubers rather than fewer large ones, balanced fertility is more important than excessive nitrogen. Too much vegetative growth delays tuber set and can reduce finish quality.
Soil, pH, and Climate Requirements for Fingerling Potato
Loose, friable, stone-free soil is one of the biggest determinants of premium fingerling quality. Sandy loam or loamy soil with high organic matter and excellent drainage is ideal. Heavy clay can still grow a crop, but it often produces forked, blunt, cracked, or rough-skinned tubers. Where clay dominates, use raised beds 20-30 cm high and incorporate well-finished compost to improve structure; avoid fresh manure, which can increase scab risk and stimulate excessive vine growth.
The ideal soil pH is generally 5.2-6.2. Slightly acidic conditions help suppress Common scab and improve micronutrient availability. Once pH rises above about 6.5, scab pressure often increases, especially in dry springs. If liming is required for a rotation crop, apply it well ahead of potatoes rather than immediately before planting.
Fingerlings perform best in cool to mild temperate conditions. Optimal soil temperature for planting is roughly 7-13°C, though emergence is faster around 10-15°C. Tuber initiation is best when day temperatures are moderate and night temperatures remain cool, ideally below 18°C. Sustained heat above 29°C stresses plants, reduces tuber set, and can lead to knobby growth, hollow defects, and secondary growth after drought-breaking rains.
The crop needs full sun, with at least 6-8 hours of direct light daily; 8-10 hours is better for yield. Adequate airflow reduces foliar disease, but exposed ridges in hot regions may overheat. In warm climates, spring planting timed to mature before summer heat is preferable. In frost-prone climates, wait until severe frost danger has passed, because young shoots can be blackened by hard freezes.
Moisture should be even, not erratic. A target of about 65-80% field capacity in the root zone is ideal during stolon formation and tuber bulking. Practically, the soil 10-15 cm deep should feel cool and slightly moist, holding together when squeezed but not releasing water or feeling sticky. Overwatered beds smell sour, stay glossy-wet, and may cause yellow lower leaves, edema-like swelling, or stem base rot. Underwatered beds become powdery or hard, and tubers may develop growth cracks, internal browning, or misshapen knobs after irrigation resumes.
Step-by-Step Planting & Propagation
Propagation is done vegetatively from certified seed tubers, not from botanical seed, if varietal uniformity and disease control matter. Always source certified disease-free stock when possible, because viruses, Blackleg bacteria, and latent fungal pathogens accumulate over generations of saved seed.
Prepare the seed tubers. Choose fingerling seed pieces about the size of a small egg or slightly larger. Because fingerlings are naturally smaller and elongated, many are planted whole. If cutting is necessary, each piece should ideally weigh 35-55 g and contain at least 1-2 strong eyes.
Pre-sprout if desired. Chitting can speed emergence in cool regions. Place seed tubers in bright indirect light at 10-15°C for 2-4 weeks until they produce short, sturdy green-purple sprouts 1-2 cm long. Avoid long white sprouts from dark storage; they snap easily and delay stand establishment.
Cut and heal carefully. If seed must be cut, use a sanitized blade and allow pieces to suberize for 2-5 days at about 12-18°C with good airflow and high relative humidity, around 85-95%. This healing reduces seed piece rot.
Form rows or raised ridges. Create rows 75-90 cm apart for field production, or 60-75 cm in intensive beds. Within the row, place seed pieces 20-30 cm apart. Tighter spacing produces smaller, more uniform fingerlings; wider spacing can increase tuber size but may reduce the premium slender profile in some cultivars.
Plant at the proper depth. Set seed pieces 7-10 cm deep in cool, medium soils. In sandy soils, slightly deeper planting helps moisture retention. Cover lightly at first if you plan repeated hilling, or cover fully and mound later as stems grow.
Fertilize with restraint. Incorporate a moderate preplant fertility program based on soil testing. A general small-scale target is balanced potassium and phosphorus with only moderate nitrogen. Excess nitrogen early creates lush tops, delayed tuber initiation, and more susceptibility to Late blight and soft growth. Aim for steady nutrition rather than a single rich dose.
Mulch or hill as shoots emerge. Once plants reach 15-20 cm tall, hill soil around the stems, leaving the upper foliage exposed. Repeat once or twice until ridges are 20-30 cm high. This protects forming tubers from sunlight, which causes greening and toxic glycoalkaloid accumulation.
In containers, choose at least 40-50 cm depth and width per plant cluster, use a coarse, free-draining growing mix, and never let the medium become waterlogged. Container crops dry faster, so irrigation frequency must increase while total volume remains controlled.
Care & Maintenance regimes for Fingerling Potato
Irrigation should follow growth stage. After planting, keep the seed zone lightly moist but never saturated; seed pieces sitting in cold, wet soil are prone to decay. During emergence, water only enough to prevent crusting and support root expansion. Once plants are 15-20 cm tall and actively leafing out, moisture demand rises.
The most critical period is from stolon formation through tuber bulking. At this stage, fingerlings typically need the equivalent of 25-38 mm of water per week from rainfall plus irrigation, though sandy soils and windy conditions may require more frequent applications. Rather than occasional deep flooding, use regular irrigation intervals that keep the upper 20-30 cm of soil evenly moist. Drip irrigation is superior to overhead watering because it reduces leaf wetness duration and lowers foliar disease pressure.
Signs of correct watering include steady top growth, firm foliage by midday, and smooth, expanding tubers. Signs of drought stress include slight leaf folding in the morning, a dull blue-green canopy, slowed growth, and tubers with netting, cracking, or second growth. Signs of excess water include pale foliage, swollen lenticels on tubers, blackened roots, and a persistently wet ridge base.
Nutrient management should emphasize moderate nitrogen, sufficient potassium, and adequate calcium and magnesium where deficient. Potassium is particularly important for tuber quality, skin finish, and stress tolerance. If foliage is pale and growth is weak early, a light sidedress may help, but stop heavy nitrogen once tuber set begins. Late nitrogen can reduce skin maturity and storage performance.
Weed control is essential in the first 4-6 weeks, before the canopy closes. Potatoes compete poorly with early weeds. Shallow cultivation is best, because deep hoeing damages stolons and developing tubers. Organic mulches can suppress weeds and buffer soil moisture, but they should be applied after the soil has warmed and only where slug pressure is manageable.
Hilling is not optional for high-quality fingerlings. As tubers swell, any exposed portion turns green in sunlight. Hill after rain or irrigation when soil is workable but not sticky. Keep ridges broad and stable; narrow ridges erode and expose tubers.
Crop rotation matters. Do not grow potatoes after other Solanaceae crops for at least 3 years, preferably 4, especially where Late blight, Verticillium wilt, or Colorado potato beetle are recurring problems. Avoid following heavily manured crops if scab is common.
Pests, Diseases & Organic Management
Colorado potato beetle is often the most destructive insect pest in temperate regions. Adults are yellow-orange with black stripes; larvae are humpbacked and reddish to brick-colored. Scout weekly from emergence onward, inspecting leaf undersides for orange egg clusters. Hand removal works on small plantings. Organic control is most effective on small larvae using Bacillus thuringiensis var. tenebrionis or spinosad, applied according to label and timed before larvae become large.
Aphids may not cause obvious chewing damage but can transmit viruses. Look for curled leaves, sticky honeydew, or colonies on tender growth. Encourage beneficial insects and avoid excess nitrogen that produces soft, attractive foliage. Strong water sprays can suppress small infestations.
Wireworms tunnel into tubers, especially in ground recently converted from pasture or grass. Bait traps, crop rotation, and avoiding potato planting immediately after sod are key preventive steps. Slugs may scar tubers and chew foliage in mulched or wet conditions; reduce hiding places, irrigate early rather than late, and use iron phosphate baits where needed.
Late blight is the most serious foliar disease in cool, humid weather. Water-soaked lesions, pale halos, and rapid canopy collapse are classic signs. Once established, it can also infect tubers. Prevention is far better than cure: wide spacing for airflow, drip irrigation, avoiding overhead watering in the evening, promptly removing volunteer potatoes, and protecting foliage with approved copper products or biofungicides when weather is highly favorable.
Early blight causes target-like concentric lesions on older leaves and progresses under stress, nutrient imbalance, or frequent leaf wetness. Maintain plant vigor and rotate crops. Common scab produces corky lesions on tuber skin and is favored by higher pH and dry soil during tuber initiation. Keeping soil evenly moist at tuber set and avoiding fresh manure significantly reduces pressure.
Blackleg and Soft rot bacteria thrive in waterlogged soils and infected seed stock. Symptoms include blackened stem bases, collapse, and foul-smelling tissue. Prevention depends on clean seed, careful cutting, warm planting into drained soil, and avoiding excess irrigation. Rhizoctonia can cause poor emergence, stem cankers, and black sclerotia on tubers; again, certified seed, rotation, and warmer, well-prepared seedbeds are the best defenses.
Because fingerlings are sold partly on appearance, even minor scab, insect scarring, or harvest abrasion reduces market value. Sanitation, rotation, balanced fertility, and consistent moisture are therefore not just agronomic details but economic essentials.
Harvesting, Curing & Optimal Storage
New fingerlings can be harvested once plants finish flowering and tubers reach usable size, but for best yield and storage, wait until vines naturally yellow and begin senescing. Some growers cut or flail vines 10-14 days before harvest to set skins, especially if the crop must be stored. Skin set is crucial for fingerlings because their delicate skin rubs off easily if harvested too green.
Before main harvest, test a few plants. Rub the tuber surface gently with your thumb. If the skin peels readily, delay harvest if weather allows. Harvest when soil is dry enough to crumble but not so hard that digging causes cuts or bruises. Use a digging fork well outside the row to avoid spearing the long tubers.
Handle harvested tubers as if they were thin-skinned apples, not stones. Do not drop them into deep bins. Keep them out of direct sunlight, which greens skins quickly. Sort immediately, removing damaged, diseased, cut, or green tubers.
If tubers are intended for short-term fresh sale, minimal curing is needed: hold them for several days in a shaded, well-ventilated place to dry surface moisture. For longer storage, cure for about 10-14 days at 12-15°C with 85-95% relative humidity and good airflow. This allows minor wounds to heal and reduces shrinkage.
After curing, store at 4-7°C for seed or longer holding, or around 7-10°C for culinary use where sweeter flavor from colder storage is undesirable. Relative humidity should remain around 90-95% to prevent shriveling, but ventilation must be sufficient to avoid condensation. Never store with apples or other ethylene-producing fruit, which can accelerate sprouting or alter quality.
Fingerlings generally do not store as long as heavy-skinned russets, particularly if harvested immature. Check monthly for Soft rot, sprouting, or dehydration. Dark storage is mandatory; even low light can trigger greening.
Companion Planting for Fingerling Potato
Good companions support pest balance, space efficiency, and soil coverage without competing excessively for root zone resources. Garlic and Onion are useful border or interrow companions because their strong scent may help confuse some insect pests, and they occupy relatively shallow rooting zones compared with the expanding potato ridge. Peas can fit earlier in the season nearby in rotation-based systems, though they should not be allowed to shade the crop once potatoes begin vigorous canopy expansion.
Low-growing aromatic or insectary companions can also help around, rather than directly within, potato rows. Thyme works well on bed edges where drainage is good, attracting beneficial insects while not creating dense, damp conditions right against stems. The key principle is to keep the ridge itself open enough for hilling, airflow, and harvesting.
Avoid close planting with other heavy feeders or members of the nightshade family such as tomatoes, peppers, and eggplants because they share many diseases and pests. Also avoid aggressive sprawling crops that interfere with hilling or trap excess humidity around foliage.
In market gardens, companion planting is most successful when treated as spatial planning rather than folklore: border alliums, edge herbs, and nearby beneficial-attractor strips tend to outperform crowded mixed plantings within the row itself.