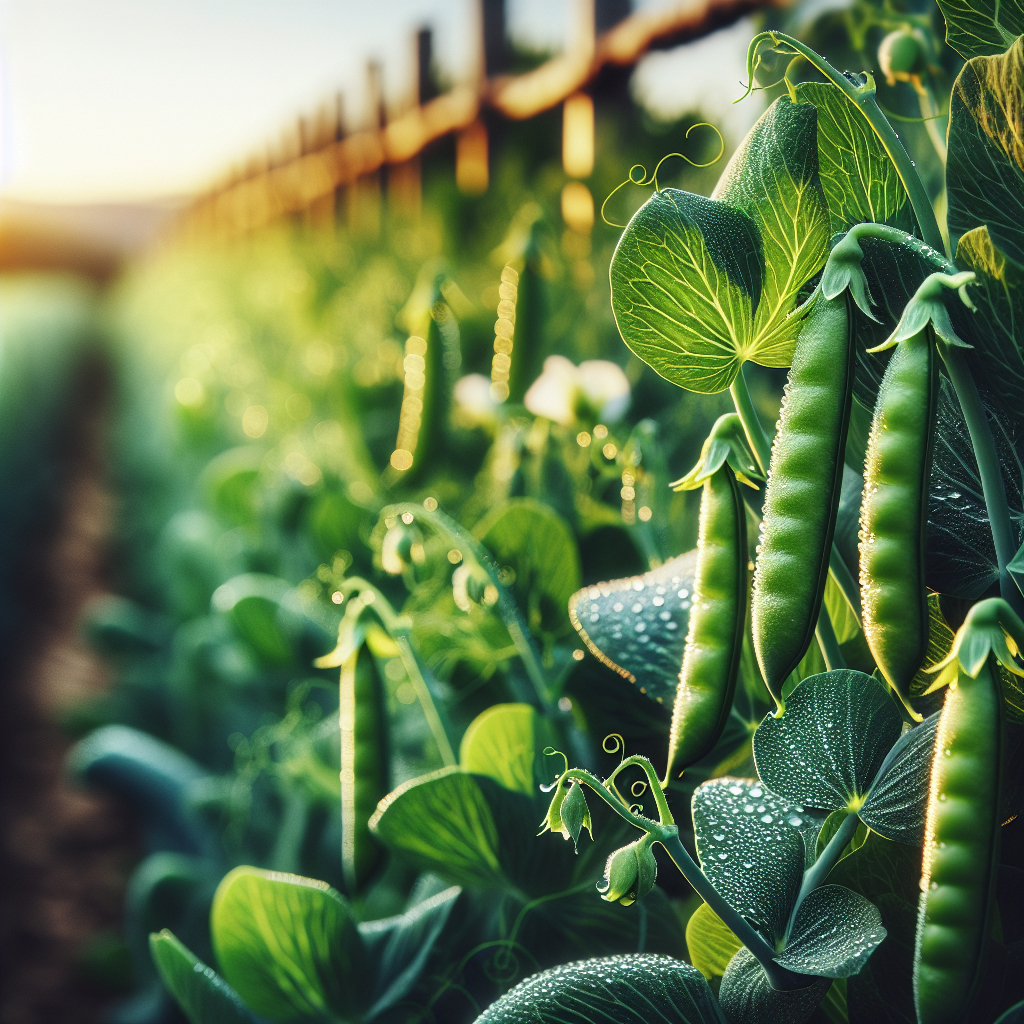
Introduction to Peas
Among the oldest cultivated food crops in the world, peas have been grown for thousands of years across Europe, western Asia, and the Mediterranean basin. Archaeobotanical evidence suggests that early forms of field peas were domesticated long before modern sweet garden peas emerged. Over time, breeders selected for sweetness, tender pods, reduced fiber, and improved cold tolerance, giving rise to the main market classes grown today: shelling peas, snow peas, and snap peas.
Peas are especially important in diversified farming systems because they occupy a valuable seasonal niche. They thrive when temperatures are too cool for warm-season vegetables, and they contribute biologically fixed nitrogen through their symbiosis with Rhizobium bacteria. This makes them useful not only as a food crop but also as a rotational and soil-improving crop. In many temperate regions, peas are among the first major direct-seeded vegetables of spring and, in mild climates, can also be grown in autumn and winter.
From a culinary standpoint, the crop is versatile. Shelling peas are harvested for the immature seeds, snow peas for flat edible pods, and snap peas for thick, succulent pods eaten whole. Pea shoots and tendrils are also marketable specialty products. Because sugars in peas convert rapidly to starch after harvest, correct timing and fast postharvest cooling are critical to preserving quality.
Botanical Profile of Peas
Peas belong to the family Fabaceae, the legume family, and are classified botanically as Pisum sativum. They are annual herbaceous plants with a relatively shallow but finely branched root system, often concentrated in the upper 20 to 45 cm of soil, though roots can explore deeper in loose, well-structured ground. Like many legumes, peas form root nodules in association with nitrogen-fixing bacteria, though effective nodulation depends on the presence of compatible Rhizobium strains and suitable soil conditions.
The stem may be dwarf, semi-vining, or strongly climbing, depending on cultivar. Heights range from roughly 45 cm in compact shelling peas to 1.8 m or more in tall heirloom and snap pea types. Leaves are compound, usually ending in tendrils that grasp nearby supports. In some cultivars, especially “afila” or semi-leafless types, tendrils are more prominent than leaflets, improving air flow and reducing lodging in dense plantings.
Flowers are typically white, cream, pinkish, or purple depending on variety, and are largely self-pollinating. This high degree of self-fertility means varietal purity is comparatively easy to maintain, though some insect-mediated crossing can still occur at low rates. Pods develop after flowering and vary widely in shape, thickness, and fiber content.
The main horticultural classes are:
- Shelling peas, also called English or garden peas, grown for the seeds inside the pod.
- Snow peas, selected for flat, tender pods harvested before seeds swell.
- Snap peas, a cross-type combining pod edibility with sweetness and thicker walls.
- Field peas, usually drier-seeded and more often grown for feed, cover cropping, or dry grain.
Physiologically, peas are adapted to cool weather. Seed germination begins at low soil temperatures, but early growth is slower in cold, waterlogged soils. Flowering and pod set perform best under moderate temperatures; sustained heat above about 27°C often reduces pollen viability, flower retention, and sweetness. For growers planning cool-season rotations with cereals or legumes, compare seasonal windows with crops like fava alternatives such as lentils.
Soil, pH, and Climate Requirements for Peas
Peas perform best in fertile, well-drained loam or sandy loam with good tilth, moderate organic matter, and a pH between 6.0 and 7.5. The ideal range for nutrient availability and nodulation is about 6.3 to 7.0. Below pH 5.8, nodulation can decline, phosphorus availability may be reduced, and plants may show weak growth even where fertility appears adequate. Strongly alkaline soils above pH 7.8 can contribute to micronutrient imbalances, especially iron chlorosis in susceptible conditions.
Drainage is non-negotiable. Peas dislike anaerobic, saturated soils, especially during germination and early root establishment. Seeds placed into cold mud often rot before emergence, and seedlings in compacted wet soil are more vulnerable to Damping-off and root diseases. A friable seedbed that crumbles easily, rather than clods or smeared soil, helps uniform emergence.
In terms of texture, peas tolerate a range of soils but are most productive where roots can penetrate freely and moisture is held evenly without standing water. Heavy clay can work if raised beds, broad beds, or well-shaped rows improve drainage. Very light sandy soils warm quickly and aid early sowing but may require more frequent irrigation because the crop has a relatively shallow root zone.
Target soil moisture should remain consistently in the moderate range, neither dusty dry nor saturated. As a practical field standard, the top 5 to 8 cm should feel cool and slightly moist, while the root zone to 15 to 20 cm should hold together when squeezed but not release free water. If soil forms a slick, shiny ribbon or water glistens in the furrow, it is too wet. If it is powdery to finger depth and seedlings wilt by mid-morning, it is too dry.
Climatically, peas are a cool-season crop. The best air temperature range for vegetative growth is about 13 to 18°C, and for flowering/pod fill about 15 to 21°C. Seedlings tolerate light frosts, and some cultivars withstand temperatures several degrees below freezing once established, especially if hardened. However, repeated freeze-thaw cycles can heave newly germinated seeds or damage floral buds.
Heat is the primary limiting factor in many regions. Once daytime highs consistently exceed 24 to 27°C, pod quality often declines, plants age rapidly, and disease pressure can rise where humidity is high. In hot climates, the crop is best grown in the coolest part of the year. In maritime or northern climates, succession sowings can extend the season considerably.
Good airflow helps keep foliage dry and lowers the risk of Powdery mildew and bacterial disease. Full sun is preferred in cool climates, but in areas with rapid spring warming, a location receiving morning sun and light afternoon shade may preserve pod tenderness slightly longer.
Step-by-Step Planting & Propagation
Peas are almost always propagated by seed and are best direct sown, since transplanting can disturb the roots and slow establishment. Begin with high-quality, untreated or appropriately treated seed from a reliable source, choosing cultivars that match your market or kitchen needs. Early shelling peas are often compact and quick, while snap peas usually need stronger trellising and a longer harvest window.
Prepare the bed 2 to 3 weeks before sowing. Remove perennial weeds, loosen the soil to at least 20 cm, and incorporate mature compost if organic matter is low. Avoid heavy additions of high-nitrogen manure immediately before sowing, as excessive nitrogen promotes lush vines with reduced pod production.
Correct pH and nutrient issues in advance. If phosphorus or potassium are low, incorporate them before planting because peas benefit from early root access to both. Phosphorus is particularly important for root development and nodulation.
Inoculate seed if peas or related legumes have not been grown recently in that soil. Use the appropriate pea/vetch Rhizobium inoculant, lightly moistening seed with clean water or a sticking solution so the inoculant adheres. Keep inoculated seed out of direct sun and plant promptly.
Sow when the soil is workable and has reached about 4 to 10°C, though germination is faster around 10 to 18°C. In many temperate areas, this means as soon as the ground can be prepared in early spring. In mild winter regions, sow in autumn through late winter.
Plant seed 2.5 to 4 cm deep in most soils. Use the shallower end in heavy soils and the deeper end in sandy or drying soils. Space seeds 2.5 to 5 cm apart in-row for intensive harvests, or 5 to 7.5 cm apart for larger podded types. Rows can be 45 to 90 cm apart depending on support system, cultivar vigor, and whether you need room for cultivation.
Install support at sowing time or immediately after emergence. Even short peas benefit from twiggy brush, netting, or low mesh. Tall varieties need trellis netting, wire, or strings at 1 to 2 m height. Early support reduces stem breakage and keeps pods clean.
Water after planting if the seed zone is dry, applying enough to moisten the top 10 to 15 cm without flooding. Overirrigation at sowing is a common cause of seed rot, especially in cold soil.
Emergence typically takes 6 to 14 days depending on temperature. Protect newly emerged seedlings from birds where pressure is severe. In large plantings, a stale seedbed technique can reduce early weed competition: prepare the bed, irrigate lightly to germinate weeds, then flame-weed or shallowly disturb the surface before sowing.
For season extension, make succession sowings every 10 to 14 days during the cool part of the planting window. In regions with short springs, choose multiple cultivars of different maturity rather than too many late sowings, because heat often catches the final planting before peak production.
If you are building a broader cool-season rotation, bed preparation principles overlap with resources on soil health strategies.
Care & Maintenance regimes for Peas
Once peas emerge, the goal is steady, uninterrupted growth. Stress at flowering and pod fill most directly reduces yield and sweetness.
Water management is the most important maintenance task. Peas generally need about 25 to 40 mm of water per week in cool weather and somewhat more in light soils or windy conditions. Rather than relying on a rigid schedule, monitor the root zone. The top centimeter may dry slightly between irrigations, but the zone from 5 to 15 cm should remain evenly moist. If plants are drought stressed, tendrils lose springiness, lower leaves may look dull or gray-green, and flowers may abort. If overwatered, foliage may yellow from the bottom, growth becomes soft, and soil near stems smells sour or remains sticky for days.
Irrigate deeply but not excessively. Drip irrigation or furrow irrigation is preferable to overhead watering because it reduces leaf wetness duration. Critical stages are pre-flowering, bloom, and pod expansion. Water stress during blooming can sharply reduce pod set, while fluctuating moisture during pod fill can diminish pod size and create fibrous texture.
Fertilization should be moderate. Because peas fix nitrogen, they rarely need heavy N applications. In fact, high available nitrogen can suppress nodulation and lead to rank vegetative growth. If the crop follows a heavily leached or infertile soil and seedlings appear pale before nodulation is established, a very light starter nitrogen application may help, but keep it conservative. A balanced preplant program emphasizing phosphorus, potassium, sulfur, and adequate calcium is usually more beneficial than additional nitrogen.
Mulching with clean straw or leaf mold can moderate soil temperature, reduce splash-borne disease, and conserve moisture, but apply after the soil has warmed slightly and seedlings are established. In cool, wet springs, thick mulch too early can prolong cold conditions around roots.
Weed control is essential during the first 4 to 6 weeks. Peas are not highly competitive when young. Shallow hoeing is effective, but avoid deep cultivation that damages roots and nodules. Once vines expand and trellises fill, canopy cover suppresses some later weeds.
Trellising should not be viewed as optional for most table peas. Supported plants have straighter stems, cleaner pods, better airflow, and lower disease pressure. Harvesting is also faster and more thorough, which improves total yield.
In intensive systems, monitor tissue appearance rather than just growth rate. Healthy pea foliage is a fresh medium green. Purpling can suggest phosphorus stress in cold soils. General chlorosis with poor vigor may indicate waterlogging, low fertility, poor nodulation, or root disease. Split a few nodules during vegetative growth; active nodules are pink to reddish inside due to leghemoglobin. White or greenish nodules are not fixing well.
Pests, Diseases & Organic Management
Peas face a manageable but important set of insect, mollusk, and disease pressures. The best organic strategy combines timing, sanitation, airflow, balanced nutrition, and regular scouting.
Aphids are one of the most common insect pests. They cluster on shoot tips, flowers, and pods, extracting sap and transmitting viruses. Heavy infestations distort growth, cause sticky honeydew, and reduce marketability. Encourage natural enemies such as lady beetles, lacewings, and hoverflies, and use strong water sprays early on small plantings. In severe cases, insecticidal soap can work if coverage is thorough and temperatures are not excessively high.
Pea weevil and other Seed-feeding beetles are more serious in some production regions than others. Adults lay eggs on pods, and larvae bore into developing seed. Crop rotation, destruction of crop residues, and planting timing can reduce local carryover.
Thrips may scar pods and flowers, particularly in dry weather. Leaf miners occasionally create winding tunnels in foliage, though economic damage is often limited unless populations surge.
Slugs and Snails can devastate emerging seedlings in cool, wet conditions. Their damage appears as ragged holes and severed stems, often worse near mulches, boards, or weedy edges. Use habitat reduction, hand trapping, iron phosphate baits, and irrigation timing that avoids persistently wet evening surfaces.
Among diseases, Powdery mildew is especially common late in the season or during periods of warm days and cool nights. It appears as white, talc-like growth on leaves and stems, reducing photosynthesis and accelerating senescence. Resistant varieties are the best defense. Good spacing, trellising, and avoiding excess nitrogen all help.
Downy mildew may appear in cool, humid weather as pale angular spots with grayish growth beneath leaves. Fusarium wilt and Root rots are more serious in poorly drained or repeatedly cropped soils; affected plants yellow, wilt, and decline despite adequate moisture. Seed rots and Damping-off are favored by cold wet seedbeds.
Ascochyta blight, Bacterial blight, and Viral diseases can also occur. Viruses often show as mosaic, curling, stunting, or deformed pods and are commonly spread by Aphids or infected seed. Remove suspicious plants early if symptoms are localized.
Organic management priorities include:
- Rotate peas and other legumes out of the same ground for at least 3 years where disease pressure is known.
- Use certified disease-free seed.
- Avoid working among wet plants to limit spread of foliar pathogens.
- Maintain even moisture without saturation.
- Improve airflow through spacing and support.
- Remove and destroy heavily infected residues after harvest.
- Select resistant cultivars whenever available.
Biological fungicides based on Bacillus species or other approved organisms may offer some suppression when used preventively, but they work best as part of an integrated plan rather than as a rescue treatment.
Harvesting, Curing & Optimal Storage
Pea harvest timing depends entirely on market class, and precision matters because quality changes quickly.
Shelling peas should be harvested when pods are plump, bright green, and filled with well-formed seeds that are still tender and sweet. If left too long, sugars convert to starch, the seed coats toughen, and flavor declines. Pods should feel full but not leathery. Snow peas are harvested flat, before seeds bulge, while pods remain glossy and crisp. Snap peas are best when pods are thick, rounded, and succulent but before strings and fiber become pronounced.
Harvest in the cool part of the day, ideally morning after surface moisture has dried. Frequent picking, every 1 to 3 days in peak season, stimulates continued flowering and prevents overmature pods from slowing production. Use two hands when possible: one to hold the vine and one to pick, reducing stem breakage.
For pea shoots, begin light cutting once vines are established and never remove so much foliage that the plant cannot recover. In crops grown primarily for pods, shoot harvest should be minimal.
Unlike onions or garlic, peas are not typically “cured” in the classic dry-down sense when sold fresh. Instead, postharvest handling focuses on rapid cooling. Field heat should be removed as quickly as possible because respiration is high and sweetness declines rapidly. Hydrocooling or forced-air cooling to near 0 to 2°C is excellent for commercial handling if done hygienically.
Fresh peas store best at 0 to 2°C with 95 to 98% relative humidity. Under ideal conditions, unshelled peas may keep for about 1 to 2 weeks, though eating quality is best as soon as possible. Snow and snap peas generally hold slightly better than shelling peas because the edible pod protects internal moisture, but they too decline with time. Avoid storing peas with ethylene-sensitive produce in environments where exposure is high, as quality deterioration can accelerate.
For home or small-farm processing, shelling peas can be blanched and frozen with excellent quality retention. Dry peas for soup or seed saving require a different harvest stage: leave pods on the plant until fully mature and straw-colored, then finish drying under cover if rain threatens. Thresh when seeds are hard and moisture is low enough for safe storage, ideally around 13% or less for seed and even lower for long-term food storage.
Seed-saving growers should rogue off-type plants during flowering and pod development. Harvest seed only from healthy, disease-free plants, dry thoroughly, and store in airtight containers in a cool, dark, low-humidity place.
Companion Planting for Peas
Peas fit naturally into companion planting systems because they grow early, enrich the soil biologically, and share space well with many cool-season crops. Their upright or trellised habit allows efficient vertical use of garden beds, and their relatively light shade can benefit some shallow-rooted companions.
Good companions include carrots, radishes, turnips, lettuce, spinach, and many brassicas. These crops occupy different root zones or growth habits and can make efficient use of spring beds. Lettuce and spinach appreciate the cooler microclimate around pea rows in late spring. Radishes mature quickly before pea vines fully expand. Carrots can be sown nearby because they do not strongly compete for nitrogen and help diversify bed structure.
A classic approach is to pair peas with support crops or bordering insectary plants. Low plantings of alyssum, dill, cilantro, or other beneficial-attracting flowers nearby can increase populations of predatory insects and parasitoids that help suppress Aphids. In mixed vegetable systems, peas also precede heavier feeders such as cabbage or tomato, which can benefit from residual soil improvement once pea residues are incorporated appropriately.
Avoid planting peas immediately next to strongly competitive alliums in cramped spaces if growth is already likely to be slow in cold weather. Some growers report weaker performance when peas and onions or garlic are crowded together, though this is often more a matter of root competition and spacing than true incompatibility. Keep vigorous tall crops from shading peas excessively during their productive window.
As a rotational companion, peas are especially useful before crops needing fertile but not overly fresh-manured ground. After harvest, vines and roots can be chopped and composted or lightly incorporated, though diseased residues should be removed. In no-dig or reduced-till systems, cutting vines at the base and leaving roots in place preserves nodules and soil structure.
The best companion planting with peas is ultimately temporal as much as spatial: combine them with crops that share cool conditions, use trellises to maximize light, and follow them with summer crops that capitalize on the opening in the bed after pea harvest.