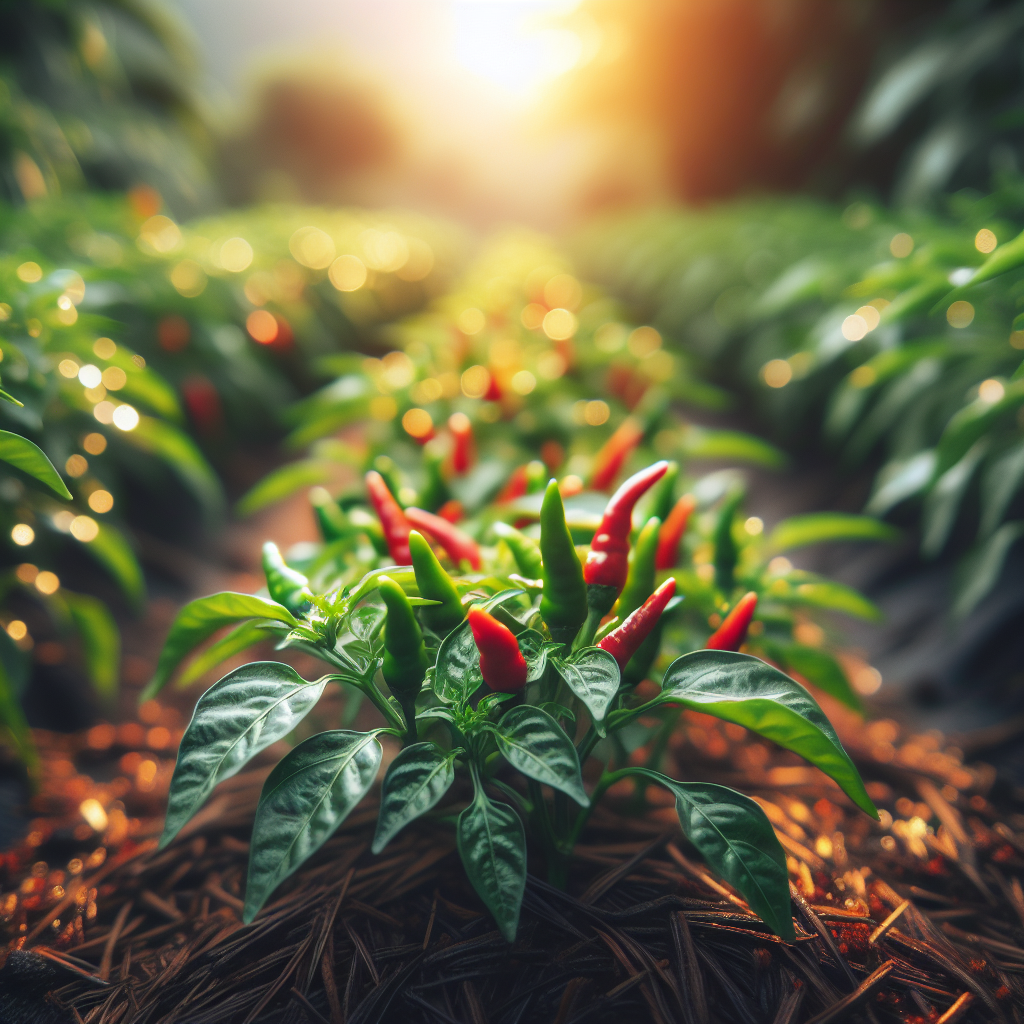
Introduction to Bird's Eye Chili
A classic hot pepper of tropical and subtropical agriculture, this chili is known for its small, slender fruits, fast ripening, and penetrating heat that commonly ranges around 50,000 to 100,000 Scoville Heat Units, though environment and strain can push it higher or lower. It is widely associated with Thai, Filipino, Indonesian, East African, and Southern Indian cuisines, and in many markets the name covers several closely related landraces rather than one perfectly uniform commercial type.
Compared with larger-fruited peppers, Bird's Eye Chili invests more energy into producing many small pods over a long season. That makes it attractive for both home gardeners and market growers: harvest can begin relatively early, picking is frequent, and plants can continue producing for months in warm weather. Its compact but branching structure also suits container production, protected cultivation, and intercropping systems.
Historically, peppers are New World crops that spread rapidly after the Columbian Exchange. Bird's Eye types became deeply naturalized in Afro-Asian farming systems, where selection favored prolific plants with thin-walled fruits, strong pungency, and reliable fruit set under heat. If you already grow other peppers, the management principles are similar, but Bird's Eye types tend to be more resilient in hot, humid climates than many sweet peppers. For comparison of broader pepper culture, see the Chili Pepper guide.
Botanical Profile of Bird's Eye Chili
This crop is most commonly classified as Capsicum frutescens, though in trade and farm practice there is overlap with small-fruited forms of Capsicum annuum. True C. frutescens types typically show an upright, bushy habit with fruits often held erect or semi-erect above the foliage. Mature plant height is usually 45 to 100 cm, but in fertile tropical soils and frost-free conditions, well-managed plants can exceed that and become woody at the base.
Leaves are smooth, medium green, and generally smaller than those of large-fruited bell or blocky pepper types. Flowers are usually white to greenish-white, borne singly or in small clusters at the nodes. Pollination is largely self-fertile, but insects and air movement can increase fruit set and contribute to cross-pollination where other peppers are nearby.
The fruits are typically 2 to 5 cm long, narrow, pointed, and thin-fleshed. Immature fruits are green and ripen through bright red, though orange or yellow forms exist in some local selections. Thin pericarp tissue means rapid drying relative to larger chilies, which is one reason these peppers are so valued for fresh use, sun-drying, sauces, and flakes.
Bird's Eye plants are botanically perennial in warm climates. In zones without frost, plants may remain productive for 2 to 3 years, although commercial productivity usually peaks in the first 8 to 14 months. Older plants become more woody, more disease-prone, and often bear smaller flushes unless aggressively pruned and fed.
Soil, pH, and Climate Requirements for Bird's Eye Chili
This crop performs best in deep, friable, well-drained loam or sandy loam rich in stable organic matter. The root system is relatively fine and oxygen-demanding, so compacted or waterlogged soils sharply reduce vigor, predispose plants to root rot, and cause blossom drop. The ideal soil texture holds moisture evenly but drains quickly after irrigation or rain.
Target soil pH is 6.0 to 6.8, with the sweet spot often around 6.2 to 6.5. Plants tolerate slightly more acidic soils down to about 5.5, but nutrient availability becomes less balanced there, especially for calcium, magnesium, and phosphorus. Above pH 7.2, iron, manganese, and zinc deficiencies become more likely, expressed as interveinal chlorosis on new leaves. If soil is acidic, incorporate agricultural lime several weeks before planting. If alkaline, use elemental sulfur over time and prioritize organic matter additions that improve micronutrient buffering.
A fertile baseline for field production is a soil organic matter content of roughly 3 to 5%. Well-finished compost can be incorporated at 2 to 5 kg per square meter before planting, but avoid heavy applications of raw manure, which can overstimulate leafy growth, delay fruiting, and increase disease pressure. Raised beds are especially useful in humid regions or heavy soils because they improve drainage and root aeration.
Temperature is one of the most important yield drivers. Seed germination is strongest at 26 to 32°C. Vegetative growth is ideal at daytime temperatures of 24 to 32°C and nighttime temperatures of 18 to 24°C. Growth slows below 16°C, and pollen viability falls when nights are too cool. Extreme daytime heat above 35°C can cause flower abortion, especially when combined with low humidity and water stress, although Bird's Eye Chili generally handles tropical heat better than many larger pepper cultivars.
This is not a frost-tolerant plant. Even light frost can kill it. For outdoor planting, wait until soil temperatures are consistently above 18°C and night temperatures stay above 13 to 15°C. In tropical climates, planting often aligns with the end of heavy rains so young plants establish without prolonged root saturation. In monsoonal regions, good drainage and mulch management are essential.
Light requirements are high. Aim for 6 to 8 hours of direct sun minimum, with full sun preferred for strongest flowering and capsaicin development. In extremely hot inland areas, 20 to 30% afternoon shade can reduce flower drop and sunscald without sacrificing much yield.
Step-by-Step Planting & Propagation
Seed propagation is the standard method. Use fresh, high-viability seed because older pepper seed often germinates unevenly. Pre-soaking seed for 8 to 12 hours in clean, room-temperature water can speed emergence, but do not soak longer or seed may suffocate.
- Fill seed trays or small pots with a sterile, fine-textured propagation mix. The medium should be moist but never muddy.
- Sow seeds 0.5 to 1 cm deep. Deeper sowing delays emergence and increases Damping-off risk.
- Maintain medium temperature at 26 to 30°C. Bottom heat is highly effective.
- Keep humidity moderate to high until emergence, usually 7 to 21 days depending on temperature and seed quality.
- Provide bright light immediately after emergence to prevent leggy seedlings. A daily light period of 12 to 14 hours under strong artificial light works well indoors.
- Water lightly and consistently. The root zone should feel evenly damp, not wet. If the surface stays glossy or algae forms, conditions are too wet.
- Pot up seedlings once they have 2 to 3 true leaves, handling by leaves rather than stems.
- Harden off for 7 to 10 days before transplanting by gradually increasing sun and outdoor exposure.
Transplant when seedlings are 10 to 15 cm tall, stocky, and have established roots that hold the plug together without circling heavily. Space plants 30 to 45 cm apart within rows and 60 to 90 cm between rows, depending on fertility, pruning system, and harvest method. Tighter spacing increases early yield per area but can reduce airflow and raise disease pressure.
For container production, use a minimum pot volume of 10 to 15 liters per plant, though 20 liters gives more stable moisture and nutrient buffering. Containers must have generous drainage holes. A high-quality mix might include composted bark, coco coir or peat, perlite, and mature compost. Avoid garden soil in containers because it compacts and drains poorly.
Vegetative propagation by cuttings is possible in elite plants. Take 10 to 15 cm semi-softwood cuttings from healthy, disease-free shoots, remove lower leaves, dip in rooting hormone if desired, and root in a warm, humid medium. This method preserves a favored phenotype but is less common than seed.
If seed-starting conditions are cool, general indoor-starting principles from this seed-starting article can help, though Bird's Eye Chili still requires warmer germination conditions than many temperate vegetables.
Care & Maintenance regimes for Bird's Eye Chili
Water management should be precise. The ideal root zone is evenly moist at roughly field capacity, never bone-dry and never saturated for extended periods. In practical terms, the top 2 to 3 cm of soil may dry slightly between irrigations, but deeper soil in the main root zone should remain lightly moist and cool to the touch. In containers, water when the top 2 cm are dry but before the entire pot becomes light and shrunken from the sides.
Underwatering signs include slight midday wilting that becomes persistent, dull or bluish-green foliage, flower drop, and small, thin fruits. Severe swings from dry to wet can cause reduced fruit set and increase physiological stress. Overwatering signs include yellowing lower leaves, soft lush growth, edema, fungus gnats in containers, sour-smelling media, and eventual root browning. If plants wilt despite wet soil, suspect root damage rather than thirst.
As a rough field guideline, established plants often need 25 to 40 mm of water per week, adjusted for heat, wind, soil type, and mulching. Sandy soils need smaller, more frequent applications; loams need deeper, less frequent irrigation. Drip irrigation is strongly preferred over overhead watering because it reduces leaf wetness and foliar disease.
Nutrition should be balanced. Excess nitrogen creates vigorous leaf growth but delays flowering and can dilute pungency and structural strength. Before planting, incorporate a moderate basal fertilizer guided by soil test results. A common strategy is modest nitrogen with adequate phosphorus, potassium, calcium, magnesium, and sulfur. Once flowering begins, shift toward a fruiting emphasis with steady potassium and calcium availability.
Nutrient deficiency clues are important:
- Nitrogen deficiency: uniform pale green older leaves, reduced vigor, short internodes.
- Phosphorus deficiency: stunted plants, dark foliage, delayed flowering, sometimes purpling in cool conditions.
- Potassium deficiency: marginal scorch on older leaves, weak fruit quality, poor stress tolerance.
- Calcium deficiency: distorted new growth and occasional blossom-end rot, especially under irregular watering.
- Magnesium deficiency: interveinal chlorosis on older leaves.
Mulch with clean straw, dried grass, leaf mold, or black plastic to stabilize soil moisture, suppress weeds, and reduce soil splash. Keep organic mulch 5 to 8 cm deep but leave a small gap around the stem to prevent collar rot.
Light pruning can improve airflow and branching. Remove the first few weak interior shoots if the canopy becomes crowded. In perennial systems, after a major harvest flush, plants can be cut back by one-third to stimulate renewed branching, provided temperatures remain warm and fertility is restored. Staking is optional for small plants but recommended in windy sites or high-yield plantings, since fruit-laden branches can split.
Weed control matters most in the first 6 to 8 weeks after transplanting. Competition during this stage can permanently reduce canopy size and yield. Hand weeding, shallow hoeing, or mulching are best. Avoid deep cultivation near stems, as pepper roots are easily damaged.
Pests, Diseases & Organic Management
Aphids are among the most common pests, clustering on shoot tips and undersides of leaves. They distort growth, excrete honeydew, and spread viruses. Early control is easiest: wash colonies off with water, release or conserve beneficial insects, and use insecticidal soap or neem-based products when needed.
Thrips are especially problematic because they scar leaves and fruits and can vector viral diseases. Fine silvering, distorted new growth, and black fecal specks are common signs. Blue or yellow sticky traps help monitor populations. Reflective mulch, sanitation, and spinosad used responsibly can help suppress outbreaks.
Spider mites thrive in hot, dry conditions, causing stippling, bronzing, and fine webbing. Increasing humidity around the crop canopy, reducing dust, and spraying the undersides of leaves with water can slow early infestations. Horticultural oils and soaps are effective when coverage is thorough.
Whiteflies can weaken plants and transmit viruses. Good airflow, yellow sticky traps, and removal of heavily infested leaves are useful. Avoid overfertilizing with nitrogen, which produces the tender growth Whiteflies prefer.
Fruit borers and Caterpillars may chew pods directly. Hand removal, pheromone monitoring where available, and Bacillus thuringiensis applications on young larvae are effective organic tools.
Major diseases include Damping-off in seedlings, Bacterial leaf spot, Anthracnose, Cercospora leaf spot, Phytophthora root and crown rot, and multiple viral complexes such as Cucumber mosaic virus and Chili leaf curl disease in tropical regions. Disease prevention is far more effective than cure.
Key prevention practices:
- Start with clean seed and sterile propagation media.
- Rotate away from solanaceous crops for at least 2 to 3 years where disease is established.
- Avoid planting after peppers, tomatoes, eggplants, or potatoes in the same bed.
- Use drip irrigation and water early in the day if overhead irrigation is unavoidable.
- Maintain spacing that allows rapid leaf drying.
- Remove diseased fruits and leaves immediately.
- Sanitize tools and hands after handling infected plants.
- Control insect vectors promptly to limit virus spread.
Anthracnose typically appears as sunken lesions on ripening fruit, often with salmon-colored spore masses in humid conditions. Harvest promptly and avoid letting ripe pods sit through rainy spells. Phytophthora is suspected when plants suddenly wilt in wet soils and the stem base darkens. In that case, improve drainage immediately; severely affected plants should be removed.
Organic disease suppression can include copper products for bacterial and some fungal issues, and biofungicides based on Bacillus subtilis or Trichoderma species as preventive tools. These work best before heavy infection, not after severe symptoms develop.
Harvesting, Curing & Optimal Storage
Bird's Eye Chili can be harvested green, but full color maturity usually delivers maximum heat, aroma, and market appeal. Most fruits are ready 75 to 120 days from transplant depending on climate, strain, and management. Ripe pods should be fully red or the expected mature color, firm, glossy, and easy to detach.
Pick every 3 to 7 days during peak production. Frequent harvesting encourages continued flowering and prevents overripe fruits from draining plant resources. Use scissors or pinch carefully to avoid tearing brittle branches. Harvest into shallow containers to prevent crushing and heating.
For fresh market storage, keep fruits dry and unwashed until use. Store at 7 to 10°C with relative humidity around 85 to 90%. Below about 7°C, chilling injury may develop, seen as surface pitting, dull color, and faster decay after removal from storage. Under good conditions, fresh pods often keep 1 to 3 weeks.
For drying, sort out damaged or diseased fruits first. Wash only if necessary, then dry surface moisture completely. Whole fruits may be sun-dried in arid climates on clean mesh screens with strong airflow and protection from dew. In humid climates, use a dehydrator or drying chamber at 50 to 60°C until pods are brittle and seeds rattle. Thin-walled Bird's Eye fruits dry relatively quickly compared with jalapeños or bells.
Condition dried chilies before long-term storage by placing them in a sealed jar for 5 to 7 days and shaking daily. If condensation appears, they are not dry enough and must be returned to the dryer. Properly dried pods should have moisture content low enough to snap cleanly rather than bend.
Store dried chilies in airtight containers away from light, heat, and humidity. Vacuum sealing extends quality. Whole dried fruits retain aroma longer than flakes or powder, which lose volatile compounds faster after grinding.
Seed saving is straightforward if plants are open-pollinated and isolated from other peppers to preserve type. Save seed only from fully ripe, healthy fruits harvested from vigorous, disease-free plants.
Companion Planting for Bird's Eye Chili
Good companions either repel pests, attract beneficial insects, or occupy different rooting and canopy niches so competition is reduced. Thai Basil is especially useful nearby because its aromatic foliage can help confuse some pests while also fitting well in warm, well-drained beds. Onion and Garlic are classic low-profile companions that may help deter some sap-feeding pests and make efficient use of bed edges. Nasturtium can function as a trap crop for Aphids while bringing pollinators and predatory insects into the planting.
Avoid crowding Bird's Eye Chili with highly competitive, sprawling crops that reduce airflow or shade the canopy excessively. Also avoid repeating peppers after related solanaceous crops in the same bed if disease has been a problem. Companion planting is most effective when combined with sanitation, irrigation discipline, mulching, and regular scouting rather than treated as a standalone solution.