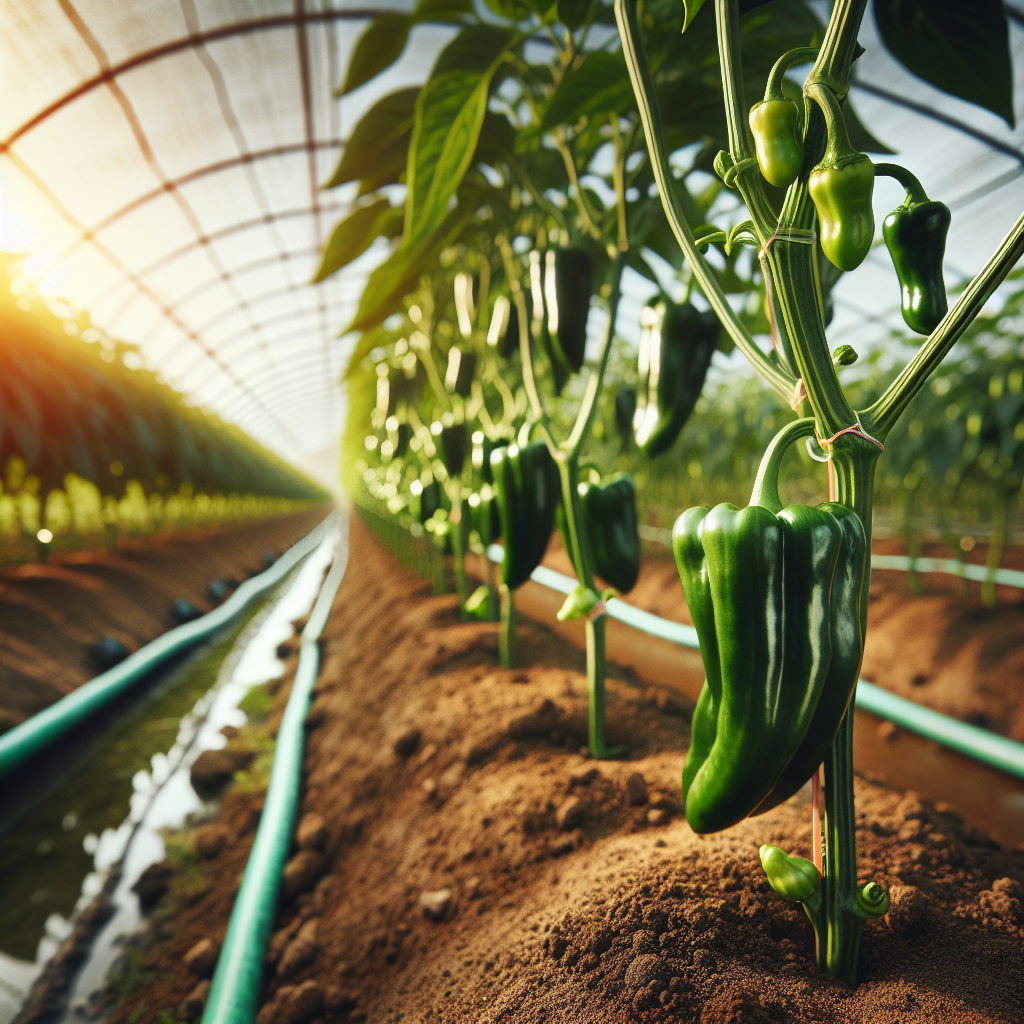
Introduction to Anaheim Pepper
A foundational New Mexican–type chili, this pepper is most closely associated with the American Southwest and California, where it became widely grown for fresh green chile use. It is typically harvested green at 6-10 inches long, with mild heat that often ranges around 500-2,500 Scoville heat units, though actual pungency varies with strain, weather, irrigation patterns, and maturity stage. When allowed to ripen fully, fruits turn red, develop deeper sweetness, and can be dried or processed into powders and sauces.
Its history is tied to the movement of New Mexican chile germplasm into California, where selection and adaptation helped create the market form now recognized as Anaheim. In culinary use it occupies an important middle ground: more flavorful and slightly hotter than a sweet pepper, but far less aggressive than many hot chiles. Growers value it because fruit size is commercially attractive, plants are productive under proper fertility, and harvest can begin relatively early compared with larger late-season peppers.
From a production standpoint, Anaheim is forgiving compared with very hot peppers, but it is still a warm-season crop with specific needs. Poor drainage, cold soils, erratic watering, and excess nitrogen are the most common causes of disappointing performance. When managed well, plants can produce a sustained flush of uniform, straight fruits suitable for fresh market, roasting, stuffing, and dehydration.
Botanical Profile of Anaheim Pepper
This cultivar belongs to Capsicum annuum, the most broadly cultivated pepper species in agriculture. Plants are usually semi-upright to bushy, commonly reaching 18-30 inches tall in open-field culture and sometimes larger in long-season or protected conditions. Stems begin soft and green, then become more fibrous with age. Leaves are smooth, medium green, ovate to lanceolate, and relatively thin compared with leathery-fruited pepper types.
Flowers are typically solitary, white, and self-fertile, though insect activity can improve pollination efficiency under some conditions. Fruit set is strongly influenced by temperature. Day temperatures around 75-85°F and night temperatures around 60-70°F favor reliable pollination; prolonged periods above 90°F, especially with hot nights over 75°F, can cause blossom drop, poor pollen viability, or misshapen fruits.
The fruit is elongated, tapered, and usually slightly curved, with a glossy green exterior when immature. Walls are moderately thick, making it useful for roasting and stuffing. Compared with many blocky sweet peppers, Anaheim generally has narrower shoulders and a more pointed tip. Physiologically, fruit pungency arises from capsaicinoids concentrated largely in placental tissue rather than the seeds themselves, though seeds can carry heat from contact.
Anaheim is often confused with related green chiles, especially Hatch-type and other New Mexican selections. The differences can be subtle and include regional strain, fruit shape, flavor profile, maturity timing, and heat level. If you want to compare fruiting habits across pepper classes, see our Bell Pepper guide.
Roots are relatively shallow but spreading, with the majority of active feeder roots in the top 8-12 inches of soil when grown in cultivated beds. This explains why the crop responds quickly to both drought and overirrigation. Unlike deep-rooted perennial crops, Anaheim depends heavily on a stable surface-root environment with good oxygen exchange.
Soil, pH, and Climate Requirements for Anaheim Pepper
Best performance comes from fertile, well-drained loam or sandy loam with high organic matter and a soil pH of 6.2-6.8. Plants will tolerate roughly 6.0-7.2, but nutrient availability becomes less balanced outside the ideal range. At low pH, calcium and magnesium uptake may be impaired; at high pH, iron and manganese deficiencies become more likely, especially in calcareous soils where interveinal chlorosis can appear on young leaves.
Drainage is critical. Anaheim pepper roots are highly sensitive to saturated conditions, and even short periods of standing water can predispose plants to Phytophthora root and crown rot. A well-structured soil should drain free water within a few hours after heavy irrigation or rain while still retaining enough moisture that the root zone does not swing from flooded to bone dry. Raised beds 6-10 inches high are strongly recommended where soils are heavy or summer storms are frequent.
Before planting, incorporate 2-4 inches of mature compost if soil organic matter is below about 4%. Compost improves water-holding in sandy soils and aggregation in clay soils. Avoid raw manure close to planting because it can drive excessive vegetative growth, salt injury, and microbial contamination risks. A pre-plant soil test is ideal; in the absence of one, a balanced starter fertility program with moderate nitrogen and adequate phosphorus, potassium, calcium, and sulfur is more reliable than high-nitrogen feeding.
Temperature matters at every stage. Seed germination is best at 80-90°F, transplant establishment at 70-85°F, and sustained vegetative and reproductive growth at 75-88°F. Growth slows sharply below 55°F, and chilling injury can occur from prolonged exposure below 50°F even if no frost forms. Frost is lethal. In cool climates, black plastic mulch, low tunnels, or row covers used early can improve root-zone warmth and speed establishment.
Anaheim prefers full sun, ideally 8 or more hours of direct light daily. In very hot inland climates, brief afternoon shade can reduce sunscald and water stress, but too much shading lowers flowering and fruit quality. Wind protection also helps; constant hot, dry wind increases transpiration, causes leaf edge scorch, and can lead to blossom drop.
For growers working on long-term fertility building, broad soil management principles overlap with those in this soil health article.
Step-by-Step Planting & Propagation
Start from seed 8-10 weeks before the final frost date. Use a sterile seed-starting mix rather than garden soil. Sow seeds 1/4 inch deep in plug trays or small cell packs, moisten thoroughly, and maintain medium temperature at 80-85°F until emergence. Bottom heat dramatically improves speed and uniformity; seeds often emerge in 7-14 days under warm conditions but can take much longer in cool media.
As soon as seedlings emerge, provide strong light for 14-16 hours daily if grown indoors. Weak light causes stretching, pale foliage, and structurally poor transplants. Keep air temperatures around 70-75°F by day and 65-70°F at night. Once the first true leaves appear, begin feeding weekly with a dilute balanced fertilizer at about one-quarter to one-half strength.
Pot up seedlings when roots begin filling the cell but before they become rootbound. Transplanting into 3-4 inch pots encourages a stronger root ball and thicker stem. During this stage, avoid overwatering. The medium should remain evenly moist, not saturated; a useful indicator is to water when the top 1/2 inch is drying but before the seedling wilts. Constantly wet media encourage damping-off, fungus gnats, and shallow root development.
Harden plants off over 7-10 days before field transplanting. Gradually expose them to outdoor sunlight, wind, and wider temperature swings. Never move tender greenhouse-grown plants directly into full sun and cool nights; leaf scorch and transplant shock can delay establishment by weeks.
Transplant only after all frost risk has passed and soil temperatures at 4 inches are consistently above 60°F, preferably closer to 65°F. Space plants 18-24 inches apart in rows 24-36 inches apart. In intensive raised beds, a 18 x 18 inch spacing works well if fertility and airflow are carefully managed. Bury transplants at the same depth they grew in the pot or just slightly deeper, but do not plant excessively deep as you might with some tomatoes.
Water transplants immediately after planting to settle the root zone. A starter solution containing phosphorus can help establishment in cool soils. Apply organic mulch only after the soil has warmed; early mulching in cold regions can delay root activity. In warm climates, mulch can be applied sooner to reduce evaporation and soil splash.
Direct sowing is possible only in very warm, long-season climates with fine-textured seedbeds and reliable irrigation, but transplanting is preferred because it improves uniformity, weed competitiveness, and earliness.
Care & Maintenance regimes for Anaheim Pepper
Irrigation should be consistent rather than heavy and sporadic. The practical target is to keep the root zone evenly moist to roughly field capacity in the active rooting depth without prolonged saturation. In the field, that usually means watering when the top 1-2 inches of soil have dried but the soil at 3-4 inches remains slightly moist and cool. In coarse sandy soils, this may require irrigation every 1-3 days during hot weather; in loam, every 3-5 days; in clay loam, less frequently but with careful monitoring.
Signs of underwatering include midday wilting that persists into evening, dull or gray-green foliage, aborted blossoms, smaller fruits, increased pungency, and thin fruit walls. Signs of overwatering include persistent drooping despite wet soil, yellowing lower leaves, edema-like blistering, slow growth, and sour-smelling anaerobic soil. Repeated wet-dry extremes are especially harmful because they contribute to blossom-end rot and irregular fruit shape.
A mature plant commonly needs about 1-1.5 inches of water per week under moderate conditions, but this should be adjusted for heat, wind, soil texture, and mulch use. Drip irrigation is best because it keeps foliage dry and reduces disease. If using overhead irrigation, water early enough that leaves dry quickly.
Nutrient management should emphasize balance. Excess nitrogen produces lush foliage, delayed flowering, softer tissues, and greater aphid susceptibility. A practical approach is a modest pre-plant nitrogen application followed by small sidedressings once plants are established and again at early fruit set. Total nitrogen needs vary widely by soil and yield target, but many field systems perform well in a moderate range rather than high-input feeding. Potassium is particularly important for fruit fill, firmness, and stress tolerance, while calcium supports cell wall integrity and reduces blossom-end rot risk when soil moisture is stable.
Mulching with straw, shredded leaves, or composted bark helps stabilize temperature and moisture, but keep mulch a couple of inches away from stems to reduce rot and slug habitat. In black plastic systems, inspect drip emitters regularly because uneven wetting causes uneven crop growth.
Staking is optional but beneficial. Fruit-laden plants can lean or break after wind or irrigation-driven rapid growth. A simple stake and soft tie, or a low basket-weave system, improves airflow and keeps fruits off the soil.
Pruning is minimal. Remove only damaged, diseased, or heavily shaded interior leaves if airflow is poor. Aggressive pruning generally reduces yield because peppers carry a relatively limited canopy and depend on adequate leaf area for fruit sizing.
Container culture is very feasible. Use a pot at least 5 gallons, preferably 7-10 gallons, with excellent drainage. A high-quality potting mix with compost and perlite works well. Container peppers dry out faster and usually require more frequent fertilization at low concentration. In midsummer, daily checks are essential because a plant in full fruit can swing from ideal moisture to severe drought stress within a single hot day.
Pests, Diseases & Organic Management
Common insect pests include aphids, thrips, flea beetles, pepper weevils in affected regions, hornworms, and spider mites. aphids cluster on tender shoot tips and leaf undersides, causing curl, sticky honeydew, and sooty mold. thrips scar leaves and flowers and are particularly important because they can vector tomato spotted wilt virus. spider mites thrive in hot, dusty, dry conditions and cause stippling, bronzing, and fine webbing.
Organic management starts with prevention. Keep weeds controlled because they harbor insect vectors and alternate hosts for viruses. Avoid excessive nitrogen that produces soft, pest-attractive growth. Maintain good airflow, use reflective mulches where appropriate to reduce aphid and thrips landing, and encourage beneficials such as lacewings, hoverflies, minute pirate bugs, and predatory mites. A strong jet of water can suppress aphids early. Insecticidal soap and neem-based products can help, but coverage must be thorough and repeated responsibly. Apply in the evening and avoid spraying open flowers when pollinators are active.
Disease pressure rises sharply under wet foliage, poor drainage, or tight solanaceous rotations. Major problems include bacterial leaf spot, anthracnose, powdery mildew in some climates, Phytophthora blight, Verticillium wilt, and several mosaic or spotted wilt viruses. Viral symptoms may include mottled leaves, distorted growth, ring spots, and stunting; infected plants should be removed because there is no cure.
bacterial leaf spot appears as small water-soaked lesions that darken and may lead to defoliation and fruit spotting. Use clean seed, avoid working wet plants, rotate out of peppers and related crops for at least 3 years where disease is established, and irrigate at the soil line. Phytophthora causes root, crown, and fruit rot, often after periods of soil saturation. The best defense is raised beds, impeccable drainage, and avoiding overirrigation.
Blossom-end rot on fruit is not a pathogen but a calcium transport disorder usually triggered by moisture inconsistency, salinity, root damage, or excessive ammonium nitrogen. Correcting irrigation regularity is more effective than simply adding calcium sprays.
Sanitation matters. Remove diseased fruit promptly, clear crop residue at season end, and disinfect tools when moving between suspect areas. Never compost clearly virus-infected material unless your compost system reaches reliably lethal temperatures.
Harvesting, Curing & Optimal Storage
Harvest timing depends on intended use. For classic green chile use, pick fruits when they are full size, firm, glossy, and medium to dark green, usually 70-90 days from transplant depending on conditions. Do not wait for full red maturity if your market or kitchen goal is roasting green chiles. For sweeter, deeper flavor and drying, leave fruits to color fully red on the plant, provided weather remains warm and disease pressure is low.
Cut or snap fruits carefully with a short stem attached if possible. Pulling aggressively can split branches or strip immature fruiting nodes. Frequent harvest every 3-7 days encourages continued flowering and reduces the load on the plant. Market fruit should be straight, smooth, and free of sunscald, soft spots, insect feeding, and disease lesions.
For roasting, green fruits can be used immediately after harvest. For drying, red fruits should be mature, sound, and free from decay. Curing in the traditional sense is less formal than with onions or garlic, but harvested peppers benefit from a brief period in a shaded, well-ventilated area to remove field heat before storage or processing.
Fresh green Anaheim peppers store best at about 45-50°F with 90-95% relative humidity. Lower temperatures risk chilling injury, seen as pitting, water-soaked areas, and rapid decay after removal from storage. Under ideal conditions, storage life is commonly 2-3 weeks, though flavor is best when used sooner. Fully red fruits are often slightly more perishable as fresh produce.
For longer storage, roasting and freezing is one of the best quality-preserving methods. Dried red peppers should be dehydrated until leathery to brittle, depending on intended use, then stored in airtight containers in a cool, dark, dry environment. If grinding into powder, ensure moisture is very low before sealing to prevent mold.
Seed saving is possible because this is an open-pollinated pepper type in many cases, but isolation is needed if other Capsicum annuum types are flowering nearby. Save seed only from fully ripe red fruits taken from the healthiest, most productive plants with desirable heat and shape.
Companion Planting for Anaheim Pepper
Useful companions are those that help with pest management, habitat layering, and efficient root-zone sharing without creating heavy competition. Thai Basil is particularly valuable nearby because its aromatic canopy can help confuse some pests while attracting beneficial insects when allowed to flower. Onion and Carrot also pair well in diversified beds: onions occupy a different root and canopy niche, while carrots make good use of lower soil layers and leave the pepper canopy largely undisturbed.
Nasturtium can function as a sacrificial and insect-attracting border plant, often drawing aphids away from peppers while also supporting pollinators and beneficial insects. Companion planting should still be treated as a support strategy, not a substitute for rotation, sanitation, and irrigation discipline.
Avoid placing Anaheim peppers immediately after or beside dense plantings of other solanaceous crops such as tomatoes, eggplants, or potatoes when disease pressure is known, because they share many pathogens and pests. Likewise, avoid shading companions that will overtop the peppers and reduce light interception.
In small-scale systems, the best companion layout is often a pepper-centered bed with peppers as the dominant crop, onions interplanted along edges, basil at intervals for habitat diversity, and nasturtiums at corners or borders rather than packed tightly between plants. This preserves airflow and keeps harvesting practical while still capturing most of the ecological benefit.