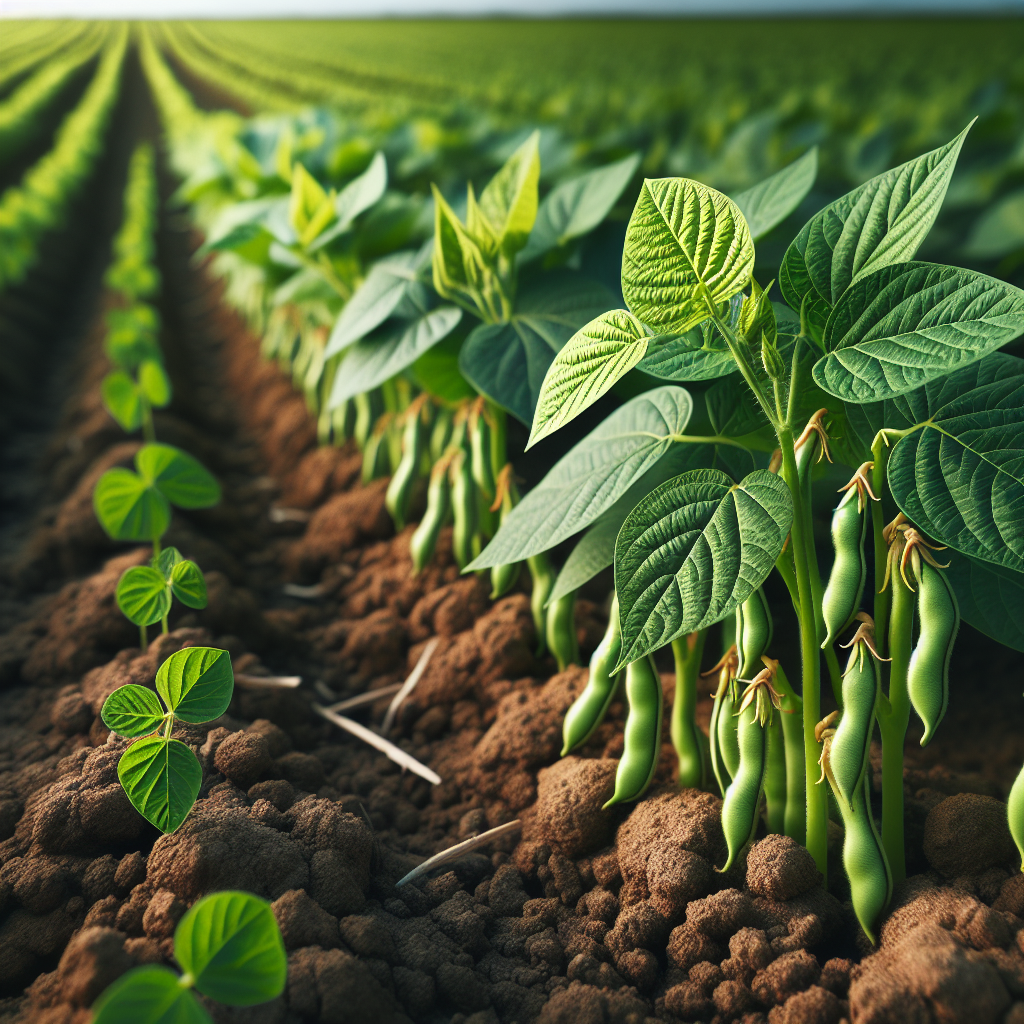
Introduction to Pinto Bean
A classic dry bean of the common bean species, pinto bean is one of the most important grain legumes in North America and a staple in Mexican, Southwestern U.S., and broader Latin American cuisines. The name “pinto” refers to the speckled or painted appearance of the seed coat before cooking; once cooked, the beans turn a more uniform pinkish-brown. Unlike snap beans grown for tender pods, pinto beans are usually cultivated to full physiological maturity so the seeds can dry on the plant or finish drying after harvest.
From an agronomic standpoint, pinto bean is valued for combining relatively short-season productivity with good protein content and nitrogen-fixing ability. Historically, dry common beans became central to Indigenous American agriculture and later to mixed farming systems because they fit well into rotations, improve dietary protein supply, and can be stored for long periods. Modern pinto types are generally bred for uniform maturity, upright habit, threshability, and tolerance to common diseases, though heirloom and regional strains may show greater variability in seed size, vine length, and maturation timing.
Pinto beans are especially well suited to semi-arid and temperate regions where warm days, moderate humidity, and a dry finish near harvest reduce disease pressure and improve seed quality. While they are often considered a relatively straightforward crop, truly high-quality production depends on timing, drainage, inoculation where needed, restraint with nitrogen, and careful harvest management to avoid cracked seed, mold, and weathering.
Botanical Profile of Pinto Bean
Pinto bean belongs to the Fabaceae family and is botanically classified as Phaseolus vulgaris, the same species that includes kidney beans, black beans, navy beans, many snap beans, and numerous fresh shell beans. It is an annual dicotyledonous legume with a taproot that quickly develops lateral roots and, under the right biological conditions, symbiotic nodules containing nitrogen-fixing rhizobia. These nodules are critical to the plant’s ability to meet much of its own nitrogen demand.
Growth habit varies by cultivar. Most commercial pinto beans are bush or semi-upright determinate to semi-determinate types, typically reaching 12-24 inches (30-60 cm) in height, though some can sprawl more under fertile conditions or irrigation. Leaves are trifoliate, medium green, and moderately pubescent in some lines. Flowers are usually white to pale lavender, self-pollinating, and borne in clusters. Pollination generally occurs before flowers open fully, which is one reason varietal purity is easier to maintain than in strongly outcrossing species.
Pods are slender to moderately plump, usually 4-6 inches (10-15 cm) long, and mature from green to yellow-tan and finally dry straw color. Each pod typically contains 4-7 seeds. Seeds are beige with reddish-brown mottling when mature and dry. Seed coat color can vary somewhat by cultivar and growing conditions; excessive weather exposure after maturity may dull the mottling.
Pinto bean has a relatively shallow effective rooting depth compared with large, deep-rooted field crops, which partly explains its sensitivity to both drought stress during flowering and waterlogging at any stage. It is also more sensitive than some legumes to salinity, soil crusting at emergence, and mechanical injury once seed moisture drops very low.
Typical crop duration ranges from about 85 to 110 days, depending on cultivar, heat accumulation, and moisture. Compared with Soybeans, pinto beans usually prefer lower humidity and are often less forgiving of saturated soils during reproduction. Their nitrogen fixation is highly beneficial, but only when seed is planted into biologically active soils with compatible rhizobia and without excessive synthetic nitrogen that suppresses nodule formation.
Soil, pH, and Climate Requirements for Pinto Bean
The best soils are well-drained loams, sandy loams, or silt loams with good tilth, moderate organic matter, and minimal compaction. Heavy clay can produce excellent yields if drainage is improved and surface crusting is controlled, but poorly aerated clay is one of the fastest ways to lose stand uniformity. Beans need oxygen around the root zone; when pore space fills with water for extended periods, roots and nodules suffocate, predisposing plants to root rots and weak growth.
Target soil pH is 6.0-7.2, with an ideal range around 6.2-6.8 for most production systems. Pinto bean will tolerate slightly more acidic or slightly alkaline conditions, but nodulation and nutrient availability decline as pH moves away from this zone. At pH below about 5.8, manganese and aluminum issues may intensify while rhizobial performance can fall off. At high pH, iron and zinc deficiencies become more likely, especially in calcareous soils.
Beans are moderate feeders, not heavy feeders. Excess nitrogen causes lush vegetative growth, delayed flowering, increased lodging, and often poorer pod set. A pre-plant soil test is the best guide, but as a general principle, pinto bean responds best to adequate phosphorus, moderate potassium, and balanced micronutrients rather than high nitrogen. Phosphorus is particularly important early for root growth and nodulation.
Climatically, pinto bean is a frost-sensitive warm-season crop. Ideal air temperatures for rapid germination are 70-85°F (21-29°C), while vegetative and reproductive growth generally perform best around 65-85°F (18-29°C). Below 50°F (10°C), growth slows markedly; near freezing, tissues are damaged or killed. Prolonged temperatures above 95°F (35°C), especially with hot nights, may reduce flower retention and pod set.
Rainfall or irrigation should be enough to support even establishment and steady growth, but the crop benefits from a relatively dry atmosphere and a drier finish near maturity. High humidity, dense canopy growth, and frequent overhead irrigation during flowering and pod fill raise the risk of bacterial blights, anthracnose, and white mold. For practical moisture management, maintain soil evenly moist during emergence and flowering, usually around 50-75% of field capacity in the root zone, then avoid large wet-dry swings. Surface dryness alone can be misleading: the top 1 inch may look dry while the 2-4 inch zone remains ideal. Conversely, if the top 2 inches stay constantly saturated, seedlings are at real risk.
Signs of underwatering include delayed emergence, midday wilting that persists into evening, flower drop, short pods, poor seed fill, and premature yellowing of lower leaves. Signs of overwatering include pale or yellow foliage despite moist soil, stunting, edema-like blistering on leaves, root browning, reduced nodulation, and a sour or anaerobic smell in the soil. In healthy fields, the root zone should be moist and crumbly, never sticky and airless for days.
For growers focused on long-term fertility, the principles in soil health strategies are especially relevant because pinto bean is very responsive to improved aggregation, drainage, and biologically active soils.
Step-by-Step Planting & Propagation
Pinto bean is propagated by seed and is almost always direct-sown. Transplanting is rarely justified because common beans resent root disturbance and do not gain enough advantage to offset transplant shock.
Select an adapted cultivar. Choose a pinto bean suited to your disease pressures, season length, and harvest method. Bush types are best for small-scale hand harvest and mechanized dry bean systems; more sprawling selections may work in low-input gardens but can complicate airflow and harvest.
Prepare a fine, firm seedbed. The surface should be loose enough for easy emergence but firm enough to hold consistent moisture around the seed. Avoid powdery over-tilled soil, which crusts after rain.
Wait for warm soil. Plant only after danger of frost has passed and soil temperature at 2 inches (5 cm) is consistently at least 60°F (16°C); 65-75°F (18-24°C) is better for rapid, even emergence. Planting into cold ground invites seed rot and patchy stands.
Inoculate if needed. In fields where common beans have not been grown recently, use an appropriate Rhizobium inoculant for Phaseolus vulgaris. This is especially helpful in low-fertility soils or new garden beds. Keep inoculated seed out of direct sun and plant promptly.
Set planting depth correctly. Sow seeds 1-1.5 inches (2.5-4 cm) deep in medium soils. In sandy soils or dry conditions, depth can increase to 2 inches (5 cm), but deeper sowing slows emergence and can weaken seedlings.
Use proper spacing. For garden or hand-tended production, place seeds 2-4 inches (5-10 cm) apart in rows 18-30 inches (45-75 cm) apart. For dense dry bean production, closer in-row spacing is common, but ensure enough airflow for disease suppression.
Irrigate lightly after sowing if needed. Moisture should wet the seed zone thoroughly but not flood it. A common mistake is frequent shallow watering that keeps only the surface damp and encourages crusting. Better to moisten the full planting depth and then let the surface dry slightly before watering again.
Monitor emergence. Seedlings usually emerge in 7-14 days depending on temperature. Check for gaps caused by crusting, birds, seedcorn maggot, or damping-off.
Thin only if necessary. If stands are overly dense, thin early to avoid competition and humidity buildup in the canopy.
Because pinto bean has epigeal emergence, the cotyledons lift above the soil surface. This makes crusted soils particularly damaging: if the hypocotyl cannot pull the seed leaves above the surface, emergence fails. In crust-prone ground, a very light irrigation or careful mechanical crust breaking can rescue a stand if timed precisely.
Care & Maintenance regimes for Pinto Bean
Once established, pinto bean performs best under consistent but not excessive care. The first priority is weed management during the first 4-6 weeks. Beans are not highly competitive early, and weed pressure during this window can reduce yield more than many growers expect. Keep rows clean with shallow cultivation or mulch in small plots. Avoid deep cultivation because bean roots and nodules are easily damaged.
Irrigation should shift with growth stage. During establishment, supply enough water to keep the seed zone uniformly moist. During vegetative growth, moderate watering encourages deeper rooting and stronger nodulation. The most critical periods are flowering and early pod fill. Moisture stress here can sharply reduce yield because flowers abort and pods fail to fill evenly. A general target is roughly 1-1.5 inches (25-38 mm) of total water per week from rainfall plus irrigation, adjusted for soil type and temperature. Sandy soils may need more frequent, lighter applications; loams can take fewer, deeper irrigations.
The key is uniformity. If soil swings from drought-hard to saturated, plants become more susceptible to blossom drop, split pods, irregular maturation, and disease. Ideally, the upper 6-8 inches (15-20 cm) of soil should stay moderately moist but well aerated. Tensiometer-guided irrigation in commercial systems often aims to avoid severe tension spikes during bloom while never pushing soils into prolonged saturation.
Fertilization should be conservative. If a soil test indicates low phosphorus or potassium, correct before planting or side-dress lightly early. Avoid heavy nitrogen topdressing. If plants are pale and nodulation is absent, the problem is often poor inoculation, cold soil, waterlogging, compaction, or pH stress rather than simple nitrogen shortage. To assess nodulation, gently dig a few plants at early flowering and inspect roots. Effective nodules are usually pink to reddish inside when cut open, indicating active nitrogen fixation.
Mulching can help in garden settings by suppressing weeds and moderating moisture, but keep mulch light and airy. Thick, wet mulch packed against stems can trap humidity and promote disease. Staking is usually unnecessary for bush pinto beans, though trellis support may benefit taller semi-vining lines.
Canopy management matters more than many people realize. Overly dense stands, excess fertility, and overhead irrigation combine to create a humid microclimate favorable to foliar disease. Water at the base when possible, especially once flowering begins. If overhead irrigation is unavoidable, irrigate early in the day so foliage dries quickly.
Toward maturity, reduce irrigation as pods yellow and seeds harden. Continuing heavy irrigation late can delay drying, promote staining and disease, and increase the chance of uneven maturity. However, cutting off water too early during active seed fill can reduce seed size and cause shriveling. The transition should be gradual: maintain enough moisture until most pods are filled, then allow the crop to dry down.
Pests, Diseases & Organic Management
Pinto bean is vulnerable to a range of insect, bacterial, fungal, and abiotic problems. The most successful organic management strategy is preventive: clean seed, rotation, airflow, balanced fertility, and dry foliage.
Common insect pests include bean leaf beetles, aphids, spider mites, leafhoppers, cutworms, seedcorn maggots, and occasionally Mexican bean beetles depending on region. aphids cluster on tender shoots and undersides of leaves, causing curling and sticky honeydew; they can also vector viruses. spider mites become severe in hot, dusty, drought-stressed conditions, producing stippled leaves and fine webbing. bean leaf beetles chew round holes in foliage and may scar pods.
Organic control starts with scouting twice weekly from emergence through pod set. Use row covers early where beetles or maggots are chronic, removing covers at flowering if needed for airflow and access. Encourage beneficial insects with flowering borders. Strong water sprays can suppress aphids in small plots, while insecticidal soap works best when coverage is thorough and temperatures are not excessively hot. Neem-based products may help with soft-bodied pests but should be applied carefully to avoid leaf burn.
Diseases often do more economic damage than insects. Major concerns include damping-off, root rot complexes, common bacterial blight, halo blight, anthracnose, rust, white mold, and various mosaic viruses. damping-off appears as rotting seed or collapsing seedlings and is favored by cold, wet soil. Root rots cause stunting, yellowing, and poor nodulation. Bacterial blights produce water-soaked lesions that enlarge and tear; infected pods may show greasy spots and seed contamination. anthracnose causes dark sunken lesions on pods and stems, especially in cool wet weather. white mold thrives in dense, humid canopies and produces cottony growth with black sclerotia.
Organic disease management depends on several non-negotiables:
- Use certified disease-free seed.
- Rotate away from beans and other susceptible legumes for 3-4 years where disease pressure is known.
- Do not work in the field when foliage is wet.
- Avoid overhead irrigation late in the day.
- Space adequately for rapid drying.
- Remove or deeply incorporate infected residues if appropriate for your system.
- Control weeds that trap humidity and host pests.
Copper-based products may suppress bacterial diseases somewhat if applied preventively, but they are not curative and should be used judiciously. Biofungicides containing Bacillus spp. or Trichoderma spp. can be helpful as part of a preventive program, especially at seedling stage or in high-value small-scale production.
Viruses such as bean common mosaic virus are best prevented through resistant cultivars, aphid management, and clean seed. Nutrient disorders can mimic disease: iron chlorosis in alkaline soil appears as yellow interveinal leaves, while waterlogging can look like generalized nutrient deficiency.
Harvesting, Curing & Optimal Storage
For dry bean production, harvest when the majority of pods are straw-colored, dry, and papery, and seeds inside are hard and fully colored. Leaves often yellow and drop as maturity progresses. Ideally, seed moisture at harvest is around 16-20% for cutting and field drying, then reduced further for safe storage. In small-scale systems, many growers wait until pods are mostly dry on the plant, then pull whole plants and finish drying under cover if weather threatens.
Timing is critical. Harvest too early and seeds are immature, soft, and prone to wrinkling during drying. Harvest too late and pods may shatter, especially after cycles of dew and afternoon heat. Weathered pods also raise the risk of stained seed coats and mold. If rain is forecast at maturity, pulling plants and drying them in a well-ventilated shed can preserve quality.
For hand harvest, cut or pull plants when about 70-90% of pods are dry, bundle loosely, and place them on tarps, racks, or slatted surfaces with good airflow. Cure out of direct rain until pods become brittle. Thresh by beating inside a clean sack, flailing on a tarp, or using a small mechanical thresher. Winnow away chaff with fans or natural breeze.
For best seed quality, final storage moisture should be about 12-14% for short- to medium-term storage and closer to 10-12% for longer storage in cool conditions. Beans stored too moist are vulnerable to mold, heating, and insect infestation; beans stored excessively dry can split more easily during handling. A practical test is that properly dried beans are hard, resist denting with a fingernail, and break rather than mash when struck.
Store in airtight containers or pest-proof bins in a cool, dark, dry place. Ideal storage temperatures are below 60°F (16°C), with low relative humidity. Use food-safe buckets, glass jars, or metal bins for smaller lots. Freeze seed lots for several days before long storage if bean weevils are a concern, then return them to dry storage. Label containers with cultivar and harvest date.
If saving seed for replanting, select only healthy, true-to-type plants from disease-free areas of the field. Dry seed carefully, avoid cracked coats, and store under cool, stable conditions. Viability generally remains good for several years if moisture and temperature are kept low.
Companion Planting for Pinto Bean
Pinto bean fits naturally into diversified plantings because it fixes nitrogen, has a modest canopy, and benefits from crops that improve spatial use or pest balance without creating heavy shade. One traditional pairing is with Corn, which can act as a structural neighbor in mixed systems, though pinto bush types are less climbing-oriented than pole beans. In larger plantings, keep corn far enough away to prevent excessive shading and competition for moisture.
Carrot is a useful companion because it occupies a different root zone and does not demand the same canopy space. Radish can help mark rows early and may loosen the surface soil, making early cultivation easier. Nasturtium is often included near bean plantings as a trap and habitat plant that can help attract beneficial insects while adding diversity around the crop edge.
Avoid placing pinto beans immediately next to alliums in dense intercrops if the goal is maximum bean vigor, as onions and garlic are commonly reported by growers to be less harmonious neighbors for beans, especially in tightly spaced beds. Also avoid crowding beans with tall, aggressive feeders that create persistent shade and humidity.
The best companion strategy is functional rather than folkloric: combine pinto bean with crops that use different rooting depths, allow airflow, and simplify cultivation and harvest. In dry climates, interplanting should still preserve enough spacing that each bean plant receives sun and the canopy dries quickly after irrigation or rain.