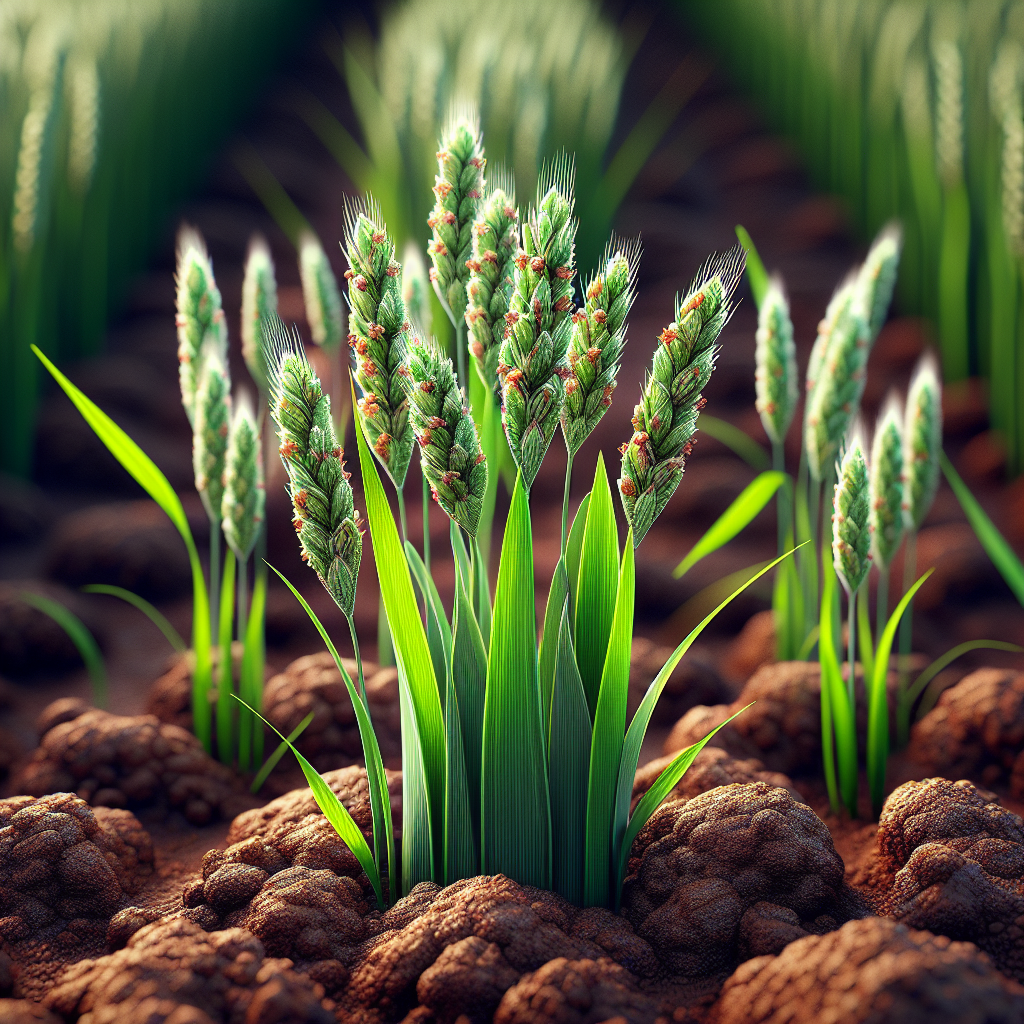
Introduction to Little Millet
A hardy annual cereal of the grass family, this crop has long been cultivated in semi-arid and sub-humid regions for grain, fodder, and household food security. It is especially important in traditional rainfed farming because it matures quickly, survives uneven rainfall better than many staple cereals, and can produce acceptable yields under low fertility where crops like Rice are far less reliable.
Historically, little millet has been grown in India, Nepal, Sri Lanka, and parts of Southeast Asia, often by smallholders managing complex mixed farms. Its grain is nutritionally valued for dietary fiber, minerals, and a relatively low glycemic response compared with many refined cereals. Agronomically, it is one of the most forgiving minor millets, but that should not be mistaken for neglect tolerance at every stage. Good establishment, careful weed control in the first month, and harvesting at the correct maturity make the difference between a mediocre stand and a profitable one.
For growers, its biggest strengths are adaptability, modest input needs, and flexibility. It can be direct-sown, line-sown, broadcast in low-input systems, or integrated into intercrops. It also performs well as a catch crop where the rainy season is short. For broader dryland system planning, the principles in this soil health article are especially relevant because steady organic matter and good aggregation directly improve emergence and drought resilience.
Botanical Profile of Little Millet
This species belongs to the Poaceae family and is classified botanically as Panicum sumatrense. It is a tufted, erect annual grass, typically reaching about 30 to 100 cm in height depending on cultivar, soil fertility, plant density, and rainfall. Under poor dryland conditions it may remain short and produce few tillers, while under balanced nutrition and timely rain it can form a denser canopy with stronger productive tillers.
Leaves are narrow, linear, and grass-like, with a fibrous root system that is efficient at scavenging moisture from upper to mid soil layers. The inflorescence is a panicle, usually slender to moderately open, bearing many tiny spikelets. The grain is very small, round to slightly oval, and enclosed in a thin husk. Seed color varies from pale cream to grayish or straw-toned depending on line and growing conditions.
Botanically and agronomically, the crop is often compared with other small millets, but it differs in growth habit, grain size, and adaptation. It is generally shorter-duration than some traditional cereals and well suited to dry seeding before rains or sowing at monsoon onset. Many local landraces show remarkable adaptation to regional stresses such as poor soils, erratic rainfall, or specific culinary preferences. Improved cultivars have typically been selected for uniform maturity, reduced lodging, and higher grain recovery after dehusking.
A key growth feature is its early vulnerability followed by later toughness. Seedlings are small and not strongly competitive at first, which is why early weed management is critical. Once established, the crop develops reasonable stress tolerance and can finish its life cycle with much less water than major cereals. Flowering and grain filling, however, remain sensitive stages; severe moisture stress at these times can sharply reduce grain set and test weight.
Soil, pH, and Climate Requirements for Little Millet
This crop grows best in well-drained loam, sandy loam, or light clay loam, but one of its major advantages is its ability to perform on relatively poor soils where other cereals struggle. Ideal soils are friable, moderately fertile, and free from prolonged waterlogging. Heavy clays can be used if drainage is improved, but standing water for more than 24 to 48 hours during seedling establishment can cause patchy emergence, root stress, yellowing, and eventual stand loss.
The preferred soil pH is roughly 5.5 to 7.5, with an optimum around 6.0 to 7.0. It tolerates mildly acidic soils better than many crops, though strong acidity below pH 5.2 may reduce nutrient availability and root vigor. In alkaline soils above pH 8.0, micronutrient deficiencies, particularly iron and zinc, may appear as pale young leaves or interveinal chlorosis. Where pH is too low, agricultural lime should be incorporated several weeks before sowing. Where pH is high, organic matter additions, localized micronutrient correction, and avoiding excessive phosphorus tie-up become more important than attempting rapid bulk pH correction.
Climatically, it is best suited to tropical and subtropical regions, especially where daytime temperatures remain between 25 and 32°C during vegetative growth. Germination is strongest when soil temperatures are at least 20°C. Below about 18°C, emergence becomes slow and uneven. Frost is highly damaging, and even cool spells during early growth can reduce vigor. The crop is generally grown under rainfall conditions of about 350 to 900 mm, but distribution matters more than total amount. A modest but well-distributed rainy season often outperforms a heavier season with long dry gaps followed by flooding.
Moisture management is especially important despite the crop's drought reputation. The ideal root-zone condition is moist but aerated soil, not sticky saturation. In practical terms, the top 5 cm of soil should be moist enough to crumble when squeezed rather than forming a wet paste. During germination and emergence, the seed zone should not dry out completely for more than a day or two. During vegetative growth, allowing the upper surface to dry slightly between rains or irrigations is acceptable and even beneficial for root aeration. During flowering and grain filling, prolonged wilting by late morning, leaf rolling, or a dull bluish-gray canopy indicate stress severe enough to reduce yield.
Signs of overwatering include yellow lower leaves, weak tillers, a sour smell in the soil, algae or moss on the soil surface in dense stands, and easy uprooting from shallow, oxygen-starved roots. The crop does not respond well to poorly drained basins or continuous flood irrigation. If supplemental irrigation is used, lighter, well-timed applications are better than infrequent deep inundation.
Step-by-Step Planting & Propagation
Propagation is by seed. Because the seed is very small, land preparation and sowing depth matter far more than many growers expect.
Select clean, viable seed from a reliable source. Seed should be bold, uniform, and free of inert matter, weed seed, and fungal discoloration. If using farm-saved seed, winnow thoroughly and test germination before planting. A simple germination test using 100 seeds on moist cloth can quickly reveal whether seed lot performance is acceptable.
Prepare a fine, firm seedbed. One deep plowing followed by 2 to 3 harrowings is usually sufficient in field conditions. The goal is not powdery dust, but a leveled surface with fine tilth in the top few centimeters and enough firmness underneath to keep seed from sinking too deeply after rain. In dryland systems, final tillage should conserve moisture rather than expose wet subsoil unnecessarily.
Incorporate well-decomposed farmyard manure or compost before sowing, ideally 2 to 5 tons per acre equivalent in low-fertility soils, adjusted to local practice. Fresh manure should be avoided immediately before seeding because it can increase weed flushes and create uneven nitrogen release.
Treat seed if disease pressure is known. In organic systems, biocontrol seed treatments based on Trichoderma or similar beneficial organisms can help suppress seedling diseases. Ash coating is sometimes used traditionally to improve seed flow and distribution during sowing.
Time sowing to dependable moisture. In rainfed farming, sow at the onset of monsoon or just before a forecast soaking rain. In irrigated production, pre-irrigate, allow the soil surface to settle, then sow into moist ground. Delayed sowing usually shortens the effective growing window and exposes flowering to late-season moisture stress.
Use line sowing whenever possible. Recommended row spacing commonly ranges from 20 to 30 cm, with shallower in poorer soils and wider where intercrops or mechanical weeding are planned. Seed rate varies by method, but line sowing typically uses less seed than broadcasting and produces better stand uniformity.
Sow shallowly, generally 1 to 2 cm deep. This is critical. Seed placed deeper than 3 cm often emerges poorly or unevenly, especially in crusting soils. After sowing, a light covering with soil or a brush harrow pass is usually enough.
Thin if needed. Once seedlings reach a few true-leaf stages, maintain moderate spacing within the row so plants can tiller without excessive competition. Overdense stands produce weak, thin stems and smaller panicles.
Establish drainage immediately. Even at planting, ensure excess rain can leave the field. Broad beds, shallow drains, or slight ridging can be useful in heavier soils.
Under favorable warm conditions, emergence may begin within 4 to 7 days. Patchiness at this stage usually points to deep sowing, crusted soil, poor seed quality, ant or bird predation, or lack of uniform seed-zone moisture.
Care & Maintenance regimes for Little Millet
Nutrient management should match realistic yield goals. Although this crop can survive on poor soils, survival is not the same as profitable production. A balanced approach usually includes organic matter plus modest nitrogen, phosphorus, and potassium based on soil test results. Excess nitrogen should be avoided because it can encourage lush weak growth, lodging, and delayed maturity, especially in fertile fields or high-rainfall seasons.
A practical program in low-input systems is to apply all compost or manure before sowing, most phosphorus and potassium basally, and split nitrogen into two doses: one at sowing or shortly after establishment and the second at early tillering. If rainfall is unreliable, avoid topdressing before a long dry spell because nitrogen may be lost or remain unavailable until too late.
Weed control is the single most important maintenance task in the first 25 to 35 days. Seedlings are not strongly competitive, and early weed pressure can reduce yield drastically. The first weeding is usually best done 15 to 20 days after emergence, followed by a second weeding around 30 to 35 days if needed. Line sowing allows wheel hoe or hand hoe use, which is often far more effective than late hand pulling in broadcast stands. Once canopy closure improves, later weed pressure usually declines.
Water management in irrigated or supplemental systems should focus on critical stages rather than frequent watering. After sowing, maintain consistent moisture in the topsoil until establishment. During vegetative growth, irrigate only when the root zone has dried moderately; a simple field check is that soil from 5 to 10 cm depth should feel slightly cool and weakly cohesive, not powder-dry and not saturated. The most important irrigation windows are active tillering, panicle initiation, flowering, and grain filling. If water is limited, prioritize flowering and early grain fill. Moisture stress then can cause partial sterility, poor grain filling, and lightweight seed.
Common field indicators help guide decisions. Healthy plants show upright leaves in the morning, good green color without excessive dark lushness, and steady tiller development. Water stress shows as midday rolling leaves, slowed growth, and premature lower-leaf drying. Nutrient deficiency may appear as pale overall color for nitrogen, purpling in stressed young plants where phosphorus is unavailable, or marginal scorching in potassium-deficient soils. Lodging risk rises when growth becomes very soft from excess fertility combined with rain and wind.
Crop rotation improves overall performance. Avoid repeated millet-on-millet planting if disease, weeds, or nutrient depletion are rising. Rotating with legumes such as Chickpeas or Peas can improve soil structure and help rebalance nitrogen dynamics. In drier belts, inclusion after pulses often improves millet establishment because weed pressure and residual fertility are more manageable.
Pests, Diseases & Organic Management
This crop is relatively resilient but not immune to biological stress. Pest and disease incidence depends heavily on local ecology, planting time, humidity, cultivar, and field sanitation.
Among insect problems, shoot fly, stem borers, armyworms, and earhead feeders can occur in some regions. Seedlings damaged by shoot fly may show deadhearts, where the central shoot dries and pulls out easily. Stem borer injury can cause similar symptoms later. earhead caterpillars or grain-feeding insects reduce grain quality near maturity. Bird damage can also be significant during milk to dough stage because the small exposed grain is attractive and easy to remove.
Organic management starts with prevention. Timely sowing helps the crop avoid peak pest windows. Clean field borders reduce alternate hosts. Balanced fertility prevents overly succulent growth that attracts certain insects. Mixed stands and border plantings with Sunflower can sometimes help divert bird attention or support beneficial insects, though placement should be strategic to avoid additional competition.
For organic suppression, encourage natural enemies by maintaining habitat strips, avoiding broad-spectrum sprays, and using neem-based products when thresholds are reached. Light traps and pheromone systems may help monitor moth activity in diversified farms. In small fields, deadheart-affected seedlings can be removed early to reduce localized pest buildup.
Disease issues commonly include smut, rust, leaf blight, and seedling damping-off under wet conditions. smut may appear as abnormal grain structures replaced by dark fungal masses. rust presents as orange-brown pustules on leaves, especially in humid weather. leaf blight causes elongated necrotic lesions that reduce photosynthetic area. Damping-off is most likely in poorly drained, overwatered, or heavily crusted seedbeds with weak seed vigor.
Organic disease management relies on clean seed, crop rotation, drainage, moderate plant density, and sanitation. Never save seed from heavily smutted or blighted fields. Remove volunteer cereals and grassy weeds that can harbor pathogens. Avoid overhead irrigation late in the day where disease pressure is high. Biocontrol seed treatments and composts that are fully matured rather than raw can reduce early root-zone problems.
Physiological problems are often misread as disease. Yellowing from saturated soil, reddening from phosphorus lock-up in cool or acidic ground, and stunting from hardpan or crusting should be ruled out before treatment. Good diagnosis matters because the remedy for root suffocation is drainage, not spraying.
Harvesting, Curing & Optimal Storage
Harvest timing determines both grain quality and shattering loss. The crop is generally ready when panicles and upper stems turn straw-colored, grains become hard, and most seed has passed the dough stage into full maturity. Depending on cultivar and environment, this may occur around 80 to 120 days after sowing. Uniform maturity is not always perfect, especially in fields with uneven rainfall or fertility, so growers often harvest when the great majority of panicles are mature but before excessive shattering or bird loss begins.
To test readiness, rub grains from several representative panicles. Mature grain should be firm and not easily dented by fingernail pressure. If too many grains are still soft, wait a few more days if weather allows. If rain or bird pressure is increasing, slightly earlier cutting followed by careful curing may be the safer option.
Plants are usually cut by sickle, tied in small bundles, and dried on a clean tarp, threshing floor, or raised platform. Avoid direct contact with damp soil because the tiny grains are difficult to recover once mixed with dirt. Bundles should be oriented to allow air movement. In humid weather, turn them regularly. Proper field curing reduces grain moisture before threshing and lowers the risk of mold and discoloration.
Threshing can be done by beating, trampling under controlled clean conditions, or mechanical threshing adjusted for small grains. Because little millet seed is light, careful winnowing is essential to remove chaff without blowing out saleable grain. Over-threshing can crack grain and reduce storage life.
For safe storage, grain should be dried to about 10 to 12% moisture, and for long-term storage closer to 9 to 10% is better where humidity is high. A practical farmer test is that grains bitten between the teeth are hard and brittle rather than chewy, but a moisture meter is far more reliable. Store only clean, fully dried grain in airtight bins, food-grade drums, or well-sealed bags placed on pallets above the floor. The storage room should be cool, dry, rodent-proof, and protected from roof leaks and condensation.
Check stored grain every 2 to 4 weeks in warm climates. Warning signs of trouble include heating, condensation inside containers, musty odor, webbing, powdery residues, or live insects. If grain was stored slightly too moist, insects and molds can multiply quickly. Sun-drying for a few hours on a dry day and re-bagging in clean containers can rescue a lot before severe loss occurs.
Companion Planting for Little Millet
In traditional low-input systems, this crop is often grown with legumes rather than as a pure stand. The best companions are species that improve biological diversity, spread risk, and do not overwhelm the millet during early growth. Good companions generally occupy a different canopy layer, root depth, or nitrogen niche.
Peas are useful in cooler or transitional environments where the season allows overlap without excessive shading. They can contribute nitrogen indirectly through system cycling and help diversify production. Chickpeas fit especially well in rotations or relay systems rather than dense simultaneous sowing in wetter conditions, but in drier regions they are valuable partners in millet-based dryland farming.
Sunflower is another useful companion or border crop. It attracts pollinators and beneficial insects, can act as a visual windbreak in small plots, and diversifies marketable output. However, it should be planted at moderate density and usually on borders or wider rows so it does not shade the millet heavily during panicle development.
Clover can be used more as a living understory or rotational associate than a direct full-season intercrop in hot dry zones. In milder climates or during the off-season, it helps protect soil, suppress erosion, and contribute organic matter. The best companion arrangement depends on rainfall, machinery access, and whether the priority is grain yield, fodder, weed suppression, or long-term soil building.
In all cases, avoid pairing with highly aggressive, fast-vining, or very tall crops at full density. Companion systems work best when row spacing, sowing date, and nutrient supply are planned so the millet is not outcompeted in its first month, which is its most vulnerable stage.