Introduction to Hawaiian Ginger
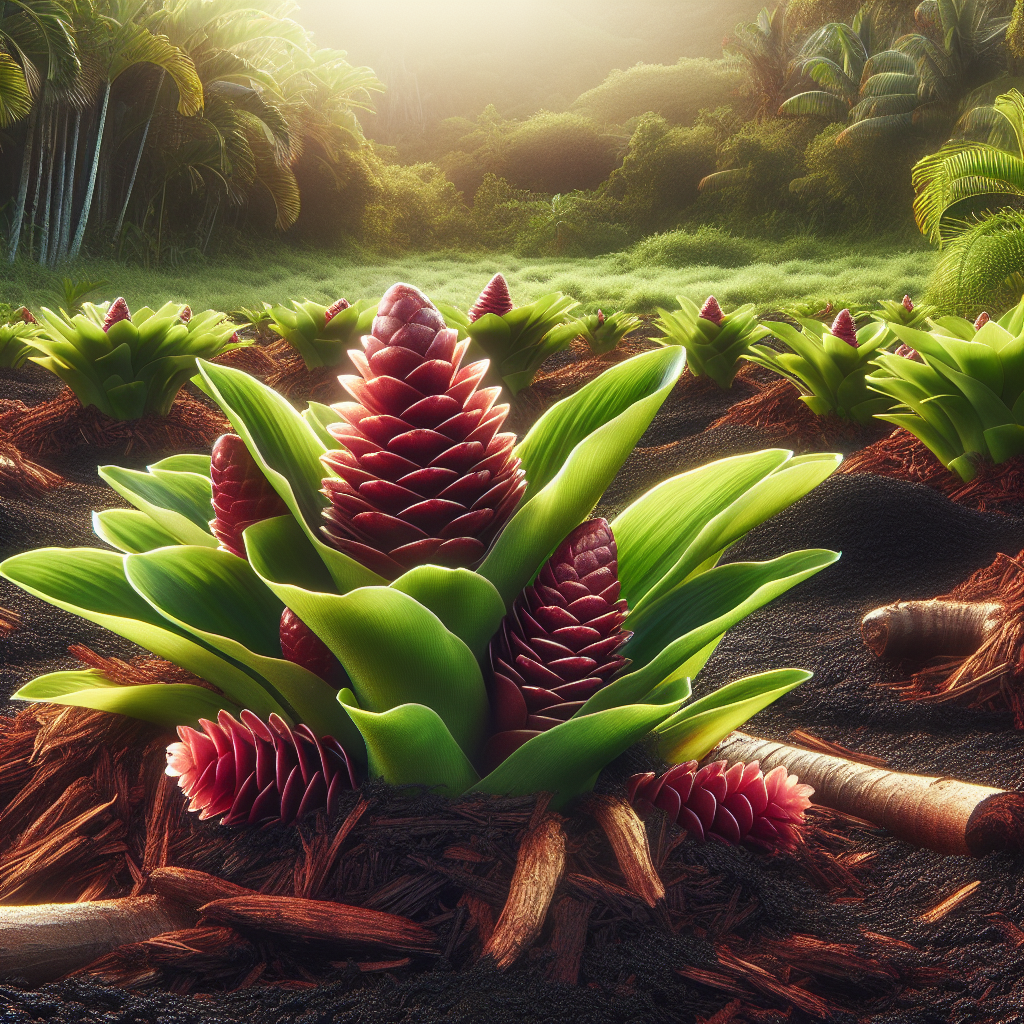
Often called awapuhi in Hawai'i, this plant occupies a unique place between ornamental tropical landscaping and specialty spice production. It is not simply “ginger grown in Hawaii,” but generally refers to shampoo ginger, a true ginger relative with pinecone-like flower heads that fill with fragrant mucilage and a rhizome that is aromatic, fibrous, and more medicinally pungent than standard culinary forms. In warm, humid regions it can naturalize vigorously, producing dense clumps of leafy pseudostems 1.2 to 2.4 meters tall.
For growers, the key to success is understanding that Hawaiian Ginger behaves like a rainforest understory crop during establishment, then like a robust tropical perennial once the root zone is well developed. It thrives where soil stays evenly moist but never stagnant, organic matter is abundant, and temperatures remain consistently warm. If you already grow tropical rhizomes such as Turmeric, many cultural principles will feel familiar, though Hawaiian Ginger is often taller, more shade-tolerant, and somewhat more sensitive to cold shock and waterlogging.
Historically, Zingiber zerumbet spread widely from Southeast Asia through the Pacific, where it became integrated into Hawaiian cultural practice for personal care, lei work, and household medicine. Modern growers cultivate it for nursery trade, cut foliage, niche herbal markets, and specialty landscape production. A commercial planting can therefore serve multiple functions: rhizome harvest, ornamental stem harvest, and ecological ground coverage in humid agroforestry systems.
Botanical Profile of Hawaiian Ginger
This species belongs to the family Zingiberaceae, the same family as culinary ginger, turmeric, cardamom, and galangal. It is a perennial monocot that grows from underground rhizomes, sending up annual leafy shoots known as pseudostems. These pseudostems are formed by tightly wrapped leaf sheaths rather than true woody stems.
The leaves are lanceolate, medium to deep green, and arranged distichously along the pseudostem, giving the plant a graceful, upright appearance. Mature leaves commonly reach 15 to 30 centimeters long, sometimes longer under high shade and rich fertility. The inflorescences emerge on separate leafless stalks from the base or near the rhizome zone. Young cone-like flower heads are green, later turning red or crimson. Between the bracts, a clear fragrant liquid accumulates, which is one of the plant’s best-known features.
Rhizomes are knobby, branched, and often more fibrous than common market ginger. Their aroma is spicy but less lemony and less juicy than culinary ginger. Depending on harvest timing, rhizomes may range from pale cream to yellowish. The species is prized less for fleshy, tender rhizomes and more for aromatic compounds, traditional use, and plant vigor.
Growth follows a seasonal pattern even in the tropics. During warm rainy periods, shoot emergence is rapid and canopy expansion can be dramatic. Flowering usually occurs once plants have built sufficient rhizome reserves, often in midsummer through autumn. In marginal climates, top growth may slow sharply below 18°C and suffer visible stress below 12°C. Frost usually kills foliage and can severely damage or destroy rhizomes if soil temperatures plunge for extended periods.
Soil, pH, and Climate Requirements for Hawaiian Ginger
This crop performs best in deep, friable, humus-rich soil with excellent drainage and high moisture-holding capacity. The ideal texture is a loam to sandy loam enriched with composted organic matter. Heavy clay can work only if raised substantially and amended to improve porosity; otherwise rhizomes are at significant risk of rot. In practical terms, the soil should hold moisture like a wrung-out sponge: consistently damp 5 to 15 centimeters below the surface, but never greasy, sour-smelling, or puddled after irrigation.
Optimal pH is slightly acidic to near neutral, roughly 5.5 to 6.8, with best nutrient availability often seen around 6.0 to 6.5. Below pH 5.2, calcium and magnesium deficiencies may become more likely, and microbial balance can shift unfavorably. Above pH 7.0, iron and manganese uptake may be reduced, leading to interveinal chlorosis on young leaves.
Organic matter is especially important. A preplant incorporation of 5 to 10 kilograms of well-finished compost per square meter creates the loose, biologically active rooting environment this species prefers. In field systems, growers often target 3 to 5% soil organic matter minimum, with higher levels beneficial in sandy tropical soils.
Climatically, Hawaiian Ginger is best suited to tropical and frost-free subtropical zones. Ideal temperatures are 22 to 32°C during active growth. Relative humidity between 60 and 90% supports strong leaf expansion and reduces marginal leaf scorch. Rainfall of 1500 to 3000 millimeters annually is suitable if drainage is excellent. Where rainfall is lower, irrigation must compensate, especially during shoot emergence and rhizome bulking.
Light management is nuanced. The plant tolerates full sun in very humid, high-rainfall environments if root moisture is stable, but usually performs best in bright filtered light or partial shade, especially in hotter inland conditions. About 30 to 50% shade often produces lush foliage with reduced water stress. Too much shade, however, can cause elongated weak stems, delayed flowering, and lower rhizome density.
Wind protection matters more than many growers expect. Because pseudostems are tall and leafy, exposed sites can shred foliage, reduce photosynthetic efficiency, and increase lodging. Planting near windbreaks, mixed tropical hedgerows, or sheltered slopes improves both appearance and yield.
For broader root-zone management principles, see Soil health strategies.
Step-by-Step Planting & Propagation
Propagation is most reliable from healthy rhizome divisions rather than seed. Select vigorous disease-free mother clumps at least one full growing season old. Good planting pieces are 5 to 10 centimeters long and contain 2 to 4 viable buds or eyes. Each section should be firm, aromatic, and free from blackened tissue, soft spots, borer holes, or sour odor.
Before planting, trim away dead roots and allow fresh cuts to dry in shade for 24 to 48 hours. This curing period reduces infection risk. In high-pressure disease areas, dusting cut surfaces with powdered cinnamon or a biological fungicide based on Trichoderma can help protect wounds.
Prepare beds 20 to 30 centimeters high if rainfall is heavy or soil is at all dense. Raised beds are strongly recommended in wet tropics. Work compost into the full bed area rather than only the planting hole, because rhizomes spread laterally. If using a mineral fertilizer program, a balanced preplant application with modest phosphorus and potassium supports early rooting; avoid excessive nitrogen at planting, which can encourage lush but weak early growth.
Plant rhizome pieces horizontally, buds facing up or sideways, 5 to 8 centimeters deep in lighter soils and 4 to 6 centimeters deep in heavier soils. Space plants 45 to 75 centimeters apart within rows, with 75 to 120 centimeters between rows depending on whether the aim is ornamental canopy, rhizome production, or mixed agroforestry. Tighter spacing creates quicker ground cover but higher humidity and disease pressure.
Water immediately after planting to settle soil around the rhizomes. During the first 3 to 6 weeks, keep the planting zone uniformly moist, not saturated. If you dig gently beside a planted piece, surrounding soil should clump lightly in the hand but break apart without releasing free water. Persistent saturation during this phase is a leading cause of failure.
Mulch with 5 to 10 centimeters of leaf mold, shredded bark, straw, or chopped tropical biomass, keeping mulch a few centimeters away from the emerging shoots. Mulch buffers soil temperature, suppresses weeds, and slows moisture swings that stress new rhizomes.
Container propagation is possible for nursery production. Use a wide container rather than a deep narrow one, since rhizomes spread laterally. A mix of coarse compost, coco coir, aged bark, and mineral aggregate such as pumice or perlite is preferable to dense peat-heavy media.
Care & Maintenance regimes for Hawaiian Ginger
Irrigation should be adjusted by growth stage. During emergence and canopy build, the crop needs steady moisture. In practical field terms, aim to keep the upper 15 to 20 centimeters of soil evenly moist, with no more than slight drying in the top 2 to 3 centimeters between waterings. In sandy soils this may mean 2 to 4 irrigations weekly in hot weather; in heavier organic soils, once or twice weekly may suffice.
Signs of underwatering include leaf edge crisping, rolled leaves during midday that fail to reopen by evening, shorter pseudostems, and reduced inflorescence formation. Signs of overwatering include yellowing lower leaves despite moist soil, a fermented smell near the crown, stunted new shoots, and rhizomes that feel soft rather than crisp when cut. If overwatering occurs, stop irrigation until the top 5 centimeters begin to dry, improve drainage channels, and reduce mulch thickness if the soil remains persistently cold and wet.
Nutrient demand is moderate to high where biomass production is strong. Hawaiian Ginger benefits from a fertility program weighted toward nitrogen early, then balanced with potassium through mid to late season for rhizome strength and stress tolerance. A common organic approach is to side-dress every 4 to 6 weeks with compost, vermicompost, or well-aged manure plus a potassium source such as sulfate of potash or kelp-based amendments. Excess nitrogen late in the season can delay tissue hardening and increase susceptibility to soft growth, lodging, and some foliar diseases.
Keep the root zone weed-free, especially during the first 8 to 12 weeks after planting. Because ginger roots occupy the upper soil layers, deep hoeing can sever feeder roots and reduce vigor. Hand weeding, shallow scuffle hoeing, and thick mulch are better options.
Hilling or lightly mounding soil around the base once or twice during the season can protect shallow rhizomes from sun exposure and encourage expansion. Do this gently to avoid burying young shoots too deeply.
Pruning needs are minimal. Remove dead or diseased pseudostems at the base with sanitized tools. In ornamental plantings, thinning a few old stems improves airflow and reduces fungal pressure in humid climates.
In cooler edge climates, container plants should be moved before nights consistently drop below 12°C. In the ground, heavy mulch over the rhizome zone may help in very mild subtropical winters, but prolonged cold still reduces performance sharply.
Pests, Diseases & Organic Management
The greatest production risks usually come from root and rhizome diseases rather than leaf-feeding insects. Poor drainage predisposes plants to Pythium, Fusarium, and bacterial soft rots. Symptoms include sudden yellowing, stem collapse, foul-smelling tissue, and brown water-soaked rhizomes. Prevention is far more effective than treatment: plant only clean divisions, avoid overirrigation, use raised beds, rotate away from infected sites for several years, and never replant suspect rhizomes.
leaf spot fungi may appear under crowded, humid conditions, causing brown or tan lesions with yellow halos. Improve spacing, remove badly affected foliage, irrigate early in the day so leaves dry quickly, and avoid overhead watering where disease pressure is high.
Common insect pests include aphids, mealybugs, spider mites in drier conditions, caterpillars, and occasionally rhizome-boring larvae. aphids and mealybugs often colonize tender growth and can also encourage sooty mold through honeydew. A strong water spray, release of beneficial insects, and repeated use of insecticidal soap or neem-based products can suppress populations if applied thoroughly to undersides and leaf sheaths.
slugs and snails may attack young shoots in wet shaded gardens. Hand trapping, iron phosphate baits, and reduction of excessive surface debris near tender emergence points are effective.
nematodes can be an issue in tropical soils, especially where continuous monocropping occurs. Soil solarization, heavy compost use, mustard cover crops where appropriate, and rotation with non-host or suppressive species help lower pressure. Clean planting stock remains essential.
Sanitation is the backbone of organic management. Remove spent, collapsed stems promptly. Disinfect cutting tools. Never compost obviously diseased rhizomes unless the compost system is hot enough to ensure pathogen kill. Maintain moderate airflow and avoid creating a permanently swampy mulch layer at the crown.
Harvesting, Curing & Optimal Storage
Harvest goals determine timing. For foliage and ornamental use, stems can be cut selectively once clumps are mature and vigorous. For fragrant flower heads, harvest when cones are fully colored but still fresh and hydrated. For rhizomes, most growers wait 8 to 12 months after planting, or until top growth begins to slow and some stems naturally yellow, indicating carbohydrate reserves have moved below ground.
Young rhizomes are milder, paler, and less fibrous. Mature rhizomes are more pungent, more aromatic, and better suited to drying, extraction, or medicinal processing. To harvest, loosen soil widely around the clump with a digging fork rather than pulling directly on the stems. Lift the mass carefully, then break or cut rhizomes apart.
Wash gently but thoroughly. Avoid bruising, because damaged tissue deteriorates quickly in humid environments. Sort immediately: keep only firm, unblemished rhizomes for storage or propagation. Set aside the best disease-free sections with visible buds for replanting.
Curing is useful when rhizomes will be stored for short-term planting stock or dried processing. Air-dry cleaned rhizomes in shade with strong ventilation for several days until the surface is dry and minor abrasions have callused. Do not cure in direct sun, which causes rapid moisture loss and shriveling.
For fresh storage, hold at about 12 to 15°C with relative humidity near 65 to 75%. Colder temperatures can cause chilling injury; warmer storage encourages sprouting and decay. Never seal fresh rhizomes in airtight plastic while surface moisture is present. Use ventilated crates or perforated bags.
For drying, slice uniformly and dehydrate at low to moderate temperatures until pieces are brittle. Properly dried product should snap cleanly and show no leathery interior. Store dried rhizome in airtight containers away from light and heat.
Companion Planting for Hawaiian Ginger
In tropical polycultures, this crop benefits from neighbors that provide light shade, living mulch functions, or beneficial insect support without aggressively competing in the same shallow root zone. Banana is an excellent upper-canopy companion in humid climates because it creates filtered light, recycles biomass through leaf litter, and shares similar water and fertility expectations. Papaya can also work in warmer sites where spacing is generous and airflow remains open.
At the herbaceous layer, Thai Basil is useful near bed edges because its flowers attract pollinators and beneficial insects while adding a harvestable intercrop. Taro can pair well in wetter tropical systems, though it should only be combined where drainage is carefully zoned so the ginger root area does not remain waterlogged.
Avoid pairing with highly aggressive spreaders that smother emerging shoots or with heavy feeders planted too densely in the same row. Also avoid companions that demand frequent deep cultivation, since Hawaiian Ginger resents disturbance around its rhizomes.
A successful companion plan uses vertical layering: taller tropicals for filtered light, mid-story aromatics for pest balance, and organic mulches or low living covers to stabilize soil moisture. The best partnerships are those that protect the root zone while preserving air movement through the canopy.