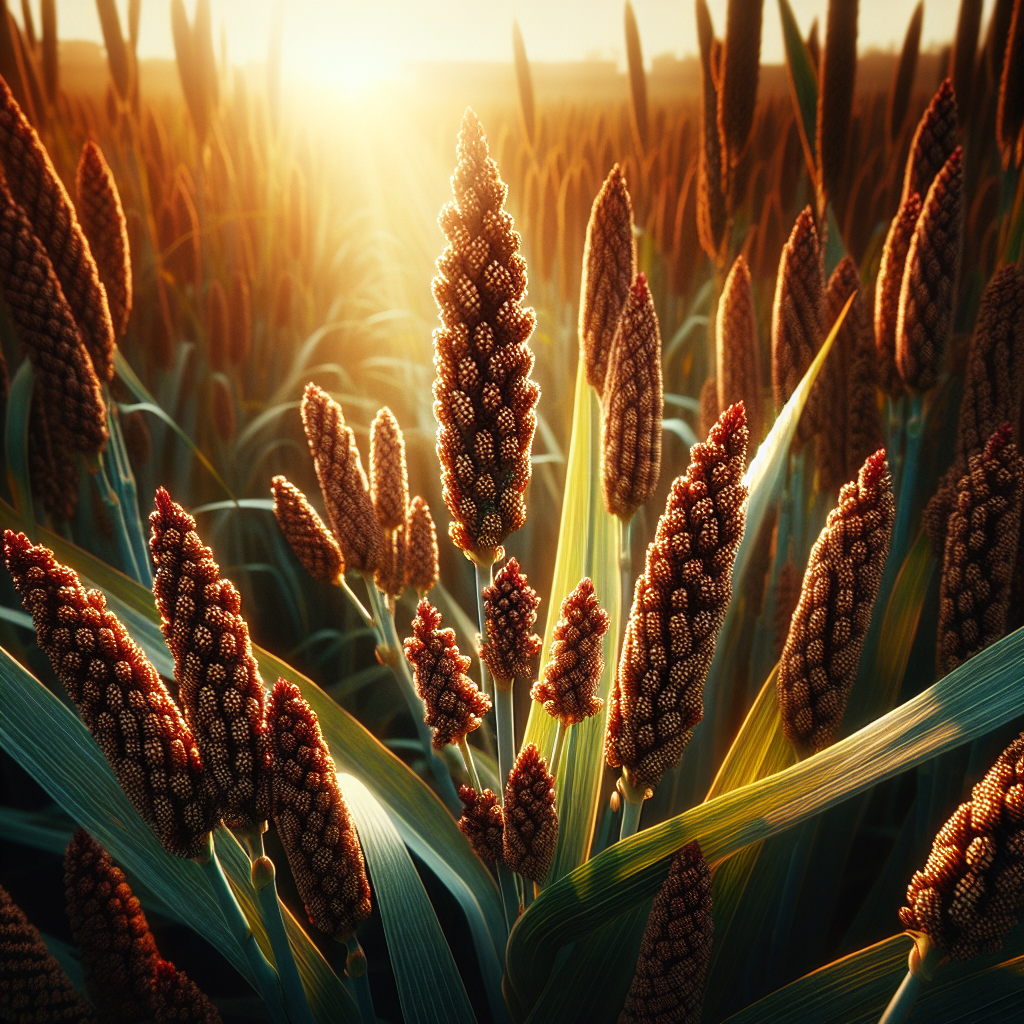
Introduction to Finger Millet
A staple grain with ancient roots, this crop has been cultivated for thousands of years in eastern Africa and the Indian subcontinent, where it remains important in both subsistence farming and climate-resilient agriculture. It is especially respected for its ability to produce grain under low-rainfall conditions, on relatively poor soils, and at elevations ranging from semi-arid lowlands to cool tropical uplands. The grain is small, hard, and remarkably storable when properly dried, which is one reason it has historically served as a famine-reserve cereal.
The crop gets its common name from the distinctive inflorescence, whose spikelets radiate like fingers from the head. Agronomically, it is a short-duration to medium-duration cereal, typically maturing in about 90 to 130 days depending on cultivar, sowing season, and environment. Compared with Rice, it demands far less standing water and tolerates intermittent dry spells much better, though yield still improves substantially under good moisture management.
For growers, one of its greatest strengths is flexibility. It can be direct-seeded, line-sown, dibbled, or transplanted from a nursery. It can be grown as a sole crop, relay crop, or intercrop with legumes. It is suitable for grain, fodder, and sometimes dual-purpose systems where straw is retained for livestock. The key to high performance is not simply its natural hardiness, but managing establishment carefully so the crop does not lose its early competitive edge to weeds.
Botanical Profile of Finger Millet
This species belongs to the Poaceae family and is a tufted annual grass. Plants usually reach 30 to 150 cm in height depending on variety, soil fertility, and rainfall. It develops a fibrous root system that is relatively efficient at exploring upper soil layers, though deep, well-structured soils allow more stable moisture extraction and better tillering.
Leaves are narrow, linear, and grass-like, with green to slightly bluish-green blades. Tillering capacity varies by genotype and plant spacing. Under low-density conditions with adequate nutrients, a single plant may produce multiple productive tillers; under dense broadcasting, fewer effective tillers form and panicle size may be reduced.
The inflorescence is a digitate head composed of 4 to 19 spikes, though 5 to 9 is common in many farmer-preferred types. Each spike bears numerous tightly packed florets that mature into very small round seeds. Grain color varies from white and tan to red, brown, and dark reddish-purple. Darker seeded types are often associated with stronger flavor and, in some regions, better storage reputation.
Flowering is usually self-pollinated, which helps maintain varietal stability. This makes seed saving more practical than in many cross-pollinated cereals, provided the grower rogued out off-types before flowering. The crop is generally categorized into race groups such as vulgaris, plana, elongata, and compacta based on head shape and spike arrangement, a useful detail when selecting varieties for threshability, grain size, and adaptation.
Cultivar choice matters. Early varieties are preferred in drought-prone areas or where the crop must fit between other seasonal plantings. Medium to late varieties may yield more under reliable rainfall or irrigated conditions. Some types are selected for blast tolerance, lodging resistance, compact heads for easier harvest, or higher straw yield in mixed crop-livestock systems.
Soil, pH, and Climate Requirements for Finger Millet
This crop thrives best in well-drained loam to sandy loam soils, but one reason it is so important globally is that it can still produce on light, gravelly, or moderately degraded land where other cereals fail. The ideal soil is friable, moderately fertile, and able to hold enough moisture for uniform germination without becoming waterlogged.
Optimal soil pH is about 5.5 to 7.5. It tolerates mildly acidic soils better than many cereals, but strongly acidic conditions below pH 5.0 may reduce nutrient availability, root development, and seedling vigor. In very acidic soils, aluminum toxicity and phosphorus fixation can become major hidden constraints. If pH is too low, liming several weeks before sowing can improve stand establishment. In alkaline soils above pH 8.0, micronutrient deficiencies, especially zinc and iron, are more likely.
Although often called drought tolerant, it should not be misunderstood as drought proof. The crop performs best with 500 to 1000 mm of well-distributed rainfall over the season. It can survive lower totals if rainfall coincides with germination, tillering, flowering, and grain filling. Long dry spells during flowering can sharply reduce grain set. Conversely, persistent saturation around the root zone can lead to chlorosis, weak roots, poor tillering, and disease pressure.
Ideal temperatures for growth are generally 24 to 30°C. Germination is strongest when soil temperatures are above 18°C. Growth slows markedly in cool conditions below 15°C, and frost is damaging. In tropical highlands, the crop can perform very well because warm days and moderate nights favor steady vegetative growth and grain filling. In hot lowland conditions above 35°C, heat stress during flowering may reduce seed formation, especially if combined with moisture stress.
Drainage deserves special emphasis. Temporary surface wetness after heavy rain may be tolerated, but standing water for more than 24 to 48 hours in seedling stages often causes patchy mortality. If roots are deprived of oxygen, leaves may turn pale green to yellow, lower stems soften, and growth becomes stunted. Raised beds or broad beds with drainage channels are especially useful in clay soils or monsoon regions.
Organic matter between 1.5% and 3.5% is generally favorable. More important than total organic matter is structure: the soil should crumble rather than smear when moist. For building resilient cereal fields, see soil health tips.
Step-by-Step Planting & Propagation
Propagation is by seed. High-quality seed should be fully mature, uniform in color, free of mold, and sourced from disease-free plants. Because the seed is tiny, careful handling during sowing is critical. Poor placement is one of the main causes of uneven stands.
Prepare the field to a fine but not powdery tilth. The seedbed should be level, weed-free, and lightly firmed so seed does not sink too deeply after rain or irrigation. Excessively fluffy soil causes uneven emergence.
Incorporate well-decomposed compost or farmyard manure before final harrowing, usually 2 to 5 tons per hectare depending on soil condition. Fresh manure should be avoided immediately before sowing because it can encourage weeds and uneven nutrient release.
Choose one of three establishment methods:
- Direct broadcasting for low-input systems, though this usually complicates weeding and gives less uniform spacing.
- Line sowing in rows 20 to 30 cm apart, preferred for better weed control and nutrient efficiency.
- Nursery raising followed by transplanting, common in parts of South Asia where rainfall onset is uncertain or fields are heavily weed-prone.
For direct sowing, mix seed with dry sand, ash, or fine compost to improve distribution. Typical seed rate is about 8 to 12 kg/ha for line sowing and 12 to 15 kg/ha for broadcasting. Transplanted systems may use less seed.
Sow shallowly, ideally 1 to 2 cm deep. Seed placed deeper than 3 cm often emerges weakly or fails altogether. After sowing, lightly cover with fine soil and press gently for seed-soil contact.
If transplanting, raise seedlings in a nursery bed for 18 to 25 days. Transplant when seedlings are sturdy but not root-bound, usually at the 3- to 4-leaf stage. Space plants around 10 cm within rows and 20 to 25 cm between rows, adjusting for variety and fertility level.
Provide a light irrigation immediately after sowing if soil moisture is insufficient. The top 3 to 5 cm should remain evenly moist until emergence. Crusting after rain is a common problem on silt-heavy soils; shallow raking between rows may help if emergence is impeded.
Germination usually occurs in 4 to 8 days under warm conditions. The most common early failure points are seed buried too deep, crusted soil, seed washed into depressions, and weed competition during the first 3 weeks.
Care & Maintenance regimes for Finger Millet
Moisture management should follow growth stage rather than a fixed calendar. During germination and early seedling establishment, maintain consistent moisture in the upper root zone. The soil should feel slightly damp but never sticky or anaerobic. If squeezed in the hand, it should form a weak ball that crumbles easily. Overwatering at this stage causes stem weakening, yellowing, and patchy damping-like losses.
After establishment, allow the surface to dry slightly between irrigations while maintaining moisture deeper in the profile. The crop is more tolerant of moderate drying at vegetative stages than at flowering. On medium-textured soils, irrigation is often most beneficial at these critical stages:
- establishment,
- active tillering,
- panicle initiation,
- flowering,
- early grain filling.
Avoid severe stress at flowering. Signs include rolled leaves by mid-morning, bluish-green foliage, shortened heads, and poor grain set. However, constant wetness is equally harmful. Symptoms of excess water include pale leaves, reduced tiller formation, blackened fine roots, and a sour smell in the soil.
Nutrient management should be balanced. The crop responds well to nitrogen, but excessive nitrogen creates lush growth, delayed maturity, and lodging risk, especially in fertile fields. As a general guide, low-input fields may receive 20 to 40 kg N/ha, while improved systems may use 40 to 80 kg N/ha split between basal application and topdressing around 25 to 35 days after sowing. Phosphorus is particularly important for early root development, and potassium supports lodging resistance and grain filling.
A practical approach is to apply all phosphorus and potassium basally, with nitrogen split into two doses. Where manure is used, reduce synthetic nitrogen accordingly. If leaves remain uniformly pale green and growth is slow despite adequate moisture, nitrogen deficiency is likely. If lower leaves show purpling in cool or acidic soil, phosphorus may be limiting.
Weed control is the single most important maintenance practice in the first month. The crop is a poor competitor when young because seedlings are small and slow to canopy. Keep the field clean from about 15 to 35 days after sowing. Two weedings, often at 15 to 20 days and again at 30 to 35 days, are common in professional production. Line sowing enables wheel hoe or hand hoe cultivation, which is usually more effective than hand pulling alone.
Thinning may be necessary in direct-seeded rows. Overcrowded stands produce thinner stems and smaller heads. Aim for uniform plant spacing once seedlings are established. In high-fertility or irrigated systems, slightly wider spacing improves air movement and reduces disease risk.
Lodging management depends on variety, nitrogen level, and wind or rain exposure. Avoid late nitrogen applications, especially after panicle initiation. In fertile fields, moderate spacing and adequate potassium help keep stems upright.
Pests, Diseases & Organic Management
The most serious disease in many production areas is blast, caused by Magnaporthe or related Pyricularia species. It can affect leaves, nodes, necks, and fingers. Neck blast is especially damaging because it blocks grain filling. Early signs include spindle-shaped lesions on leaves with gray centers and darker margins. Severe infection around heading can leave panicles partially empty or whitened.
Organic management of blast starts with prevention: use tolerant varieties, avoid excessive nitrogen, maintain good spacing, destroy infected residues where disease pressure is high, and do not save seed from heavily infected fields. Seed treatment with hot water or approved biological protectants may reduce seed-borne inoculum. Balanced nutrition, especially sufficient silicon in some soils and adequate potassium, often improves plant resilience.
seedling blights and damping issues are more common in poorly drained nurseries or overly wet direct-seeded fields. Use raised nursery beds, avoid thick sowing, and water lightly rather than heavily.
Common insect pests include shoot fly, stem borers, earhead caterpillars, aphids, and occasional armyworms depending on region. Bird damage can be significant at milk to dough stage, especially in small plots near hedgerows.
Organic management principles include:
- timely sowing so the crop escapes peak pest windows,
- clean field borders to reduce alternate hosts,
- encouraging beneficial insects with border plants such as Sunflower and Yarrow,
- neem-based sprays where locally permitted and effective,
- light traps or pheromone traps for monitoring moth pests,
- hand removal of localized caterpillar outbreaks in smallholdings,
- synchronized community planting to reduce staggered pest carryover.
For birds, reflective tape, coordinated scaring, netting in high-value seed plots, or sacrificial border rows can reduce losses. Rodent management should focus on habitat reduction around storage and field edges rather than relying only on reactive control.
Harvesting, Curing & Optimal Storage
The crop is ready for harvest when heads are fully formed, grains are hard, and the panicles shift from green to their mature cultivar color. Lower leaves often begin to dry naturally, and grain at the base and tip of the fingers should be equally firm. Depending on the variety, this usually occurs 3 to 4 weeks after flowering.
Do not harvest too early. Immature grain has higher moisture, poor threshability, and lower storage life. A simple field test is to bite a grain; mature seed is hard rather than soft or milky. Target grain moisture at harvest is often around 18 to 22%, followed by prompt drying.
Harvest may be by cutting whole plants, cutting earheads only, or uprooting and bundling, depending on local practice. In humid weather, small bundles should be stood upright or laid on clean tarps for partial field drying before threshing. Avoid direct contact with wet soil, which increases mold risk.
Threshing can be done by beating dried heads, trampling, or mechanical threshers. Clean grain thoroughly to remove chaff, dust, and shriveled seed. Fine impurities hold moisture and reduce safe storage life.
Dry grain to about 12% moisture for medium-term storage and closer to 10% or below for long-term storage in warm climates. A practical low-tech indicator is that grains should be very hard, flow freely, and not feel cool or damp when held in a closed hand. If using sealed containers, grain must be fully dry; otherwise condensation and fungal spoilage can occur.
Properly dried grain stores extremely well, one of this crop's historic advantages. Use moisture-proof bins, clean sacks on pallets, metal drums, or hermetic bags. Storage areas should be cool, dry, dark, and rodent-proof. Inspect monthly for clumping, insect frass, stale odor, or moisture migration. Seed intended for planting should be kept especially dry and protected from high heat to preserve viability.
Straw should also be dried before stacking if intended for fodder. Wet straw heats internally and molds quickly.
Companion Planting for Finger Millet
This crop fits well into diversified dryland systems, especially where the goal is to spread risk, improve ground cover, and make better use of soil nitrogen. The best companions are generally legumes that do not outcompete seedlings in the first few weeks and that mature on a compatible timeline.
Good companions include Chickpeas, Peas, Soybeans, and Clover. In field-scale systems, legumes can be strip-intercropped or relay-seeded depending on rainfall pattern. Legumes help diversify root architecture, moderate weed pressure, and add biological nitrogen to the wider rotation, though the cereal itself still benefits from direct fertility planning.
Intercropping works best when row geometry is deliberate. For example, alternating 2 to 4 rows of the cereal with 1 to 2 rows of a legume often preserves light interception while allowing access for weeding. Avoid highly sprawling companions that smother young seedlings, and avoid very tall companions that heavily shade the panicles during reproductive stages.
Companion systems are most successful when sowing dates are adjusted so neither species dominates too early. If rainfall is erratic, establish the cereal first and introduce the companion after emergence. In lower-input farms, this often gives more reliable stands than simultaneous broadcasting.
Beyond intercropping, this grain also performs well in rotation after legumes and before root crops or oilseeds. Rotations help suppress disease carryover, improve nutrient use efficiency, and reduce weed shifts common in continuous cereal culture.