Introduction to Clemson Spineless Okra
Developed and popularized in the United States in the early 20th century, this classic okra variety became famous for combining strong yield potential with pods that are far less prickly than older types. The name “spineless” is slightly misleading in a strict botanical sense, because plants may still have some fine hairs on stems and leaves, but the pods are notably smoother and easier to harvest than many traditional cultivars.
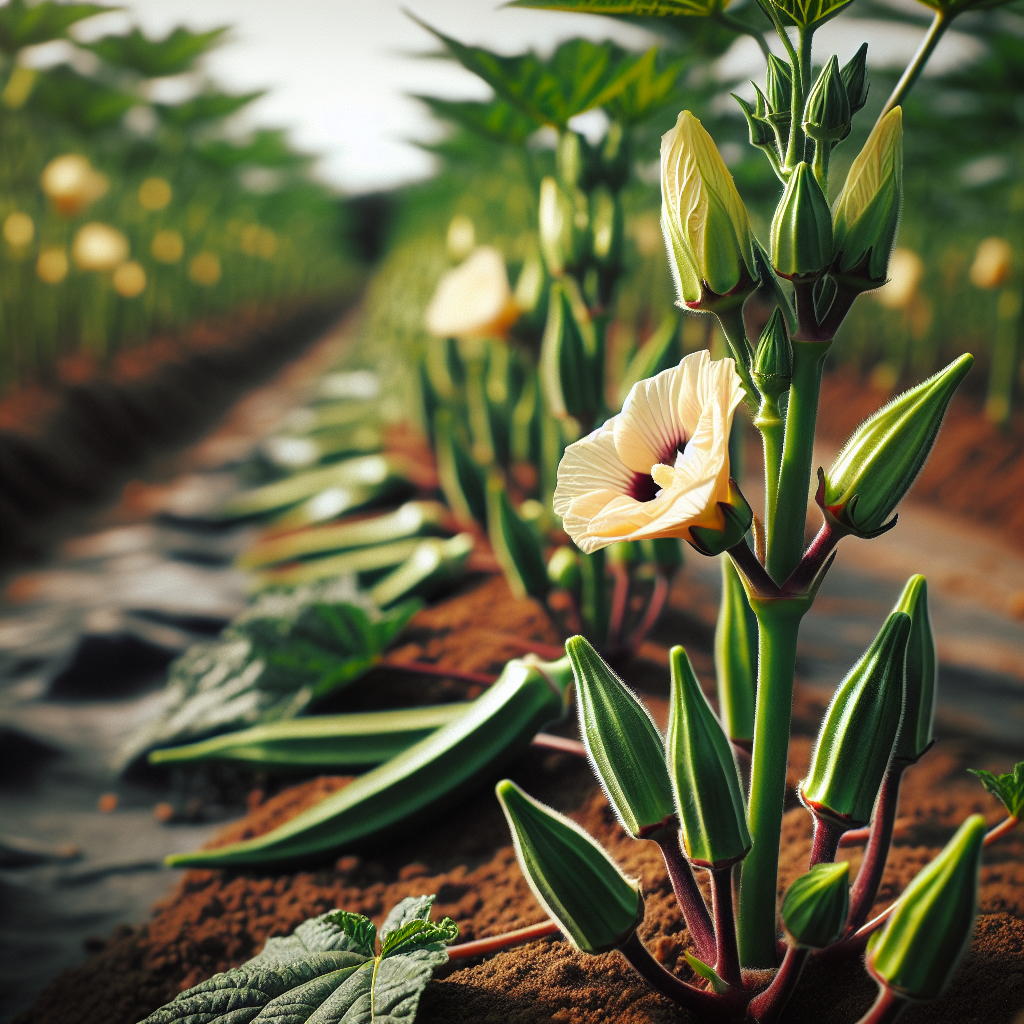
This variety remains a benchmark for summer production because it tolerates intense heat, continues flowering when many cool-season vegetables fail, and produces uniform, marketable pods. Plants are upright, vigorous, and usually reach 4 to 5 feet tall in fertile ground, with attractive hibiscus-like pale yellow flowers marked by a deep maroon center. For growers seeking a reliable warm-season crop, it performs especially well in long, hot summers and can be grown anywhere frost-free conditions last long enough for pod production.
From a culinary perspective, pods are best harvested young at about 3 to 4 inches long, when texture is tender and mucilage is moderate rather than overwhelming. If left too long, pods become fibrous, woody, and better suited for seed saving than fresh use. For broader okra culture basics, see our Okra guide. A useful background read on fertility and structure management is this article on soil health.
Botanical Profile of Clemson Spineless Okra
This crop belongs to the Malvaceae family, the same broad family as hibiscus and cotton, which explains the striking floral form and the preference for warmth. It is botanically a tender perennial in frost-free tropical climates, but almost always grown as a warm-season annual in temperate regions.
Growth is typically erect with a central stem that branches more as fertility and spacing increase. Leaves are large, palmate, and lobed, often 4 to 8 inches across, creating significant transpiration demand in hot weather. Flowers are solitary in the leaf axils and open for a short period, often less than a day, before pod set begins. Pollination is commonly self-sufficient, though bees can improve flower visitation and overall field activity.
Pods are medium to dark green, ridged, tapered, and generally harvested immature. Clemson Spineless is known for relatively uniform pod shape and a harvest pattern that rewards frequent picking. Seeds are round, gray-green to olive-brown when mature, and enclosed in pods that dry hard on the plant if not harvested.
Typical time to first harvest is about 55 to 65 days from sowing under warm conditions. In cooler soils, emergence and development slow dramatically. In ideal heat, plants can move from flowering to harvestable pods in just a few days, which is why missed picking intervals quickly lead to oversized pods.
Soil, pH, and Climate Requirements for Clemson Spineless Okra
This is a heat-loving crop that performs best when daytime temperatures stay between 80 and 95°F (27 to 35°C). Growth slows below 70°F (21°C), and seed germination becomes erratic in cold soil. The minimum practical soil temperature for sowing is about 65°F (18°C), but germination is far faster and more uniform at 75 to 90°F (24 to 32°C). Air temperatures below 55°F (13°C) can stunt seedlings, and frost will kill plants outright.
The best soils are well-drained sandy loams or loams rich in organic matter, with enough depth for a strong taproot system. Although plants tolerate moderate drought better than many vegetables, they are much more productive when moisture is steady and the root zone is loose and aerated. Heavy clay soils can work if amended and formed into raised beds, but poorly drained ground leads to reduced vigor, root stress, and higher disease pressure.
Ideal soil pH is 6.0 to 6.8, though acceptable performance is often possible from 5.8 to 7.2. Below pH 5.8, nutrient imbalances and reduced microbial activity may limit growth. Above pH 7.2, micronutrient issues, especially iron chlorosis, can appear on young foliage. A pre-plant soil test is worth the effort because okra can look superficially healthy while hidden deficiencies reduce flowering and pod set.
Target soil organic matter in the 3 to 5% range for garden production. Excessively rich, high-nitrogen soil can create lush stems and leaves with delayed flowering, so fertility should be balanced rather than maximal. Work in finished compost, not raw manure immediately before planting, especially in humid regions where excess nitrogen and salt can stress seedlings.
Moisture should be consistent in the top 6 to 10 inches of soil once plants are established. A good practical target is soil that feels evenly moist but not sticky or saturated. If you squeeze a handful from the root zone and it forms a weak ball that crumbles when touched, that is usually close to ideal. If it smears, glistens, or stays in a tight lump, the bed is too wet. Overwatered okra often shows pale lower leaves, slowed growth despite wet soil, and sometimes stem stress near the crown. Underwatered plants wilt in midday heat and recover poorly by evening, with pods becoming short, tough, or curved.
Full sun is essential. This crop needs at least 8 hours of direct light daily, and yields are highest in open sites with strong morning sun and good airflow. Shade reduces flowering, stretches internodes, and increases foliar disease risk in humid climates.
Step-by-Step Planting & Propagation
Propagation is almost always by direct seeding. Transplanting is possible, but okra dislikes root disturbance because of its taproot, so direct sowing is preferred whenever the season is long enough.
Prepare the bed 2 to 3 weeks before sowing. Loosen soil to at least 10 to 12 inches deep. Incorporate compost at roughly 1 to 2 inches over the bed surface, then mix thoroughly. If drainage is questionable, form raised rows or beds 6 to 8 inches high.
Wait for true warmth. Sow only after danger of frost has passed and soil has reliably warmed. Planting into cold ground often causes patchy emergence, seed rot, and weak seedlings that never fully catch up.
Improve germination if desired. Okra seed coats are relatively hard. For faster sprouting, soak seeds in room-temperature water for 8 to 12 hours before planting. Do not soak longer than 24 hours, as oxygen deprivation can reduce viability.
Sow at the correct depth. Plant seeds 1/2 to 1 inch deep. In lighter sandy soils, lean toward 1 inch; in heavier soils, stay closer to 1/2 inch. Good seed-to-soil contact matters more than deep burial.
Space generously. Sow seeds 3 to 4 inches apart in rows 3 to 4 feet apart, then thin seedlings to 12 to 18 inches apart once they are a few inches tall. In highly fertile soils where plants become large, 18 to 24 inches may be better. Crowding reduces airflow and makes harvesting difficult.
Water for establishment. After sowing, moisten the bed deeply but gently. Keep the upper inch of soil from crusting during germination. In hot weather, this may mean light irrigation once or twice daily until emergence, then shifting to deeper, less frequent watering.
Thin decisively. When seedlings have 2 to 3 true leaves, remove weaker plants rather than delaying. Early thinning improves stem strength, root expansion, and eventual yield.
Mulch after warm-up. Once seedlings are established and soil is thoroughly warm, apply 1 to 2 inches of clean straw or leaf mulch, leaving a small gap around the stem. Mulch stabilizes moisture, reduces weed competition, and keeps pods cleaner.
For short-season climates, seeds can be started in biodegradable pots 3 to 4 weeks before transplanting, but only move them out when nights are reliably warm and roots have not begun circling. Plant the entire pot carefully to avoid taproot disruption.
Care & Maintenance regimes for Clemson Spineless Okra
Once established, this variety is relatively forgiving, but high performance depends on disciplined irrigation, moderate fertility, and relentless harvest timing.
Watering should shift from frequent shallow applications to deep soaking. A practical target is about 1 to 1.5 inches of water per week from irrigation plus rainfall, increasing in sandy soil or during prolonged heat above 95°F (35°C). During flowering and heavy pod set, the root zone should remain evenly moist to about 6 inches deep. If soil dries severely between irrigations, pods become fibrous sooner and plants may abort blossoms. Drip irrigation is ideal because it keeps foliage dry and reduces disease pressure.
To check moisture professionally, insert a finger or soil probe 4 to 6 inches deep. If the soil at that depth is dry and powdery, irrigate. If it is cool and evenly moist, wait. If it is wet, heavy, and smells sour, reduce watering and improve aeration or drainage. Okra tolerates brief dryness better than prolonged saturation.
Nutrient management should be restrained. Before planting, a balanced organic fertilizer can be applied according to soil test results. If no test is available, a modest pre-plant rate emphasizing phosphorus and potassium over heavy nitrogen works well. Once plants reach 12 to 18 inches tall, a light side-dress of compost or balanced fertilizer can support continued flowering. If foliage is dark green and lush but flowering is sparse, stop nitrogen additions.
Weed control is most important in the first 4 to 6 weeks, when seedlings grow slowly relative to summer weeds. Shallow cultivation is better than deep hoeing because roots near the surface are easily damaged. After plants gain height, they generally shade out smaller competitors.
Staking is usually unnecessary, but in windy sites or very fertile soils where plants exceed 5 feet, temporary support may prevent leaning. Lower leaves can be removed sparingly late in the season to improve airflow and ease harvest, but avoid over-pruning because leaves drive pod production.
Harvest every 1 to 2 days at peak season. This is not optional if tenderness is the goal. Pods enlarge quickly, and frequent picking stimulates continued flowering. Use a knife or pruners rather than twisting large pods from stems, which can damage branches. Even spineless types can irritate skin, so sleeves and gloves are often appreciated during midsummer harvests.
Pests, Diseases & Organic Management
The major insect pests include aphids, flea beetles, stink bugs, leaf-footed bugs, corn earworms, and various caterpillars. In some regions, root-knot nematodes are the most serious hidden problem.
aphids cluster on tender growth and leaf undersides, causing curling and honeydew buildup. Small infestations can be knocked off with water or controlled with insecticidal soap, applied in the evening to avoid leaf burn. flea beetles chew many small holes in young leaves, especially on seedlings, and are most damaging during establishment. Row cover used early can protect young stands, but remove it when flowering begins if pollinator access is needed.
stink bugs and leaf-footed bugs feed directly on developing pods, causing dimples, deformities, and corky tissue. Hand removal, trap crops, and timely harvest reduce damage. caterpillars can chew foliage and scar pods; Bacillus thuringiensis is useful when applied to small larvae.
root-knot nematodes are more likely in sandy soils and long-used vegetable beds. Symptoms include stunting, midday wilting despite adequate moisture, yellowing, and poor yield. Confirm by examining roots for galls. Crop rotation, solarization, organic matter improvement, and resistant rotation crops help reduce populations over time.
Common diseases include powdery mildew, Cercospora leaf spot, southern blight, charcoal rot, fusarium wilt, and damping-off in cold wet soils. Most disease problems are aggravated by poor airflow, overhead irrigation, continuous cropping, and weed pressure.
powdery mildew appears as white dusty growth on leaves late in the season, especially where days are warm and nights humid. It rarely kills plants immediately but reduces vigor. Improve spacing, avoid excess nitrogen, and remove heavily infected tissue if practical. Leaf spots produce brown or gray lesions that coalesce under wet conditions; sanitation and drip irrigation are key.
southern blight causes rapid collapse near the soil line, often with white fungal growth and small sclerotia at the crown. Once present, remove infected plants immediately and avoid replanting susceptible crops in that bed for several seasons. fusarium wilt causes one-sided yellowing or progressive vascular decline, especially in warm soils.
Organic prevention is more effective than rescue. Rotate away from okra and related malvaceous crops for at least 2 to 3 years when disease or nematodes are present. Keep beds weed-free, use mulch to reduce soil splash, water in the morning if overhead irrigation is unavoidable, and remove crop residue at season end rather than composting diseased material in cool piles.
Harvesting, Curing & Optimal Storage
Harvest begins when pods are young, glossy, and usually 3 to 4 inches long, though some growers cut slightly smaller for premium tenderness. The pod should snap cleanly when bent; if it flexes without snapping or feels tough along the ridges, it is already too mature for the best table quality.
Use hand pruners or a sharp knife and cut with a short stem attached. Harvesting every day during hot spells is often necessary because pods can move from ideal to overgrown in 48 hours. Removing mature pods promptly is critical because once seeds begin hardening, the plant diverts energy away from new flowering.
There is no true curing phase for fresh-market okra in the way there is for onions or sweet potatoes. Instead, postharvest handling should focus on rapid cooling without chilling injury. Ideal storage temperature is about 45 to 50°F (7 to 10°C) with high relative humidity around 90 to 95%. At these conditions, pods may hold for 7 to 10 days. Below about 45°F, chilling injury can appear as surface pitting, discoloration, and accelerated decay once pods return to room temperature.
Never wash pods before storage unless they will be used immediately. Surface moisture encourages decay. Instead, field-sort out bruised, oversized, or insect-damaged pods and store only dry, clean produce. Pack loosely in perforated bags or ventilated containers to maintain humidity while allowing gas exchange.
For seed saving, leave several of the healthiest early pods on vigorous, true-to-type plants until they dry brown on the stem. Harvest before pods split in rainy weather. Finish drying indoors if needed, then shell and store seed in a cool, dry, dark place. Because okra can cross-pollinate at low levels via insects, isolation is helpful if maintaining varietal purity.
Companion Planting for Clemson Spineless Okra
Companion planning works best when driven by canopy structure, pest pressure, and irrigation compatibility rather than folklore alone. Good companions either occupy a different root or light niche, attract beneficial insects, or help reduce pest concentration.
Sweet Potato is an especially useful partner in larger beds because it covers soil, suppresses weeds, and helps moderate evaporation around the okra row without competing heavily for vertical space. Keep enough separation so vines do not engulf young stems.
Basil can be tucked along bed edges where it attracts pollinators and beneficial insects while sharing the same preference for warm weather and regular moisture. Peas are less of a simultaneous hot-summer companion in many climates, but can be used in seasonal succession: cool-season peas enrich the rotation before okra takes over the bed in summer.
Flowers such as Nasturtium are often useful nearby as living insect habitat and as a visual indicator plant for aphids. Avoid pairing okra too closely with very aggressive sprawling cucurbits unless spacing is generous, because airflow and harvest access decline quickly.
In diversified gardens, the best arrangement is often okra in a north-side row, lower companions at the south edge, and pollinator-friendly herbs or flowers at row ends. This preserves sun exposure, keeps harvest lanes open, and reduces the humid microclimate that favors disease.