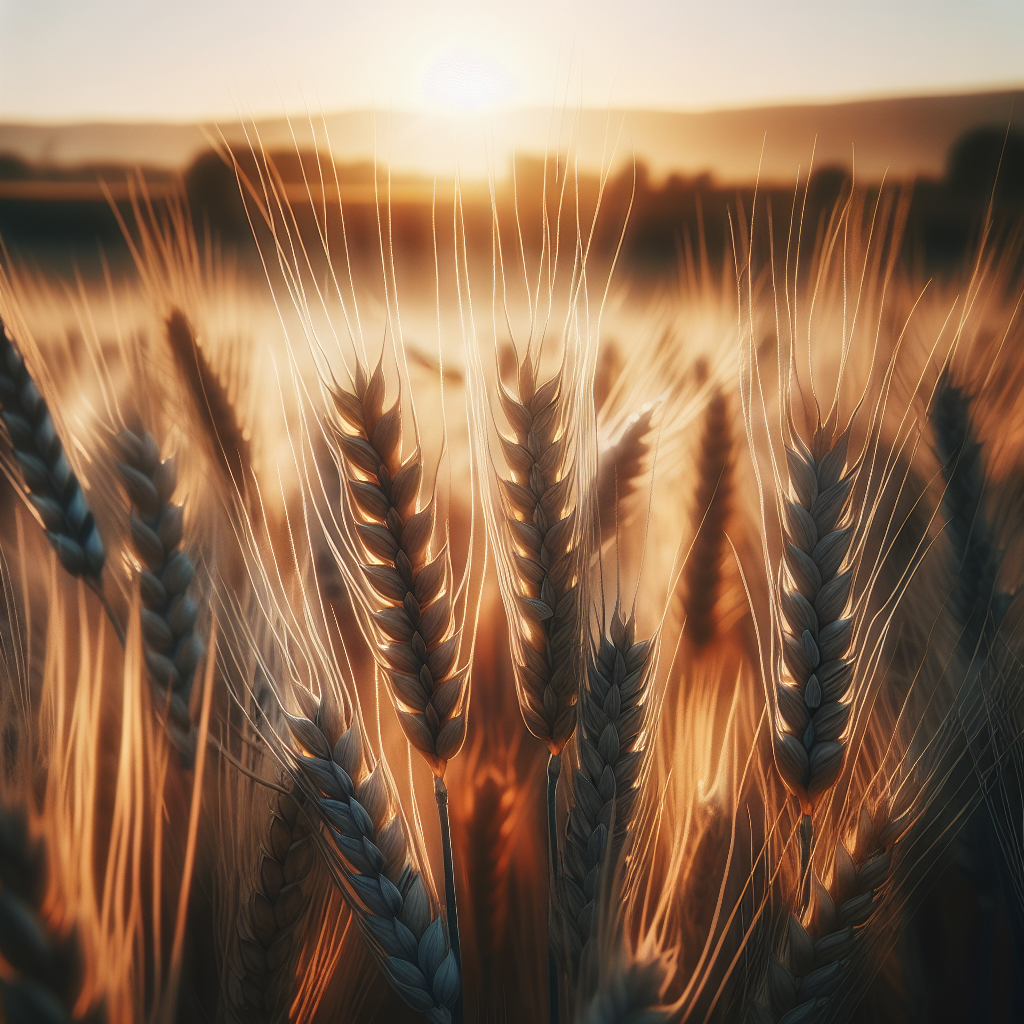
Introduction to Wheat
One of humanity’s foundational domesticated grains, wheat has been cultivated for roughly 10,000 years and remains a cornerstone of global agriculture. Modern production includes bread wheat, durum wheat, club wheat, hard and soft wheats, and regionally adapted spring or winter types. Although often considered a broad-acre crop, the same agronomic principles apply whether wheat is grown on a few rows, a diversified small farm, or a commercial field: choose the right type for the season, create a fine and firm seedbed, establish an even plant population, feed the crop according to yield potential, and avoid stress during tillering, stem elongation, flowering, and grain fill.
Wheat is especially responsive to management precision. Small mistakes in sowing depth, nitrogen timing, drainage, or disease prevention can reduce tiller survival, grain set, test weight, and end-use quality. Conversely, well-managed wheat can be one of the most reliable and profitable cereals in temperate and semi-arid systems. In rotations, it pairs well with legumes and broadleaf breaks, and growers comparing cereal systems may also benefit from our Corn guide for contrasting nutrient demand, rooting behavior, and seasonal management.
Botanical Profile of Wheat
Wheat belongs to the grass family Poaceae, tribe Triticeae, and genus Triticum. The most widely grown species is Triticum aestivum, known as common or bread wheat. Durum wheat, used for semolina and pasta, is Triticum turgidum subsp. durum. Wheat is an annual, cool-season cereal with a fibrous root system, hollow stems called culms, alternately arranged narrow leaves, and a terminal inflorescence known as a spike.
Growth proceeds through several agronomically important stages. After germination, the crop enters the seedling phase, then tillering, when side shoots develop from the plant base. Productive tillers are critical because each fertile tiller can bear a grain head. Stem elongation follows, marked by jointing and booting, then heading, anthesis or flowering, milk stage, dough stage, and physiological maturity. Yield is largely determined by three components: number of heads per unit area, number of kernels per head, and kernel weight.
Winter wheat requires vernalization, meaning a period of cold exposure is necessary to trigger reproductive development. It is usually sown in autumn, overwinters as a vegetative plant, and resumes rapid spring growth. Spring wheat lacks this cold requirement and is sown after winter. Winter forms often yield more where winters are suitable because they exploit cool-season moisture and have a longer growth duration.
Botanically, wheat can also be described by grain hardness, color, and gluten characteristics. Hard red wheats are favored for bread flour due to stronger gluten; soft wheats are often used for pastries and biscuits; durum is especially hard, amber-colored, and prized for pasta. Awns, the bristle-like structures extending from the spikelets in some cultivars, may contribute modestly to photosynthesis and can deter grazing but may complicate handling.
Soil, pH, and Climate Requirements for Wheat
Wheat performs best in well-drained loam, clay loam, or silt loam soils with good structure, moderate water-holding capacity, and a firm seed zone. It can grow in lighter sandy soils if fertility and moisture are carefully managed, but these soils are less forgiving because they dry quickly and often lose nitrogen through leaching. Heavy clays can produce excellent yields if drainage is adequate; however, standing water for even 48 to 72 hours during early growth can thin stands, stunt roots, and predispose the crop to crown and root diseases.
Ideal soil pH is generally 6.0 to 7.5. Wheat tolerates mildly acidic soils better than some crops, but yields often decline below pH 5.5, particularly where aluminum toxicity or manganese imbalance occurs. In alkaline soils above pH 8.0, micronutrient deficiencies such as zinc or iron chlorosis may appear, especially in calcareous conditions. If a soil test indicates low pH, lime should be incorporated months before planting to allow reaction time. If pH is high, focus on cultivar choice, organic matter improvement, and targeted micronutrient correction rather than attempting dramatic pH shifts.
A productive wheat field should have at least moderate organic matter and good aggregate stability. Compacted layers restrict root penetration and reduce the crop’s ability to extract water during stem elongation and grain fill. Before sowing, inspect the upper 20 to 30 cm of soil for plow pans, smearing, or dense zones. Where compaction is severe, strategic subsoiling before the season or deep-rooted rotation crops can improve rooting depth.
Climatically, wheat prefers cool vegetative growth and relatively dry, mild conditions during grain maturation. Optimal temperatures for germination are around 12 to 25°C, though seeds can germinate at lower temperatures if moisture is adequate. During vegetative growth, 15 to 20°C is favorable. Prolonged temperatures above 30°C during flowering or grain fill can sharply reduce kernel set and grain weight. High humidity and rainfall during heading and maturation increase the risk of rusts, fusarium head blight, and sprouting in the head.
Moisture demand varies by growth stage. Establishment requires consistent moisture in the top 2 to 5 cm of soil, not saturation. During tillering, moderate soil moisture encourages root expansion and tiller retention. Water stress at jointing to heading is particularly damaging because it reduces spike development and fertile florets. The most sensitive period is often from booting through grain fill. As a practical benchmark, irrigated wheat generally performs best when soil moisture is maintained near 60 to 80% of field capacity through active growth, avoiding prolonged depletion below roughly 50% during reproductive stages. Overwatering is equally harmful: yellowing lower leaves, a sour or anaerobic soil smell, blackened roots, and patches of stunted plants often indicate waterlogging rather than nutrient shortage.
Step-by-Step Planting & Propagation
Wheat is propagated by seed, almost always direct-sown. Vegetative propagation is not used in commercial practice. Start with clean, high-germination seed from a cultivar matched to your region, season length, disease pressure, and end use. Certified seed is preferred because it reduces varietal mixture and seedborne diseases.
Choose the wheat type. Select winter wheat for regions with cold winters but not extreme winterkill risk, and spring wheat where winters are too severe, too wet, or where the growing window favors spring sowing. Match maturity to frost risk and heat stress patterns.
Soil test before planting. Determine pH, phosphorus, potassium, sulfur, and residual nitrogen. This is essential because wheat responds strongly to balanced nutrition, and over-applying nitrogen without sulfur or adequate potassium can produce lush but weak growth.
Prepare the seedbed. Wheat establishes best in a fine, firm seedbed with small aggregates and good seed-to-soil contact. In conventional systems, cultivate enough to level and break clods without pulverizing the surface. In reduced-till or no-till systems, residue should be evenly distributed, and seed placement must be accurate.
Time planting correctly. Winter wheat is usually sown 2 to 6 weeks before the average first hard freeze, allowing enough time for emergence and 2 to 4 leaves before dormancy. Planting too early can increase disease, insect, and excessive fall growth risks; planting too late reduces tillering and winter hardiness. Spring wheat should be planted as early as fields can be worked, while avoiding smearing and compaction in wet soils.
Calibrate seeding rate. The goal is a target number of established plants, not simply kilograms per hectare. Depending on seed size and expected conditions, common targets range from about 250 to 450 established plants per square meter. In favorable early sowing conditions, lower rates may suffice because tillering compensates. In late planting or dryland situations with poor emergence odds, increase seeding rates to secure an adequate stand.
Sow at the proper depth. Typical depth is 2.5 to 4 cm in moist, fine-textured soils. In drier or lighter soils, 4 to 5 cm may be needed to reach moisture. Avoid very shallow planting in drying conditions, as uneven emergence causes maturity variation. Avoid depths greater than about 6 cm unless a cultivar is specifically suited, because deep sowing can weaken emergence and reduce stand uniformity.
Manage row spacing. Narrow rows of 15 to 20 cm are common and help the canopy close faster, suppress weeds, and intercept light efficiently. Wider spacing can work in low-input or intercropped systems but often leaves more room for weeds.
Use seed treatment where needed. Biological or permitted organic seed treatments can reduce damping-off and seedling blights in high-risk conditions. In low-input systems, warm, well-aerated soils and clean seed become even more important.
Roll or firm the field if needed. On loose seedbeds, a light roller improves seed-soil contact and moisture uptake. Do not compact wet soils.
Check emergence. Seven to 14 days after sowing, dig plants in several spots to verify depth, seminal root development, and stand count. Early diagnosis is crucial if crusting, birds, slugs, or wireworms have reduced emergence.
For broader rotation planning and field ecology, see soil health strategies.
Care & Maintenance regimes for Wheat
Once established, wheat requires disciplined management rather than frequent intervention. The most important routine tasks are monitoring stand density, preserving root-zone aeration, balancing fertility, preventing weeds from gaining the early advantage, and protecting the crop during reproductive stages.
Nitrogen management is central. Wheat needs nitrogen for tiller production, leaf area, protein formation, and grain filling, but timing matters. Too much early nitrogen can create overly lush growth, increase lodging risk, and stimulate foliar disease. Too little during tillering and stem elongation reduces head numbers and grain count. A split-application strategy is often best: a modest base amount at or before planting if soil reserves are low, followed by topdressing from late tillering to early stem elongation. High-protein bread wheat may require later supplemental nitrogen, but late applications should be matched to moisture outlook and yield potential. Typical total nitrogen programs vary widely by target yield and soil supply, often from 60 to 180 kg N/ha.
Phosphorus is especially important at establishment because it drives early root growth and tiller vigor. Deficient fields show stunted plants and sometimes purplish leaf tones. Potassium improves water regulation, disease resilience, and straw strength; deficiency can increase lodging and marginal leaf scorch. Sulfur is increasingly important in intensive systems and sandy soils; deficiency resembles nitrogen shortage but often appears first on younger leaves as general yellowing.
Irrigation should be based on crop stage and soil water status rather than calendar intervals. In dryland climates, conserve moisture by minimizing unnecessary tillage and maintaining surface residue. Under irrigation, one common approach is to irrigate when 40 to 50% of available water in the root zone has been depleted, tightening that threshold during booting, flowering, and early grain fill. Avoid light, frequent irrigation that keeps the surface wet but leaves deeper roots underdeveloped. Also avoid irrigation during cool, humid evenings near heading if disease pressure is high.
Weed control is most critical from emergence through tillering. Wheat is a strong competitor once established, but early-season weeds steal light, moisture, and nitrogen. A stale seedbed, clean rotation, narrow row spacing, and vigorous establishment all reduce weed burden. Mechanical weeding is limited in dense cereal stands, so prevention and pre-plant field sanitation matter greatly. Broadleaf weeds can be especially troublesome in seed crops or quality markets.
Lodging prevention deserves special attention. Lodged wheat suffers from difficult harvest, lower grain quality, sprouting risk, and disease. Causes include excessive nitrogen, dense stands, high winds, storms, weak straw genetics, and shaded conditions. Keep nitrogen proportional to expected yield, avoid over-irrigation, ensure potassium sufficiency, and choose lodging-resistant cultivars in fertile environments.
Regular scouting should include plant counts, tiller density, leaf color, lower stem health, weed species identification, insect checks, and canopy humidity. In high-yield systems, tissue testing at key stages can refine topdress decisions. A healthy crop should have upright leaves, a well-anchored crown, white active roots, and uniform progression through growth stages across the field.
Pests, Diseases & Organic Management
Wheat faces pressure from insects, weeds, fungal diseases, and occasional bacterial or viral problems. The most effective management is integrated: resistant cultivars, crop rotation, sanitation, balanced fertility, residue management, and timely scouting.
Major insect pests include aphids, Hessian fly, armyworms, cutworms, wireworms, and cereal leaf beetle in some regions. aphids damage directly by feeding and indirectly by vectoring barley yellow dwarf virus. Heavy infestations can cause yellowing, stunting, and reduced grain fill. Encourage natural enemies such as lady beetles, lacewings, hoverflies, and parasitoid wasps by maintaining field-edge diversity and avoiding unnecessary broad-spectrum sprays. Early planting or delayed planting, depending on the pest’s life cycle in your region, can help escape infestations. Seed quality and vigorous emergence reduce vulnerability to soil pests.
Fungal diseases are often the greatest threat. Rusts, including stem rust, leaf rust, and stripe rust, can spread rapidly under conducive conditions. powdery mildew favors dense, humid canopies. Septoria and tan spot thrive where infected residue remains and rainfall splashes spores upward. Fusarium crown rot affects the base of stems under stress, while fusarium head blight is especially serious during wet flowering periods because it can reduce yield and contaminate grain with mycotoxins.
Organic disease management begins with rotation. Avoid planting wheat after wheat where residue-borne diseases are common. Use at least a one- to two-year break with non-host broadleaf crops where feasible. Select resistant or tolerant cultivars whenever available. Ensure adequate airflow with reasonable plant density, avoid excessive nitrogen that creates a lush canopy, and use clean seed. Residue management is important, but complete residue removal is not always desirable; balance disease reduction with erosion control and soil health.
Root and crown diseases often intensify in compacted, poorly drained soils. If patches of stunting recur in the same areas, dig plants and inspect crowns and roots. Healthy crowns are firm and pale; diseased tissues are brown, water-soaked, or rotted. Correct drainage, reduce traffic on wet fields, and rotate away from cereals if take-all or other root diseases are suspected.
Weeds in wheat include wild oats, ryegrass, bromes, mustards, pigweed, chickweed, and many others depending on region. Organic suppression relies on crop rotation, false seedbeds, delayed seeding where practical, competitive cultivars, and high-quality stand establishment. Clean field edges and prevent seed set in patches. Weed management is cumulative across seasons, not a single-event task.
Bird damage can occur at planting or maturity, and rodents may attack seed or create lodging patches. Good residue management, synchronized sowing, and prompt harvest reduce losses.
Harvesting, Curing & Optimal Storage
Wheat is ready for harvest when kernels reach physiological maturity and then dry down to safe harvest moisture. Physiological maturity is often marked by loss of green color in the peduncle and a hard kernel transitioning out of the dough stage. For combine harvest, grain moisture is commonly targeted around 12 to 14%, though wheat may be cut slightly higher and then dried with forced air if facilities are available. Harvesting too wet raises drying costs and spoilage risk; harvesting too dry increases shattering losses and cracked grain.
The simplest field signs of readiness are golden straw, dry heads, firm kernels that cannot be dented easily with a fingernail, and moisture readings within the target range. If the crop is uneven due to variable emergence or late tillers, wait until the bulk of heads are mature but monitor closely for lodging, storms, or sprouting risk.
Combine settings matter. Cylinder or rotor speed should thresh kernels cleanly without excessive cracking. Fan speed must separate chaff while retaining grain. Concave clearance should match kernel size and crop dryness. Excessive tailings, broken kernels, or unthreshed heads indicate the need for adjustment.
For small-scale growers harvesting by hand, cut when heads are fully mature and dry, then bundle and cure under cover with good airflow. Thresh only after stems and heads are fully dry. Avoid stacking damp bundles tightly, as mold and heating can develop surprisingly quickly.
Postharvest handling is where many quality losses occur. Wheat stores best when clean, cool, dry, and protected from insects and rodents. For medium- to long-term storage, grain moisture should generally be 12% or lower; in warm climates or for very long storage, 10 to 11% is safer. Grain above safe moisture can heat internally due to fungal activity and respiration. Warning signs include condensation, musty odor, caking, hot spots, and insect activity.
Clean grain before storage to remove chaff, cracked kernels, weed seeds, and fine material that obstruct airflow and harbor pests. Aerate bins to keep grain temperature cool and uniform. Inspect regularly for weevils, borers, moths, and mold. Food-grade sealed containers work for small quantities, while bulk grain should be stored in dry bins with insect exclusion and monitoring.
If preserving seed for future planting, select grain from healthy, true-to-type stands, dry it gently, and store it under cool, low-humidity conditions. Seed intended for sowing should retain high germination and vigor; avoid using grain exposed to severe heat, disease, or mechanical cracking.
Companion Planting for Wheat
In large-scale systems, companion planting for wheat is better understood as intercropping, nurse cropping, strip cropping, or rotational association rather than the garden-style pairing used with vegetables. The best companions are species that suppress weeds, improve soil structure, support beneficial insects, or contribute nitrogen without outcompeting the wheat.
Legumes are the most valuable partners in rotation and, in some systems, in mixed stands. Clover, vetch, field peas, and lentils can enrich the system biologically by adding nitrogen, improving soil tilth, and diversifying rooting depth. Undersowing a low-growing clover after wheat establishment can provide living cover, reduce erosion, and add organic matter, but timing is critical so the companion does not compete excessively for moisture in dry regions.
Wheat also works well in rotation with pulses and oilseeds. A broadleaf break crop reduces disease carryover from cereal residues and helps manage grassy weeds. Rotating with Soybeans is especially common because the legume effect often improves nitrogen economy and breaks many cereal pest cycles.
In mixed farming systems, border plantings of flowering herbs or native insectary strips can encourage natural enemies of aphids and caterpillars. The key is to place these plantings at margins rather than within the wheat stand unless the system is specifically designed for relay or strip intercropping.
Avoid aggressive companions that create heavy shade, compete strongly for water, or complicate harvest timing. Tall brassicas, sprawling cucurbits, and vigorous perennial grasses are generally poor in-field companions. Wheat’s greatest companion benefits usually come from what is planted before or after it, not directly beside every row.
The strongest practical strategy is to view companion planting for wheat as whole-farm ecological design: cereal-legume rotation, residue diversity, field-edge biodiversity, and cover crops that protect soil between cash crops. Done well, these practices improve resilience, lower pest pressure, and maintain the soil structure that wheat depends on for high yields and strong grain quality.