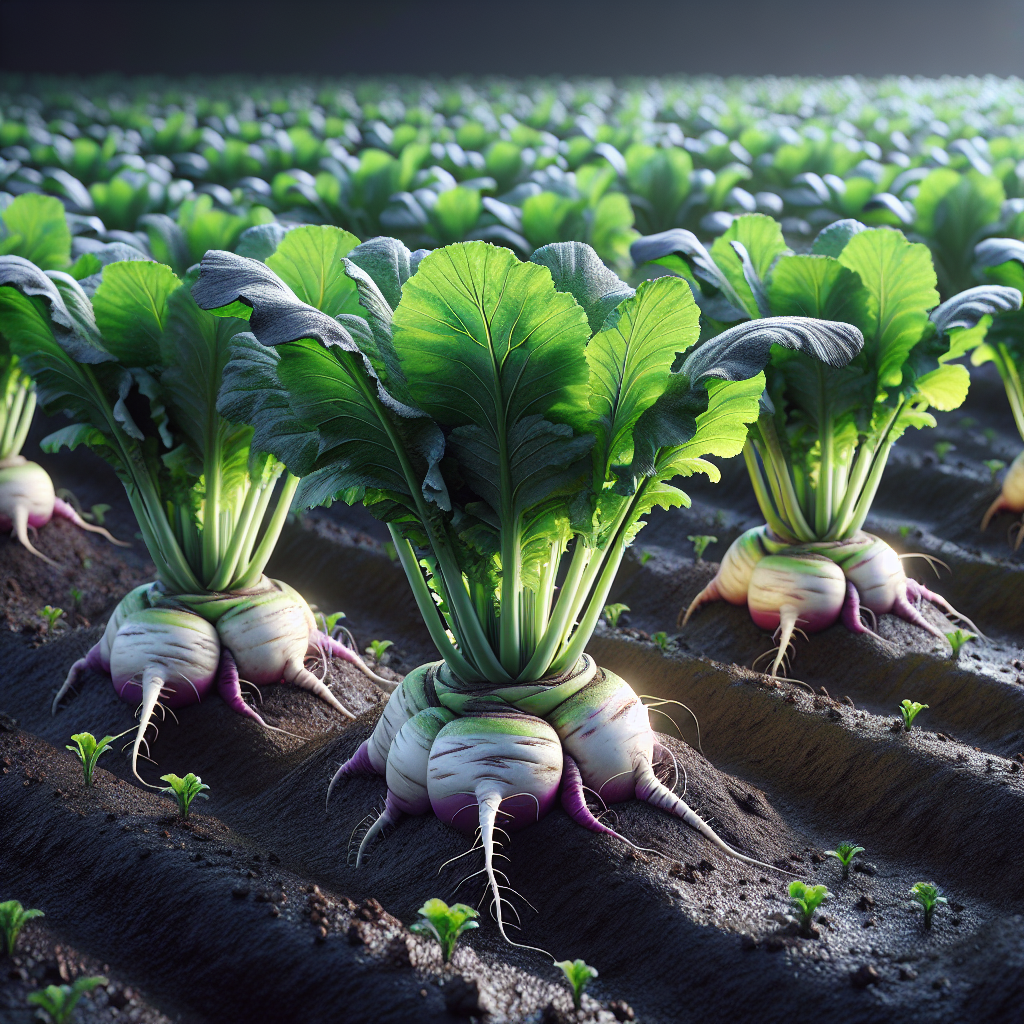
Introduction to Turnip
A classic member of the mustard family, turnip has been cultivated for thousands of years across Europe and Asia as a dependable food crop for both people and livestock. It is one of the most adaptable cool-season vegetables, capable of producing usable greens early and marketable roots soon after. Modern growers prize turnip for its short crop cycle, broad culinary range, and ability to fit into succession planting systems where space must be used intensively.
Unlike many root crops that require a long season, turnip can move from seed to harvest quickly, especially in cool weather. This speed makes it ideal for spring and autumn production, and in mild winter regions it can be grown through much of the cold season. Flavor is strongly influenced by growing conditions: rapidly grown roots in cool, moist soil are usually mild, sweet, and crisp, while plants stressed by heat, crowding, or uneven water often become pungent, woody, or fibrous.
Turnips are especially useful in diversified vegetable systems because they can serve multiple purposes. Small roots are harvested fresh for bunching, larger roots can be stored, and the tops are sold or cooked like mustard greens. In crop planning, they are often grouped with other brassicas, though their speed and direct-seeding habit make them operationally closer to quick roots such as radish. For mixed plantings and rotation ideas, see this fall companion planting guide.
Botanical Profile of Turnip
Turnip belongs to the family Brassicaceae, the same family as cabbage, broccoli, mustard, and rapeseed. The species Brassica rapa is highly variable, containing several cultivated groups including turnips, Chinese cabbages, and some leafy greens. In the turnip subgroup, the edible portion commonly called the root is botanically a swollen hypocotyl-root structure, which is why shape, shoulder color, and upper-root exposure vary significantly among cultivars.
Most turnip cultivars are biennial by life cycle but grown as annuals for root or leaf production. In the first season, the plant forms a rosette of leaves and enlarges the storage organ. If exposed to sufficient cold after reaching a certain physiological stage, it can vernalize and later bolt, sending up a flowering stalk in the second phase of development. This is important agronomically because premature bolting reduces root quality, especially when spring sowings are exposed to fluctuating cold followed by warmth.
Leaves are typically lobed to slightly hairy, depending on cultivar, and emerge from a crown just above the swollen root. Root color ranges from pure white to cream, yellow, golden, or purple-topped white. Purple coloration near the shoulder is usually due to anthocyanin development where the upper portion is exposed to sunlight. Common market classes include small white salad turnips, traditional purple-top roots, and yellow-fleshed storage types. Japanese salad turnips such as 'Hakurei' are especially noted for sweetness, tender texture, and edible tops, while older field types are more robust and suited to bulk production or animal feed.
Turnip greens are highly nutritious, rich in vitamins A, C, and K, plus calcium and folate. The roots contain carbohydrates, water, fiber, and glucosinolates, the sulfur-containing compounds typical of brassicas that contribute to flavor and potential pest interactions. These compounds become more pronounced under stress, which is one reason environmental management directly affects eating quality.
Soil, pH, and Climate Requirements for Turnip
Turnip performs best in cool weather, ideally where daytime temperatures remain between 10 and 21°C (50 to 70°F). Growth slows in prolonged cold near freezing, but established plants tolerate light frost well, and flavor often improves after cool nights because sugar accumulation increases while harsh pungency decreases. Once temperatures consistently exceed 24°C (75°F), root enlargement becomes less reliable, texture degrades, and bolting or pithiness becomes more likely depending on cultivar.
The ideal soil for turnip is loose, friable, stone-free, and well drained, with enough moisture-holding capacity to prevent drought stress. Sandy loam to silt loam is excellent. Heavy clay can produce misshapen roots, slow emergence, and increase risk of rot if drainage is poor. If clay soil must be used, create raised beds at least 15 to 20 cm high and incorporate mature compost to improve structure, not fresh manure, which can stimulate excessive leaf growth and forked or rough roots.
A soil pH of 6.0 to 7.2 is ideal, with 6.3 to 6.8 especially reliable for nutrient availability and reduced clubroot pressure. Below pH 5.8, brassicas often show reduced vigor and increased disease susceptibility. If clubroot is known in the field, raising pH toward 7.2 with agricultural lime can help suppress disease severity. Perform liming several months ahead where possible, because abrupt pH correction immediately before sowing is less effective.
Turnip is moderately hungry but not a heavy feeder compared with long-season brassicas. It responds best to balanced fertility with good phosphorus for root establishment and moderate nitrogen for steady leaf production without overly lush tops. Excess nitrogen, especially in warm weather, can delay root bulking and produce coarse greens with more insect pressure. A practical baseline for many garden and small-farm soils is to incorporate 2 to 5 cm of finished compost before planting and supplement according to soil test results. On low-fertility ground, a balanced organic fertilizer can be banded lightly below and beside the seed row.
Moisture management is central to quality. Aim for consistently moist soil in the top 10 to 15 cm during germination and the upper 20 cm during bulking. As a field target, soil should feel cool and cohesive but not sticky, and when squeezed should form a weak ball that crumbles with light pressure. If soil repeatedly dries between waterings, roots become woody, cracked, or sharply flavored. If soil stays saturated and airless, seedlings may damp off and roots may develop rot or poor shape. Sudden heavy irrigation after drought commonly causes splitting.
Step-by-Step Planting & Propagation
Turnips are almost always direct-seeded. Transplanting is generally discouraged because root disturbance increases the likelihood of misshapen or stunted roots. Begin by preparing a fine, level seedbed free of large clods and undecomposed residues. Because seed is small, surface uniformity matters; uneven soil leads to patchy emergence.
For spring crops, sow as soon as the soil is workable and has reached at least 7°C (45°F), though germination is fastest between 13 and 24°C (55 to 75°F). For highest root quality, many growers prefer late summer to early autumn sowing so that bulking occurs under cooling conditions. In mild climates, sowings can continue through autumn for winter harvest.
Make shallow drills 1 to 1.5 cm deep. In lighter soils and dry conditions, sow slightly deeper; in cool heavy soil, stay shallow. Space rows 25 to 45 cm apart for hand harvest and small-scale garden culture, or according to cultivation equipment in field systems. Sow seed thinly, aiming for plants 5 to 10 cm apart for small salad turnips and 10 to 15 cm apart for larger storage roots. Because precision sowing of tiny seed can be difficult, slightly denser sowing followed by thinning is common.
Keep the seed zone uniformly moist until emergence, which usually occurs in 3 to 10 days depending on temperature. A crusted surface can seriously reduce stand establishment, so use a light mulch, row cover, or gentle irrigation in vulnerable soils. Once seedlings have developed their first true leaves, thin promptly. Delayed thinning leads to elongated, underdeveloped roots because crowded seedlings compete before bulking begins.
Succession sow every 10 to 14 days for a continuous supply rather than planting a large block at once. This is especially useful for salad turnips, which are best harvested young. In market gardens, stagger sowing by cultivar type: very fast white turnips for fresh bunching and slightly slower purple-top or yellow types for storage.
If producing greens rather than roots, sow more densely and harvest young leaves as cut-and-come-again or by whole-plant bunching. However, when the goal is dual harvest of greens plus roots, avoid overharvesting foliage early; removing too many leaves reduces photosynthetic capacity and can limit final root size.
Care & Maintenance regimes for Turnip
Once established, turnip benefits from steady, moderate care rather than aggressive feeding or frequent disturbance. The first three weeks are the most critical: this is when stand density, weed pressure, and early moisture consistency determine eventual root uniformity.
Water deeply enough to moisten the root zone without leaving the bed saturated. As a practical benchmark, provide roughly 2.5 cm of water per week from rainfall plus irrigation in cool weather, increasing slightly in sandy soils or windy conditions. During rapid bulking, insufficient water for even a few days can reduce tenderness. Signs of underwatering include dull bluish foliage, slowed growth, stronger pungency, and roots that become tough or cracked. Signs of overwatering include yellowing lower leaves, persistently wet soil with sour odor, algae on the surface, and roots that seem swollen but watery, with increased disease risk.
Mulching with a light layer of weed-free straw or shredded leaves can stabilize moisture and suppress weeds, but keep mulch thin over emerging seedlings so it does not interfere with stand establishment. In intensive beds, shallow hand weeding or wheel-hoe cultivation is best. Turnips do not compete well with weeds in early growth, and even short weed pressure can reduce root size significantly.
Nitrogen should be managed carefully. If plants are pale and growth is slow on low-fertility soils, a light side-dress of nitrogen after thinning can help, especially for greens production. Apply modestly; excessive nitrogen can result in luxurious tops with poor root development. Organic growers often use diluted fish emulsion, compost tea from well-finished compost, or feather meal in small measured amounts. A second feeding is rarely needed for short-season roots unless fertility is extremely low.
Floating row cover is highly effective in early stages, especially where flea beetles, cabbage root maggot, or leaf-chewing insects are common. Install immediately after sowing or at emergence and seal edges well. Remove only when necessary for thinning or where heat accumulation becomes a concern. Because turnips are generally grown for vegetative tissues rather than fruit set, exclusion covers can remain in place for much of the crop cycle.
Bolting risk is influenced by cultivar, sowing date, and weather. Spring-seeded turnips exposed to cool conditions after emergence, followed by long days and warmth, may send up flower stalks rather than enlarge roots. Choose bolt-resistant cultivars for spring and reserve sensitive heirloom types for autumn. Any plant showing early stem elongation should be harvested promptly, since texture will decline.
Pests, Diseases & Organic Management
As a brassica, turnip shares many pest and disease pressures with cabbage-family crops. The most common early pest is flea beetle, which causes numerous tiny shot-holes in leaves. Seedlings are especially vulnerable, and severe feeding can stunt or kill young plants. Row covers are the most reliable organic control. Fast, vigorous growth supported by moisture and fertile soil also helps seedlings outgrow minor damage.
cabbage root maggot is more serious in some regions. Adult flies lay eggs near the stem base, and larvae feed on roots, causing wilting, poor growth, and tunnels that ruin marketability. Use crop rotation, row cover exclusion from planting time, and sanitation to break the life cycle. Avoid planting brassicas repeatedly in the same bed. Beneficial nematodes may help in biologically active soils.
aphids can colonize leaf undersides, especially in dry weather or on nitrogen-rich plants. They distort leaves and leave sticky honeydew. Control starts with balanced fertility and strong water sprays, followed by insecticidal soap if needed. harlequin bugs, caterpillars, and occasionally slugs may also attack foliage depending on climate.
Diseases include damping-off in poorly drained seedbeds, downy mildew in cool humid weather, Alternaria leaf spot, black rot, and clubroot. damping-off is prevented by clean seed, good airflow, moderate watering, and well-drained soil. downy mildew appears as pale angular patches with grayish growth beneath leaves; reduce leaf wetness duration and maintain spacing. black rot, a bacterial disease, often enters through leaf margins and causes yellow V-shaped lesions. Use clean seed, avoid overhead irrigation late in the day, and remove infected crop debris.
clubroot is among the most destructive diseases for turnip in acidic or infested soils. It causes swollen, distorted roots, wilting in warm parts of the day, and severe stunting. Once present, it can persist for years. Prevention is essential: rotate out of brassicas for several years, maintain pH near neutral, improve drainage, and avoid moving contaminated soil on tools or boots.
Good organic management depends less on rescue treatments and more on systems thinking: long rotations, sanitation, proper spacing, steady growth, and physical exclusion. Remove diseased residues after harvest and compost only if your compost system reaches pathogen-killing temperatures. Otherwise, dispose of them away from production beds.
Harvesting, Curing & Optimal Storage
Harvest timing depends on cultivar and intended use. Small white salad turnips are often best at 3 to 6 cm diameter, when flesh is crisp, mild, and nearly fiber-free. Standard purple-top types are commonly harvested at 5 to 8 cm diameter for fresh use, while storage types may be allowed to grow larger if still firm and smooth. Oversized roots frequently become woody, especially if growth has been uneven.
For fresh-market quality, harvest while roots are turgid and before severe freezing. Lift gently with a fork in compacted soils to avoid skinning or breakage. If bunching with tops, wash quickly in cool water and hydrocool or refrigerate promptly. Greens lose quality faster than roots, so top-on turnips are more perishable than topped roots.
If harvesting for storage, remove tops to about 1 to 2 cm above the crown without cutting into the root shoulder. Long tops continue transpiring and pull moisture from the root, while excessively close trimming can create wounds that invite rot. Do not cure turnips in the same way as onions or winter squash; they do not require a warm curing period. Instead, handle gently, sort out damaged roots, and cool them rapidly.
Ideal storage conditions are 0 to 1°C (32 to 34°F) with 95% relative humidity. Under these conditions, healthy roots can store for 2 to 4 months depending on cultivar. Lower humidity causes shriveling and rubbery texture; higher temperatures accelerate sprouting, flavor deterioration, and decay. In home storage, a perforated bag in the refrigerator crisper works well for shorter periods. In root-cellar conditions, pack roots in damp sand or sawdust if humidity is hard to maintain, but ensure ventilation and inspect regularly.
Flavor often improves slightly after cool storage, but roots kept too long can become spongy or develop stronger brassica notes. If greens are the priority, harvest them young and use immediately, because even chilled leaves decline quickly.
Companion Planting for Turnip
Companion planting for turnip works best when it is interpreted practically rather than romantically. The main goals are to reduce pest pressure, maximize bed use, moderate soil moisture, and avoid direct competition. Because turnip is a compact, quick crop, it fits well between slower vegetables or in shoulder seasons before warm-season plantings.
Good companions include lettuce, spinach, peas, and bush herbs that do not heavily shade the bed. These species occupy different canopy levels and often share similar cool-season preferences. Fast leafy crops can be interplanted in adjacent rows, provided airflow remains adequate. Turnips can also follow nitrogen-contributing legumes in rotation, benefiting from residual fertility without excessive fresh nitrogen.
Aromatic intercrops such as onions, garlic, and some herbs are often used around brassicas in diversified gardens, mainly as part of a broader pest-confusion strategy rather than a guaranteed control measure. Their strongest benefit may be spatial diversity rather than direct repellence. Avoid crowding turnips with large brassicas such as cabbage or broccoli in the same tight bed, since they share pests and diseases and can create humid, congested conditions favorable to infection.
Do not plant turnips repeatedly after any brassica crop in the same soil zone. Companion planting does not replace rotation. In professional systems, the most important compatibility rule is family separation over time. Follow turnips with unrelated crops such as legumes, alliums, or fruiting vegetables, and avoid immediate succession with mustard-family crops if disease or root maggot pressure has been present.
In mixed plantings, monitor spacing carefully. A companion that seems beneficial can still reduce yield if it competes for light, water, or root space during the first month of turnip growth. The best companions are therefore modest, fast, and shallowly competitive, supporting efficient bed turnover without compromising root quality.