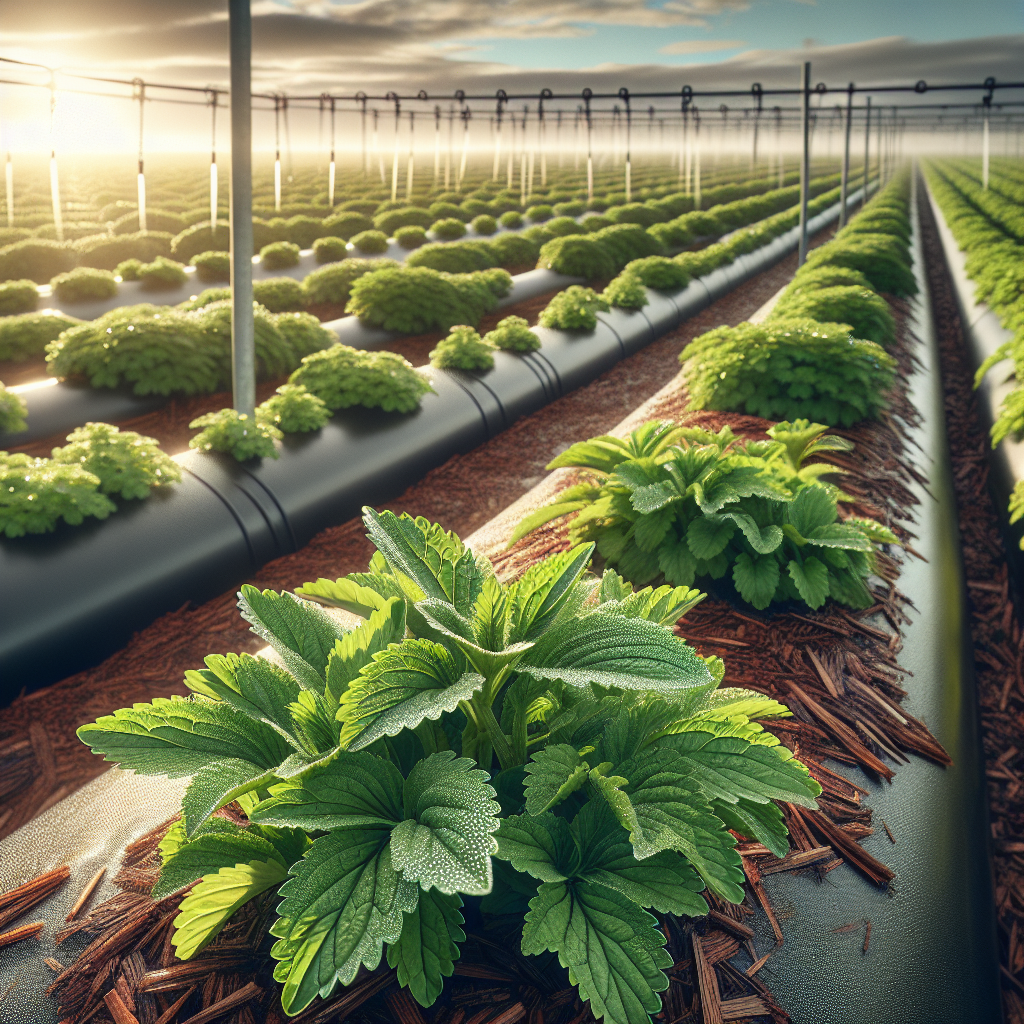
Introduction to Stevia Leaf
Native to Paraguay and parts of Brazil, this small shrubby herb became globally important because its leaves contain steviol glycosides, especially stevioside and rebaudioside A, compounds many times sweeter than sucrose. Long before commercial extraction, Indigenous Guaraní communities used the leaves to sweeten herbal infusions and medicinal preparations. Modern growers value it as both a home-scale herb and a commercial natural sweetener crop.
For practical production, it is important to understand that this is not a rugged, neglect-tolerant herb in the way many people assume. It has delicate roots, dislikes waterlogging, performs poorly in cold soils, and loses vigor quickly under heavy shade or repeated hard stress. High-quality production depends on balancing vegetative growth with leaf sweetness, which is influenced by cultivar, day length, fertility, and harvest stage.
In warm climates without frost, plants can behave as short-lived perennials. In temperate regions, they are commonly grown as annuals or overwintered indoors. If you already manage other warm-season herbs, some principles overlap with Thai Basil, particularly the need for warmth, steady moisture, and frequent shaping, though stevia is more sensitive to root-zone saturation and cold.
For growers developing broader ecological production systems, the companion strategy principles discussed in this companion planting article are especially relevant to stevia because it benefits from pollinator support, light pest buffering, and soil-covering neighbors that do not outcompete its shallow root system.
Botanical Profile of Stevia Leaf
This species belongs to the Asteraceae family, making it a relative of sunflower, lettuce, and chrysanthemum. It is an herbaceous perennial in frost-free conditions and typically reaches 30 to 90 cm tall, depending on cultivar, fertility, spacing, and how often it is pinched. The stems are slender, branching, and somewhat brittle when lush. Leaves are opposite, soft, serrated to slightly toothed, and highest in sweetness just before flowering.
The plant's commercial value comes from steviol glycosides concentrated in the foliage rather than roots, flowers, or seeds. Rebaudioside A is generally preferred for a cleaner sweetness with less bitter or licorice-like aftertaste, while stevioside can contribute stronger sweetness but also more bitterness. Many modern cultivars have been selected for higher Reb A content, improved leaf yield, more uniform growth, or better adaptation to specific climates.
Flowering is strongly affected by photoperiod. Stevia is generally considered a short-day plant, meaning shorter days encourage floral initiation. Once plants shift strongly into flowering, leaf quality and harvestable vegetative mass usually decline. For leaf production, growers aim to maximize branching and leaf area before full bloom. Small white tubular flowers appear in clusters and are attractive to beneficial insects, but if your goal is premium dried leaf, flowering is usually a signal that harvest should happen soon.
Its root system is fine, fibrous, and relatively shallow. This explains several common management failures: overwatering leads quickly to root stress, compacted soil stunts growth, and deep cultivation near mature plants can set them back sharply. Seed viability is often inconsistent, and many commercial growers prefer vegetative propagation to preserve sweetness profile and field uniformity.
Soil, pH, and Climate Requirements for Stevia Leaf
The ideal soil is loose, well-drained, biologically active, and moderately fertile. Sandy loam or loam with generous organic matter is usually best. Heavy clay can work only if it is substantially amended and planted on raised beds or ridges. If water stands around roots longer than a few hours after irrigation or rain, the site is risky for stevia.
Optimal pH is generally 6.0 to 7.5, with the sweet spot around 6.3 to 6.8. In strongly acidic soils below about 5.8, nutrient uptake becomes less balanced and root performance often suffers. In alkaline soils above 7.5, micronutrient lockout, especially iron, manganese, and zinc, can produce pale foliage and slow growth. If chlorosis appears on new leaves in high-pH ground, tissue testing and targeted micronutrient correction may be necessary.
Stevia thrives in warm but not brutally scorching conditions. Ideal daytime temperatures are roughly 20 to 30°C, with nighttime temperatures of 15 to 20°C. Growth slows noticeably below 12 to 15°C, and chilling injury can occur with prolonged cold exposure even before frost. Frost can kill tops outright and damage crowns. In very hot climates above 35°C, plants can survive but may show midday wilt, reduced leaf expansion, and slower sweet-glycoside accumulation if water stress is frequent.
Full sun is best in most regions, especially where summers are mild to warm. In very hot inland or tropical lowland areas, light afternoon shade can reduce stress and leaf scorch. Aim for at least 6 hours of direct sun; 8 or more is preferable for compact growth and higher leaf yield. Excess shade causes elongated stems, weak branching, and lower harvest weight.
Moisture management is critical. Stevia prefers evenly moist soil, not wet soil. A useful target is to keep the top 5 to 10 cm of soil lightly moist while allowing excellent air exchange in the root zone. In field terms, the soil should feel cool and slightly damp when squeezed, but not sticky or water-releasing. Signs of overwatering include yellowing lower leaves, stalled growth despite moist soil, a dull gray-green canopy, stem-base softening, fungus gnat activity in containers, and a sour smell from the media. Signs of underwatering include leaf edge crisping, drooping that persists into evening, slower tip growth, and increased bitterness in harvested leaves from stress.
Step-by-Step Planting & Propagation
Start with the right propagation method. Seed is possible but less reliable because germination rates can be low and offspring may vary in sweetness and vigor. Cuttings are the professional standard when uniformity matters.
For seed propagation:
- Use fresh seed from a reputable source; viability declines quickly.
- Sow on the surface or with only a dusting of fine vermiculite, because light helps germination.
- Maintain media temperature at 21 to 24°C.
- Keep humidity high but the medium only lightly moist, never soggy.
- Germination usually occurs in 7 to 21 days.
- Transplant only when seedlings have several true leaves and can be handled without stem damage.
For vegetative propagation:
- Take 7 to 10 cm tip cuttings from healthy, non-flowering mother plants.
- Remove lower leaves, leaving 2 to 4 leaves at the top.
- Dip in rooting hormone if desired, especially for large batches.
- Insert into a sterile, airy medium such as 50:50 perlite and coco coir or peat.
- Maintain bottom warmth around 22 to 25°C and high humidity.
- Provide bright indirect light until rooted, usually within 10 to 20 days.
- Harden gradually before field planting.
Transplant outdoors only after all frost danger has passed and soil has warmed to at least 16°C, with better establishment above 18°C. Cold planting often leads to sulking plants that never fully recover in short-season regions.
Prepare beds deeply but gently. Incorporate well-finished compost, not raw manure. Fresh high-nitrogen amendments can force lush but watery growth and reduce leaf quality. Raised beds 15 to 25 cm high are ideal in regions with spring rain or heavier soils.
Spacing depends on production goal. For bushy garden plants, space 30 to 45 cm apart in rows 45 to 60 cm apart. For denser leaf production, 25 to 30 cm within rows can work if air circulation is maintained. Closer spacing increases early canopy closure and suppresses weeds, but can increase humidity-related disease pressure.
After transplanting, water deeply once to settle roots, then shift quickly to moderate irrigation. Mulch lightly with clean straw, leaf mold, or weed-free fine bark, keeping mulch a few centimeters away from the stem base. This stabilizes moisture while reducing splash-borne disease.
Pinch young plants once they reach 15 to 20 cm tall. Removing the tip above a node stimulates branching and increases eventual leaf yield. A second light pinch may be useful if plants become leggy early.
Care & Maintenance regimes for Stevia Leaf
Nutrient management should be moderate, not aggressive. Stevia does not need heavy feeding, and excessive nitrogen often produces oversized, soft leaves with diluted sweetness and greater disease susceptibility. A soil rich in organic matter with balanced baseline fertility is best. As a general field guideline, use a modest nitrogen program and prioritize steady availability of potassium and calcium. If using organic inputs, compost, vermicompost, fish hydrolysate, alfalfa meal, and balanced slow-release organic fertilizers can work well in restrained amounts.
During establishment, keep moisture consistent for the first 2 to 3 weeks. After that, irrigate based on soil type and weather. In sandy soil, light frequent watering may be needed every 2 to 3 days during hot spells. In loam, a deep watering once or twice weekly may be enough. In containers, daily checking is essential in summer because roots can dry rapidly. Avoid the common mistake of shallow daily splashing, which encourages weak surface rooting and unstable moisture swings.
A practical irrigation benchmark is to water when the top 2 to 3 cm of soil becomes dry, while deeper root-zone soil remains faintly moist. Drip irrigation is strongly preferred over overhead irrigation because leaves intended for drying should stay clean and disease pressure remains lower.
Weed management matters because young plants are not highly competitive. Keep a 20 to 30 cm weed-free zone around each plant during establishment. Hand weeding is safest because the roots are shallow and easily damaged by hoeing too close. Organic mulch helps substantially.
Pruning and shaping should be regular but purposeful. If grown over a long season, light trimming after the first small harvest can encourage a second flush. Never remove so much foliage that the plant is left weak and unable to regrow. Leave enough nodes and healthy leaves for photosynthesis. If flower buds begin forming earlier than desired, a light tip trim can delay flowering and preserve leaf tenderness, but repeated delay may eventually reduce vigor.
In regions with frost, overwintering is possible. Before temperatures fall below about 7 to 10°C consistently, dig healthy plants, prune them back by one-third to one-half, and pot them into sharply drained media. Keep them in bright light, 15 to 21°C if possible, and water sparingly through winter. Overwintered plants can provide spring cuttings and an earlier crop than seed-grown starts.
Pests, Diseases & Organic Management
Stevia is not usually the most pest-prone crop in mixed herb systems, but stress makes it vulnerable. Aphids often target tender growing tips, especially under high nitrogen fertility or in protected structures. Whiteflies and Spider mites can become serious in greenhouses or dry hot conditions. Thrips may scar leaves and distort new growth. Slugs and Snails can chew young transplants in damp climates.
For Aphids and Whiteflies, begin with prevention: avoid overfertilization, maintain airflow, and inspect plant tips twice weekly. Strong water sprays can suppress early colonies. Insecticidal soap works if applied thoroughly to leaf undersides, preferably in the cool part of the day. Neem-based products may help, but repeated use should be cautious in hot weather to avoid leaf stress. Beneficial insects such as lacewings, hoverflies, and lady beetles are valuable if broad-spectrum sprays are minimized.
Spider mites are favored by dusty, hot, dry conditions. Symptoms include stippling, bronzing, and fine webbing on leaf undersides. Increase humidity around greenhouse crops, rinse foliage when practical, and use horticultural oils or soaps early before populations explode.
Root and crown diseases are the most important cultural threat. Pythium, Rhizoctonia, and other damping-off or root-rot organisms can kill seedlings and weaken mature plants. The strongest defenses are sanitation, clean propagation media, warm soils, sharp drainage, and disciplined irrigation. If plants wilt despite wet soil, inspect roots: healthy roots are pale and fibrous; diseased roots are brown, mushy, or sparse.
Leaf spots and mildews may appear in humid weather, especially when spacing is tight and overhead irrigation is frequent. Remove badly affected foliage, improve air movement, and water early so foliage dries quickly. Rotating the bed and avoiding repeated herb plantings in the same soil can reduce pathogen carryover.
Organic management works best as a system rather than a spray schedule. Healthy transplants, airflow, proper spacing, morning irrigation, mulch to reduce splash, and balanced fertility will prevent more problems than corrective treatments alone.
Harvesting, Curing & Optimal Storage
The highest-value harvest is usually taken just before full flowering, when leaf biomass is high and sweetness compounds are well developed. In many regions, this means harvesting in late summer to early autumn as day length shortens and buds begin to form. Leaves can still be used after flowering begins, but flavor quality and tenderness may decline.
For small-scale harvest, cut stems 10 to 15 cm above ground, leaving viable nodes if you want regrowth. For repeated cut-and-come-again harvests, remove only the upper third to half of the plant. Harvest on a dry morning after dew has evaporated but before the hottest part of the day. Wet harvest material dries poorly and is more prone to discoloration.
Handle gently. Bruising darkens leaves and lowers visual quality. Strip leaves from stems either before or after drying, depending on your drying system. Whole stems are easier to hang; stripped leaves dry faster and more evenly on screens.
Drying temperature is important. Aim for warm, moving air and shade rather than direct sun. Ideal drying conditions are around 35 to 45°C with strong ventilation. Excessive heat can drive off desirable aromatic notes and darken the product; poor airflow encourages mold. Leaves are sufficiently dry when they crumble cleanly and midribs snap rather than bend.
For highest quality, dry to roughly 10% moisture or slightly below. If leaves feel leathery, cool, or flexible in storage jars, they are not dry enough and may mold. Once fully dry, store in airtight containers away from light, moisture, and heat. Opaque jars, vacuum-sealed bags, or food-grade tins work well. Under cool, dark, dry conditions, quality is best within 12 months, though sweetness remains longer than aroma.
If producing powder, grind only as needed. Whole leaves store better because less surface area is exposed to oxygen and humidity. For market sales, keep lots labeled by harvest date and field block, since flavor and sweetness can vary with season and management.
Companion Planting for Stevia Leaf
The best companions are low-competition plants that attract beneficial insects, moderate pest pressure, and avoid casting heavy shade. Thyme is especially useful as a dry-footed, low-growing border herb that helps occupy soil surface space without overwhelming stevia roots. Yarrow is excellent nearby for drawing predatory insects and pollinators. Nasturtium can act as a trap crop for Aphids in diversified gardens, while Clover may function in pathways or adjacent alleys as a living mulch and nitrogen-contributing cover, provided it is kept from competing directly at the crown.
Good companion placement matters more than simply mixing species. Keep taller insectary plants on the north or west side in the northern hemisphere so stevia still receives full sun. Low herbs can be placed in row edges, while flowering beneficial-attracting species should be offset enough to preserve airflow. Because stevia is shallow-rooted, avoid pairing it with aggressive spreaders or heavy feeders that demand frequent irrigation.
Avoid dense canopies from sprawling cucurbits, vigorous mints, or tall crops planted too close. These can increase humidity, reduce sunlight, and complicate harvest. The ideal companion layout creates a clean, accessible herb bed with moderate biodiversity rather than a crowded polyculture.
When designed well, companion planting around stevia improves field ecology, supports pollinators, reduces bare-soil evaporation, and lowers pest flare-ups without sacrificing leaf quality. The key is restraint: stevia should remain the dominant crop in its immediate root zone.