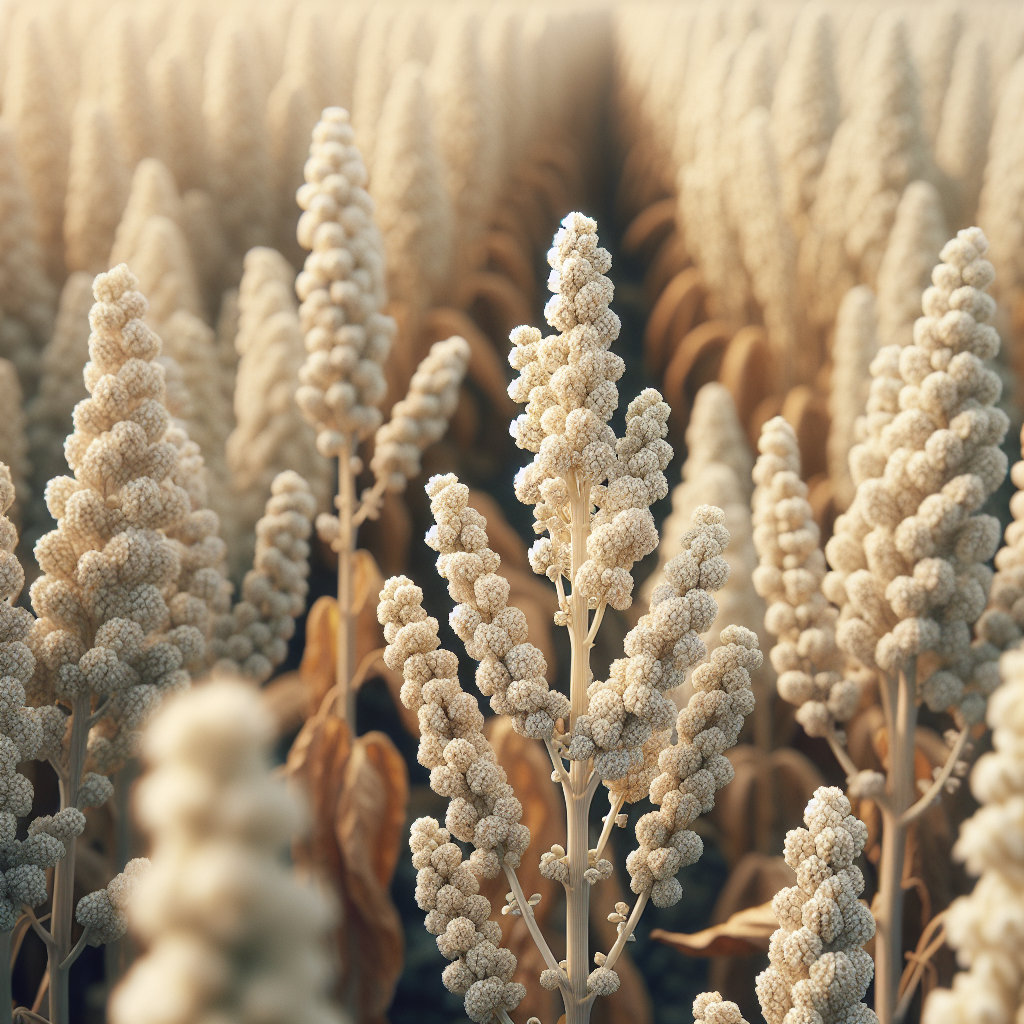
Introduction to White Quinoa
Originating in the Andean region of South America, this ancient grain crop has been cultivated for thousands of years at elevations and in climates where many cereals struggle. White-seeded types are especially valued in food production because they tend to cook to a softer texture than darker forms and are widely accepted in commercial grain markets.
As a crop, it sits in an interesting botanical and agronomic category: quinoa is not a true cereal grass like Wheat, but a broadleaf pseudo-cereal that produces highly nutritious seed. White quinoa is often chosen by growers who want a relatively short-season grain with tolerance for light frost, moderate salinity, and low to medium fertility soils. However, strong yield and high seed quality do not happen by neglect. It requires precise sowing depth, careful weed control early in growth, and a dry finish to avoid sprouting, mildew, and seed staining.
White quinoa is best understood as a crop for cool to mild growing windows rather than hot, humid summers. It can be productive in highland, semi-arid, Mediterranean, and temperate environments if planted so that flowering and seed maturation occur before extreme heat or persistent rain. Its ability to thrive in difficult conditions has made it increasingly important in diversified farms, climate-resilient grain systems, and low-input rotations. For growers interested in broader system design, see soil health strategies.
Botanical Profile of White Quinoa
This species belongs to the Amaranthaceae family, the same broad family that includes beets, spinach, and amaranths. It is an annual dicotyledonous plant rather than a grass, and that distinction matters in the field because its seedlings look more like lambsquarters than like cereal grains. In fact, quinoa is closely related to weedy Chenopodium species, which can complicate early identification and rouging.
White quinoa typically forms an erect central stem with varying levels of branching depending on cultivar, spacing, fertility, and moisture. Plant height may range from 3 to 7 feet (about 0.9 to 2.1 meters), though compact lowland cultivars often remain shorter. Leaves are broad, often triangular to diamond-shaped, and may show mealy coatings on young tissue. As the crop matures, foliage color can shift from green to yellow, red, or purple depending on genetics and environment, even in white-seeded lines.
The inflorescence is a dense terminal panicle, sometimes with secondary panicles on side branches. Flowering is largely self-pollinated, though some outcrossing can occur, especially under insect activity and mixed plantings. Seed color in white quinoa ranges from ivory to pale tan. White-seeded cultivars generally have thinner seed coats and a more neutral flavor profile, though this varies by line. Most commercial seed contains saponins in the outer coating, which help deter birds and some pests but require post-harvest washing or abrasion before consumption.
Botanically, quinoa is highly variable. Some lines are adapted to long-day temperate conditions, others to short-day tropical highlands. This is one reason growers should source seed from a region with similar latitude, day length, and temperature pattern. A cultivar that performs well in the Andes may flower too late or too early in a lowland temperate farm if not selected for local adaptation.
Soil, pH, and Climate Requirements for White Quinoa
This crop is often praised for tolerance to poor soils, but commercial-quality production depends on balance rather than extremes. The ideal soil is a well-drained loam or sandy loam with moderate water-holding capacity and good aeration. Heavy clay can be used if drainage is excellent and the surface is not prone to crusting, but compacted soils sharply reduce stand establishment and root development. Waterlogged conditions are especially dangerous during emergence and flowering.
A target soil pH of 6.0 to 8.0 is generally suitable, with best nutrient availability and root performance around 6.5 to 7.5. One of quinoa's advantages is relative tolerance to mildly alkaline and somewhat saline soils compared with many grain crops. Still, excessive soluble salts can reduce germination and create patchy emergence. If electrical conductivity is elevated, successful establishment depends on having enough moisture to dilute salts in the seed zone while avoiding prolonged saturation.
White quinoa needs full sun and performs best with cool to moderate daytime temperatures. Optimal growth is usually seen between 60 and 75°F (16 to 24°C). Germination can begin in cool soils, often around 40 to 45°F (4 to 7°C), but emergence is slower and more uneven at the lower end. Light frosts during vegetative stages are often tolerated, especially by adapted cultivars, but hard frost during flowering can reduce pollination and seed set.
High heat is a major yield limiter. Temperatures above about 90°F (32°C), particularly during flowering and early grain fill, can cause pollen sterility, flower abortion, and poor panicle fill. Humidity is another critical factor. Dry air and low rainfall during maturation are ideal. Persistent humidity encourages Downy mildew, lodging, delayed dry-down, and darkened seed.
Moisture needs are moderate. Quinoa is more drought resilient than shallow-rooted vegetables, but it is not a zero-water crop. The most important rule is to keep the upper soil profile consistently moist during germination and early seedling growth, then avoid both severe drought stress and chronic saturation. As a guide, soil in the top 1 to 2 inches should remain lightly moist, never muddy, until seedlings are well rooted. Later, the root zone should dry slightly between irrigations. If you squeeze a handful of soil from 3 to 4 inches deep and it forms a weak ball that breaks apart easily, moisture is usually near a good mid-range. If the soil smears, stays glossy, or smells sour, it is too wet.
Step-by-Step Planting & Propagation
This crop is propagated by seed. Direct sowing is strongly preferred because seedlings develop a delicate taproot and do not always transplant cleanly. Start with a stale seedbed if possible: prepare the soil 10 to 14 days early, irrigate lightly to germinate weeds, then shallow-cultivate or flame weed before sowing.
- Select adapted seed. Use a white quinoa cultivar suited to your latitude and season length. Lowland-adapted seed is essential outside traditional Andean zones.
- Prepare a fine, firm seedbed. Clods interfere with shallow sowing and reduce seed-to-soil contact. The surface should be level and crumbly.
- Apply pre-plant nutrients modestly. Excess nitrogen causes rank growth, delayed maturity, and lodging.
- Sow when soil is cool but workable. In temperate climates, this is often early spring after severe freezes are past, or late summer to early autumn in mild winter regions.
- Plant shallowly. A sowing depth of 0.25 to 0.75 inch is ideal. In crust-prone soils, stay toward the shallower end. Deep planting is a frequent cause of failure.
- Space according to management style. For hand-tended beds, rows 12 to 18 inches apart with plants thinned to 4 to 8 inches apart work well. For field production, row spacing of 10 to 20 inches is common, with in-row density adjusted for cultivar size and weed pressure.
- Irrigate gently after sowing if rainfall is not expected. Avoid forceful watering that buries seed or causes crusting.
- Thin once seedlings reach 2 to 4 inches tall. Retain the most vigorous, upright plants.
Germination usually occurs in 3 to 10 days under favorable conditions, longer in cool soils. Seedlings are small and vulnerable in the first two to three weeks, so this is the critical period for stand success. A uniform stand is more important than high plant density; overcrowded plants produce weaker stems and smaller panicles.
In very small-scale systems, starting in soil blocks or deep plug trays can work if seedlings are transplanted extremely young, before roots circle. Even then, direct sowing remains agronomically superior for grain production.
Care & Maintenance regimes for White Quinoa
Early-stage management determines whether the crop becomes competitive or gets overwhelmed. Seedlings grow slowly at first and are poor competitors with fast annual weeds. Keep the bed weed-free during the first 4 to 6 weeks using shallow hoeing, wheel hoe cultivation, or precision hand weeding. Once plants are 10 to 14 inches tall and canopy begins to close, they suppress later weed flushes more effectively.
Nitrogen should be managed conservatively. A total of roughly 40 to 90 pounds of actual nitrogen per acre is often sufficient depending on soil organic matter, previous crop, and yield target. In fertile garden soils, little additional nitrogen may be needed. Too much nitrogen produces lush stems, prolonged greenness, late panicle maturity, and lodging. Leaves that become very dark green, oversized, and succulent are a warning sign of overfeeding. If tissue is pale yellow-green and growth is stunted uniformly, moderate sidedressing may help, but avoid late applications after panicle initiation.
Phosphorus and potassium should be based on soil test results. Phosphorus supports root establishment and early vigor; potassium improves stem strength and stress tolerance. Sulfur can also matter in low-organic-matter soils.
Irrigation should follow crop stage:
- Emergence to 4-leaf stage: maintain evenly moist topsoil. Do not let the seed zone dry fully.
- Vegetative growth: water deeply but less often, encouraging deeper rooting.
- Flowering to early grain fill: avoid drought stress. Moisture deficit here can sharply cut yield.
- Final ripening: reduce irrigation substantially or stop entirely once most seed has formed and foliage begins drying, provided plants are not wilting severely.
Signs of underwatering include midday wilting that persists into evening, slowed stem elongation, small panicles, and premature yellowing of lower leaves. Signs of overwatering include yellowing despite wet soil, soft stems, lower leaf drop, fungal spotting, and shallow roots. In heavy soils, overwatering can also cause a bluish-green, stagnant appearance before collapse.
Lodging risk rises with high fertility, dense stands, wind exposure, and overhead irrigation late in the season. To reduce lodging, avoid excess nitrogen, use moderate spacing, and do not keep the soil saturated once plants are fully established. In windy sites, slightly lower plant populations often produce sturdier stems.
In mixed farms, rotation is essential. Avoid planting after or before related chenopod crops such as beet or spinach when disease carryover is a concern. A 3- to 4-year rotation away from related hosts helps reduce foliar disease pressure.
Pests, Diseases & Organic Management
The most common and economically important disease in many regions is Downy mildew, caused by Peronospora variabilis. It begins as pale angular lesions on leaves, often with grayish or purplish growth on the undersides under humid conditions. Severe infection reduces photosynthetic area, weakens plants, and can lower seed fill. The best organic controls are preventive: resistant or tolerant seed lines, wide enough spacing for airflow, drip or furrow irrigation instead of overhead watering, rotation, and destruction of volunteer plants and chenopod weeds.
Damping-off can affect emergence in cold, wet soils. Prevent it by using well-drained beds, avoiding over-irrigation, and not planting too deep. Seedlings that collapse at the soil line rarely recover.
Leaf spot diseases and Bacterial blights may occur in humid conditions, especially where foliage stays wet overnight. Again, airflow and irrigation timing matter. Water in the morning if overhead irrigation is unavoidable.
Insect pests vary by region. Aphids may colonize new growth and panicles, especially under excess nitrogen. They can distort tender tissue and excrete honeydew that encourages sooty growth. Control by preserving beneficial insects, washing off early infestations, and avoiding lush overfertilized growth. Flea beetles may chew small holes in young leaves, though established plants usually outgrow moderate injury.
Leaf miners and Caterpillars can occasionally damage foliage or panicles. In small plantings, row cover during early establishment helps exclude many pests, but it should be removed by flowering to avoid heat buildup and to improve airflow. If intervention is needed, biological controls such as Bacillus thuringiensis can be used against Caterpillars when larvae are small.
Bird pressure is inconsistent. Some flocks ignore quinoa due to saponins, while others feed heavily on maturing seed heads. Netting, reflective tape, and synchronized harvest timing reduce losses. Rodents can also damage drying seed if windrows or harvested heads are left exposed.
Organic field sanitation is especially valuable. Remove volunteer quinoa and related weeds like lambsquarters, which can act as alternate hosts for pathogens and insect pests. Clean seed, clean borders, and dry harvest conditions often do more than sprays.
Harvesting, Curing & Optimal Storage
White quinoa is ready for harvest when plants have largely senesced, leaves have dropped or dried, stems have lost much of their green color, and seed in the upper and lower panicle rubs free with firmness. Mature seed is hard enough that it cannot be dented easily with a fingernail. Seed moisture at harvest is ideally around 12% or lower for mechanical handling, though hand-harvested plants can be cut slightly earlier and dried under cover.
One challenge is uneven maturity, especially in branched plants or fields with variable fertility. Wait too long and shattering, bird feeding, lodging, or rain damage increase; harvest too early and seed drying becomes more laborious. In small-scale systems, cut whole plants or panicles and bundle them for curing in a dry, airy space out of direct rain. Hang upside down or lay on mesh racks with strong ventilation.
Thresh when material is crisp-dry. This can be done by rubbing panicles, treading on bagged plants, beating inside a clean container, or using small-scale threshing equipment. Winnow carefully to remove chaff. Because quinoa seed is small, use screens matched to cultivar size.
After threshing, cure further if needed until seed moisture reaches about 10 to 12% for medium-term storage and closer to 8 to 10% for long-term storage in sealed containers. A practical test is that dry seed feels hard, flows freely, and does not clump. If bitten, it should be brittle rather than chewy. Never package seed that still feels cool or slightly damp after being held in a closed container for several hours.
Store in food-safe airtight bins in a dark, cool, low-humidity environment. Ideal storage temperatures are below 60°F (16°C), and lower is better for maintaining flavor and viability. Protect from insects with tight lids and clean storage areas. If keeping seed for planting, label by cultivar and harvest lot, and avoid mixing white lines with colored quinoa if purity matters.
Most harvested grain still contains saponins unless you are growing a sweet, low-saponin cultivar. For eating, wash thoroughly until rinse water loses bitterness and foam, or use abrasion methods where appropriate.
Companion Planting for White Quinoa
This crop is usually grown as a block or grain strip rather than interplanted densely like a garden vegetable, but companion species can still improve field ecology and pest balance. The best companions are low-competition plants that do not shade quinoa during its critical early growth period and that support pollinators or beneficial insects nearby rather than directly smothering the row.
Yarrow is especially useful on margins because its umbels attract parasitic wasps, hoverflies, and predatory insects that help keep Aphids in check. Clover can be used as a managed living mulch in paths or between widely spaced beds, but it must be mowed or suppressed so it does not outcompete young quinoa for moisture. Thyme works well on bed edges in dry systems, where it supports beneficial insects without adding much canopy competition. Nasturtium can serve as a trap and distraction plant for some sap-feeding pests in nearby garden-scale plantings.
Avoid pairing with tall, heavy feeders or sprawling crops that shade the stand, increase humidity, or complicate harvest. Companion plants should remain peripheral and strategic, not invasive. In production settings, the best "companion planting" for quinoa is often ecological strip design: insectary borders, clean cultivation during establishment, and non-competitive flowering allies on field edges rather than inside the grain rows.