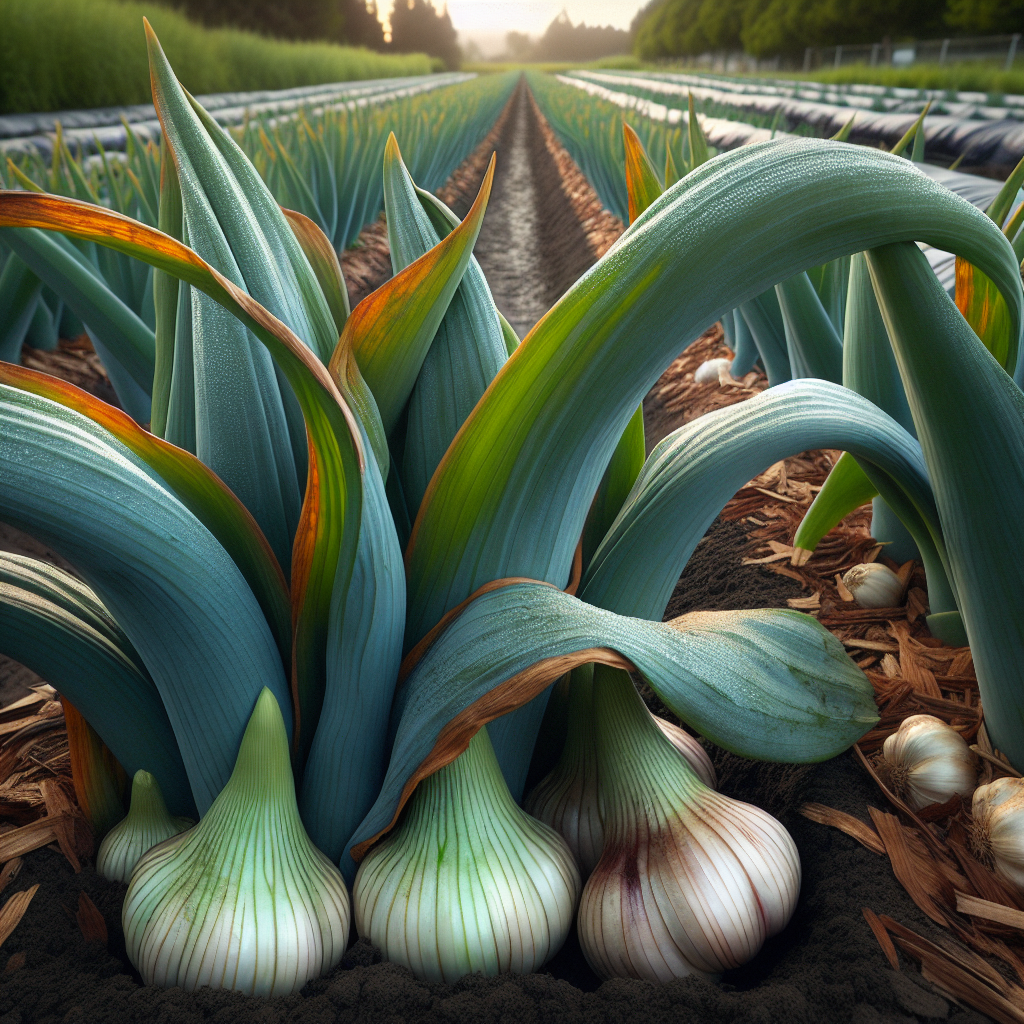
Introduction to Elephant Garlic
Despite its common name, this crop is not a true garlic in the same botanical sense as common culinary garlic, but a form of leek-type allium selected for producing very large segmented bulbs. That distinction matters because its flavor is usually milder, sweeter, and less pungent than standard garlic, especially when roasted or lightly cooked. In the field, however, many cultural practices overlap with garlic production: fall planting in many climates, clove-by-clove propagation, consistent but not excessive moisture, and a dry-down period before harvest.
Growers value it for oversized cloves, strong market appeal, and versatility in the kitchen. Bulbs can reach several times the size of common garlic, often with 4 to 6 very large cloves wrapped in thick outer skins. It is especially appealing to home growers and direct-market farmers because it looks dramatic, stores reasonably well when cured correctly, and can produce tender scapes in many conditions. For growers already familiar with Garlic, the biggest practical differences are spacing, a stronger need for deep, loose soil, and a tendency to produce rounds or undersized bulbs if planting stock is weak or growing conditions are uneven.
Historically, elephant garlic has long been cultivated around the Mediterranean and in parts of Europe and the Middle East as part of the broader Allium ampeloprasum complex. Its popularity surged in modern kitchen gardens because it combines the visual impact of giant bulbs with a flavor profile acceptable even to people who find regular garlic too sharp. In commercial terms, it is often sold at a premium when bulbs are uniform, wrappers are intact, and cloves are large enough for easy peeling.
Botanical Profile of Elephant Garlic
This crop belongs to the species Allium ampeloprasum, the same broad species complex that includes leeks and some great-headed garlic types. It is usually classified as Allium ampeloprasum var. ampeloprasum. Unlike Allium sativum, true garlic, it often behaves more like a robust biennial allium with a stronger leek-like growth habit in the leaves and pseudostem.
Plants form broad, strap-like, blue-green leaves with a waxy surface. The foliage is typically taller and coarser than common garlic, often reaching 60 to 120 cm depending on fertility, climate, and day length. Underground, the plant develops a large basal plate and then a bulb composed of several giant cloves surrounded by thick, papery wrappers. Small corm-like offsets can also form around the main bulb, especially if plants are stressed, immature, or grown from non-ideal stock.
Those offsets are important biologically and agriculturally. If planted, they often do not immediately become a multi-cloved bulb. In the first year they frequently produce a single solid round, somewhat like a giant onion-garlic pearl. Replanting that round the following season commonly yields a proper segmented bulb. This two-step development explains why growers who save planting stock should sort carefully: large cloves usually give the most reliable first-year market bulbs, while offsets are useful for expansion but slow down production.
In many environments, plants may send up a central flower stalk or scape. Some strains bolt more readily than others, especially after winter chilling. Removing the scape usually redirects resources toward bulb size, though some growers leave a few for observation or seedhead aesthetics. Seed is not the standard propagation method; vegetative propagation is far more reliable and preserves bulb size traits.
Soil, pH, and Climate Requirements for Elephant Garlic
The ideal soil is deep, friable, well-drained loam with high organic matter and excellent aeration. Because bulbs become exceptionally large, any compaction layer in the top 20 to 30 cm of soil can visibly reduce bulb expansion, create asymmetrical cloves, or trap moisture around the basal plate. Heavy clay can be used if improved with compost and shaped into raised beds, but poorly drained ground is one of the fastest ways to lose a crop to rot.
Target a soil pH of 6.2 to 7.0, with the sweet spot around 6.5 to 6.8. Below about 6.0, nutrient availability becomes less balanced and root growth can be restricted. In overly alkaline soils above 7.5, micronutrient issues, especially with iron or manganese, may show up as pale foliage and sluggish growth. If the soil is acidic, apply agricultural lime well before planting according to a soil test. Avoid fresh, caustic amendments immediately before planting because they can damage clove tissue.
Nutritionally, elephant garlic prefers fertile soil with moderate to high nitrogen early in growth, adequate phosphorus for root establishment, and strong potassium for bulb formation and overall stress tolerance. A realistic preplant target in garden or small-farm systems is a generous incorporation of finished compost plus a balanced organic fertilizer, with extra nitrogen supplied in split applications during active vegetative growth. Too much nitrogen late in the season can delay maturity, soften wrappers, and reduce storage life.
Climate-wise, the crop performs best in temperate regions with a cool establishment period and a warm, relatively dry finish. Fall planting is preferred in many areas because cloves root in cool soil, benefit from winter chilling, and resume vigorous spring growth. In colder zones, mulch helps protect against freeze-thaw heaving. In very mild winter climates, it still performs well, though bulb sizing may depend more heavily on cultivar adaptation and accumulated chill.
Ideal growing temperatures are roughly 10 to 24°C during vegetative growth. Prolonged heat above 30°C, especially combined with drought, can shorten the bulbing period and reduce final bulb size. Conversely, waterlogged cold soils in winter can rot cloves before emergence. Full sun is best; a minimum of 6 hours of direct light is workable, but 8 or more hours supports stronger foliage and larger bulbs.
If you are improving bed structure before planting alliums, broad principles in this soil health article are highly relevant, especially where compaction and drainage are limiting factors.
Step-by-Step Planting & Propagation
Start with the best planting stock you can source. Choose large, healthy bulbs with intact wrappers and no signs of mold, softness, basal plate damage, or shriveling. Separate bulbs into cloves only shortly before planting, ideally within 24 to 48 hours, because long-separated cloves dry out faster and can lose vigor.
Select the largest outer cloves for primary production beds. These produce the strongest plants and the biggest harvest bulbs. Reserve tiny interior pieces or side offsets for nursery rows if you want to expand your stock over multiple seasons. Planting mixed sizes in one bed usually results in uneven maturity and nonuniform bulb size.
Prepare beds 20 to 30 cm deep. Work in mature compost and, if needed, a balanced organic fertilizer. Raised beds 10 to 20 cm high are especially useful in regions with wet winters. Remove perennial weeds completely before planting because alliums compete poorly early on.
In most temperate climates, plant in autumn, about 2 to 6 weeks before the ground freezes hard. In milder regions, late autumn to early winter is suitable. In very cold, short-season areas, early spring planting is possible, but bulbs are often smaller because the plants have less time to establish before bulbing begins.
Plant cloves pointed end up, basal plate down, at a depth of about 5 to 8 cm of soil above the clove. In colder climates, planting slightly deeper plus a winter mulch can improve survival. Space cloves 15 to 20 cm apart within rows, with 25 to 40 cm between rows depending on your weeding method and target bulb size. Wider spacing generally pays off with elephant garlic because crowding restricts the dramatic bulb expansion buyers expect.
After planting, water enough to settle soil around the cloves but do not saturate the bed. The goal is moist, oxygenated soil, not wet soil. A 5 to 8 cm mulch layer of clean straw or shredded leaves can regulate winter temperature swings, suppress weeds, and reduce crusting. Keep mulch lighter in regions with heavy spring rains so the bed can dry and warm appropriately.
For propagation from offsets, plant them separately and expect patience. Small offsets commonly produce only rounds in year one. Harvest and replant those rounds the following season for full bulbs. Commercially, this is a slower route, but it is useful for maintaining stock without sacrificing all prime cloves.
Care & Maintenance regimes for Elephant Garlic
Water management determines whether the crop finishes with dense, well-wrapped bulbs or with rot-prone, poorly formed heads. Maintain evenly moist soil during establishment and active leaf growth. A good practical target is moisture in the root zone that feels cool and slightly damp 5 to 10 cm below the surface, never muddy and never powder dry. In field terms, about 2.5 cm of water per week from rain or irrigation is often sufficient in spring, but sandy soils may need more frequent, lighter irrigation while heavier soils need less frequent, deeper watering.
The critical period is from rapid spring leaf expansion through early bulb enlargement. Moisture stress at that stage reduces leaf area, and each healthy leaf corresponds roughly to a bulb wrapper and contributes to final bulb size. If plants wilt repeatedly in daytime and do not recover by evening, growth is already being checked. If leaf tips scorch early, bulbs stay small, or outer cloves fail to size, inconsistent watering is often part of the cause.
Overwatering has a distinct signature. Lower leaves may yellow prematurely, the soil may smell sour, plants can appear stunted despite abundant moisture, and bulbs may show brown basal plate discoloration when lifted. In severe cases, roots become sparse and tan rather than white and fibrous. Stop irrigation as bulbs approach maturity and when about one-third to one-half of the leaves have yellowed naturally. Excess moisture late in the cycle reduces wrapper quality and storage life.
Feed plants early, not late. Once shoots are 10 to 15 cm tall, side-dress with a nitrogen source such as blood meal, feather meal, or a balanced pelleted fertilizer appropriate to your system. Repeat once or twice at 3- to 4-week intervals until just before bulbing intensifies. After that point, heavy nitrogen can push leaf growth at the expense of curing and bulb firmness.
Weed control should be meticulous. Elephant garlic has a shallow, relatively sparse root system compared with aggressive summer vegetables. Even moderate weed pressure can cut bulb size sharply. Hand weed shallowly or use stirrup hoes when weeds are tiny. Avoid deep hoeing near plants because root pruning reduces yield.
Mulch helps with both weed suppression and moisture buffering, but monitor it in humid areas. Thick mulch pressed against stems can trap moisture and encourage fungal issues. Pull it back slightly from the pseudostem once spring warms.
Scape management depends on your production goal. If scapes form, remove them when they make one curl or while still tender. This usually improves bulb size and marketable uniformity. Scapes themselves are edible and saleable. If you want to study maturity behavior in your strain, leave a few plants uncut as a comparison.
Crop rotation is essential. Do not plant elephant garlic after onions, leeks, shallots, or other alliums for at least 3 years, and 4 years is better where disease pressure exists. Rotation reduces buildup of soilborne pathogens and bulb pests.
Pests, Diseases & Organic Management
Compared with some vegetables, this crop is not constantly besieged, but when problems occur they can be economically significant because the crop occupies the bed for a long period. The biggest risk factors are wet soil, repeated allium planting, and stressed growth.
Onion thrips are among the most common insect issues. They rasp leaf tissue and suck plant fluids, producing silvery streaks, dull foliage, and reduced vigor. Heavy infestations can reduce bulb size by limiting photosynthesis. Encourage natural predators, avoid excessive nitrogen that creates lush susceptible growth, and use strong water sprays early where practical. In certified organic systems, spinosad or insecticidal soaps may help if timed carefully, though coverage on waxy leaves can be challenging.
Bulb mites can damage stored planting stock and field bulbs, especially where decay is already present. Infested cloves may be soft, pitted, or distorted. Prevention is far more effective than cure: use clean planting stock, rotate crops, and avoid saving bulbs from diseased beds.
Nematodes, particularly Stem and bulb nematodes, can cause swelling, distortion, poor emergence, and soft bulbs. Once introduced, they are difficult to eradicate. Buy clean seed stock, sanitize tools, and maintain a long rotation away from alliums. Destroy suspect plants rather than composting them.
Fungal and oomycete diseases are often the greatest concern. White rot is particularly devastating in alliums. It causes yellowing, collapse, and a white fluffy fungal growth at the bulb base, often with tiny black resting bodies. Because it persists in soil for many years, prevention is critical: never move contaminated soil, use clean stock, and avoid introducing infected bulbs.
Basal rot and other storage or field rots are favored by warm, wet conditions and wounds. Soft bulbs, brown basal plate tissue, and poor curing are common clues. Downy mildew can also strike in cool, humid weather, showing as pale leaf lesions and grayish growth under favorable conditions. Good spacing, morning irrigation rather than evening watering, and strong airflow reduce disease pressure.
Organic management rests on five principles: clean planting stock, raised and well-drained beds, long crop rotation, sanitation of cull bulbs and debris, and irrigation discipline. Remove and destroy infected plants promptly. Do not leave diseased bulbs in the ground after harvest, since they can serve as inoculum reservoirs.
Harvesting, Curing & Optimal Storage
Harvest timing is a balance between maximum bulb size and acceptable wrapper integrity. Wait too long and wrappers split, exposing cloves and shortening storage life. Harvest too early and bulbs may be undersized or insufficiently matured. A common indicator is when roughly 40 to 60% of the foliage has yellowed and fallen over naturally, while several upper leaves remain partly green.
Loosen bulbs carefully with a digging fork or undercutter, staying well outside the row to avoid slicing the large bulbs. Do not pull forcefully by the stems if the soil is firm; neck breakage and basal damage reduce storage quality. Lift on a dry day if possible.
Handle bulbs gently. Elephant garlic bruises more easily than many growers expect because the cloves are large and the wrapper layers can tear under rough handling. Shake off loose soil, but do not wash bulbs intended for storage. Keep roots and tops attached during the initial curing stage.
Cure in a shaded, warm, dry, well-ventilated place for 2 to 4 weeks. Ideal curing conditions are roughly 24 to 30°C with strong air movement and low ambient humidity. Spread bulbs in a single layer on racks or hang them in bundles with good spacing. Direct sun after lifting can scald bulbs, especially in hot climates, so avoid prolonged exposure.
Bulbs are fully cured when necks are dry, outer wrappers are papery, and roots are brittle. At that point, trim roots and cut tops down to 2 to 5 cm above the bulb unless you are braiding or selling with stems for presentation. Sort out any damaged, soft, split, or diseased bulbs and use them first.
For storage, keep bulbs cool, dry, and well ventilated. A target of 10 to 15°C with relative humidity around 60 to 70% suits small-scale storage well. Warmer rooms accelerate sprouting and shrinkage; colder, damp conditions can encourage mold. Under good conditions, elephant garlic generally stores for several months, though often not as long as the best softneck garlic cultivars. Check monthly and remove any softening bulbs immediately.
Save only the healthiest, largest, truest bulbs for replanting. This is one of the simplest ways to improve your line over time. Replanting small or marginal stock steadily drifts the crop toward more rounds, smaller bulbs, and inconsistent maturity.
Companion Planting for Elephant Garlic
This crop fits well into diversified gardens and market beds because its upright habit occupies relatively little horizontal canopy space while its sulfurous aroma may help confuse or deter some pests. The best companions are usually shallow to moderate feeders that do not heavily shade it and that appreciate similar moisture conditions during cool to mild weather.
Carrot is a classic partner because its fine foliage does not crowd the allium canopy, and the two crops occupy different root profiles. Some growers also pair elephant garlic with Lettuce during early growth, using lettuce as a quick intercrop before the bulbs fully size. Beet can work in adjacent rows where spacing is generous, and Spinach is useful as a fast spring companion in wide beds.
Avoid pairing it tightly with crops that need frequent heavy irrigation late into summer, because elephant garlic benefits from a drying period as harvest approaches. Likewise, avoid dense, sprawling neighbors that trap humidity around leaves and bulbs. Brassicas can be nearby in rotation plans, but do not let vigorous midsummer canopies shade the crop during the bulb-filling period.
Companion planting should not replace rotation discipline. The most important rule is still to keep it away from repeated allium plantings and from disease carryover zones. In practical production, companion planting is most helpful for space efficiency, weed suppression, and diversified harvest timing rather than as a standalone pest-control strategy.