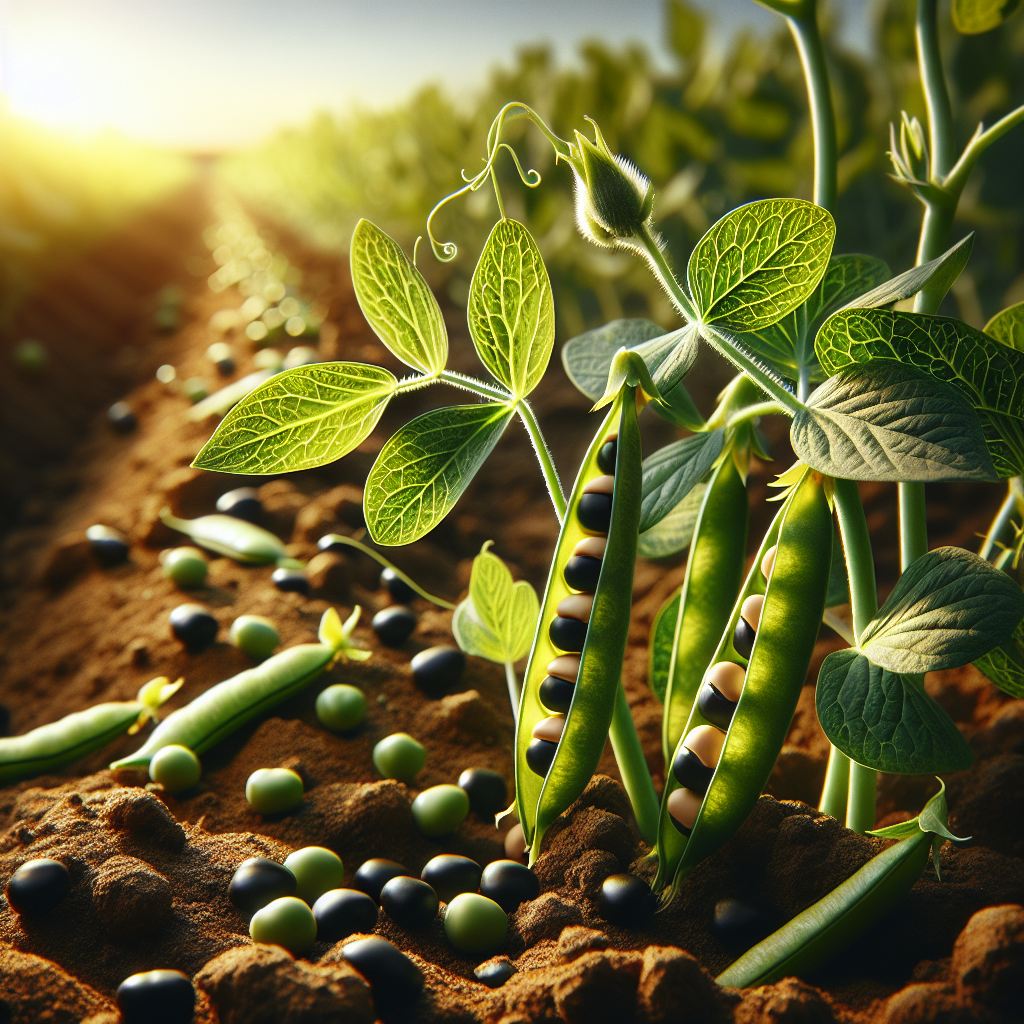
Introduction to Black Eyed Peas
A staple legume across Africa, the American South, the Caribbean, and parts of Asia, this crop is one of the most practical warm-season field and garden beans for dry climates and low-input systems. Although commonly called a pea, it is botanically a cowpea, and its cream-colored seed with the characteristic black hilum gives it the familiar "black-eyed" appearance.
Historically, black eyed peas traveled from Africa through global trade routes and became deeply embedded in Southern U.S. food traditions, especially for New Year meals symbolizing luck and prosperity. Agronomically, they matter just as much as they do culturally: they tolerate heat better than many common beans, perform reliably in sandy or lower-fertility soils, and contribute nitrogen to crop rotations through symbiosis with Rhizobium bacteria. In small farms and home gardens, they can serve triple duty as a food crop, soil-improving legume, and summer ground cover.
Growers should understand one key trait from the beginning: black eyed peas are resilient, but resilience is not the same as maximum yield. They survive neglect better than many legumes, yet commercial-quality pod set and full seed fill still depend on warm planting conditions, moderate fertility, good weed control in the first month, and moisture consistency during bloom and pod development.
Botanical Profile of Black Eyed Peas
This crop belongs to the Fabaceae family and is more closely related to other cowpeas than to true garden peas. Plants vary by cultivar, but most black eyed pea types are bushy, semi-vining, or trailing annuals with trifoliate leaves, papilionaceous flowers, and elongated pods typically borne in pairs or small clusters.
Important botanical and agronomic features include:
- Growth habit: Bush to semi-vining, usually 18-36 inches tall, though some heirloom or forage cowpeas can run longer.
- Root system: A strong taproot with numerous lateral roots, giving better drought tolerance than shallow-rooted legumes.
- Nitrogen fixation: Effective when compatible rhizobia are present; nodules are usually visible on roots 3-5 weeks after emergence in healthy systems.
- Flowers: Usually pale yellow, cream, or light purple, depending on strain.
- Pods: Slender, 5-10 inches long, turning from green to tan, straw, purple, or brown at maturity depending on cultivar.
- Seeds: Most classic black eyed pea cultivars are ivory to buff with a distinct black eye, though related cowpea strains may show brown, red, or pink eyes.
Black eyed peas are often grouped as southern peas, field peas, or cowpeas. From a production standpoint, cultivars differ in days to maturity, plant architecture, synchronized pod set, and suitability for hand harvest versus mechanical harvest. Some are better for fresh shelling at the green-shell stage, while others are selected for dry-down and storage. If your goal is dry beans, favor compact, early, concentrated-setting cultivars; if your goal is multiple hand harvests for fresh use, choose a cultivar with extended flowering and easier shelling.
For growers comparing legumes, black eyed peas generally tolerate hotter weather than Soybeans, but they are less frost tolerant and should never be rushed into cold ground.
Soil, pH, and Climate Requirements for Black Eyed Peas
This crop performs best in full sun, high heat, and well-drained soil. It is one of the better legumes for marginal ground, but yield and disease pressure are strongly shaped by soil structure and drainage.
Ideal soil texture ranges from sandy loam to loam. Clay soils can work if they are friable and well drained, but heavy, compacted clay often causes slow emergence, poor nodulation, and increased root disease. Sandy soils warm quickly and are excellent for early planting, but they dry out faster and may require more frequent irrigation during flowering.
Preferred pH is about 5.8 to 7.0, with an optimum near 6.0-6.5. Below pH 5.5, nodulation and nutrient availability often decline, particularly phosphorus, calcium, and molybdenum. Above pH 7.5, iron and zinc deficiencies become more likely, especially in calcareous soils. If pH is low, incorporate agricultural lime several months before planting. If pH is high, avoid over-liming and rely on compost, localized fertility, and foliar micronutrient correction only if tissue tests confirm deficiency.
Drainage is non-negotiable. Black eyed peas dislike waterlogged conditions far more than brief dryness. Saturated soils for even 24-48 hours in warm weather can reduce oxygen around roots, interrupt nodulation, and predispose seedlings to Damping-off or root rot. The ideal moisture profile is evenly moist in the top 3-4 inches during germination, then moderately moist but never swampy once roots expand.
A practical target for irrigation scheduling is to maintain roughly 50-70% of field capacity through vegetative growth and closer to 60-75% during flowering and pod fill. In garden terms, soil should feel slightly cool and cohesive when squeezed, but not smear into a sticky ribbon or release free water. If the top inch is powdery and dry while the 2-3 inch layer is barely moist, the crop is entering stress. If the soil smells sour, footprints linger, and lower leaves yellow while the soil is still wet, overwatering is likely.
Temperature requirements are warm. Seeds germinate best at 70-95°F (21-35°C), with rapid, uniform emergence above about 68°F (20°C). Below 60°F (16°C), germination slows markedly and seed rot risk increases. Established plants thrive in daytime temperatures of 75-95°F (24-35°C). They tolerate heat better than many beans, but prolonged temperatures above 100°F (38°C), especially combined with hot night temperatures, may reduce pollination and pod retention.
Frost sensitivity is high. Even light frost can kill seedlings or severely damage mature plants. Plant only after all danger of frost has passed and the soil has truly warmed.
Rainfall and drought tolerance are often misunderstood. Black eyed peas can survive dry spells because of their rooting depth and conservative growth habit, but yield loss occurs when drought hits at flowering or early pod fill. Drought stress at that stage typically causes blossom drop, short pods, poor seed fill, and stringy pod walls. Consistent water during reproductive stages is what separates survival from productivity.
For broader fertility-building principles in low-input systems, see soil health strategies.
Step-by-Step Planting & Propagation
Propagation is by seed. Direct sowing is strongly preferred because seedlings develop a taproot early and resent transplant disturbance.
1. Select the planting window. Wait until soil temperature at 2 inches deep is consistently at least 65°F (18°C), ideally 70°F (21°C) or warmer in the morning. In cool springs, delaying planting by a week often produces a better stand than sowing into marginal soil.
2. Prepare the bed. Create a fine, firm seedbed free of large clods. Black eyed peas do not need heavily enriched ground; in fact, excessive nitrogen promotes lush foliage at the expense of pod production. Incorporate finished compost modestly, about 1-2 inches on poor garden soil, or use none at all if soil already has good organic matter and a history of legumes.
3. Inoculate if needed. If cowpeas have not been grown in the field recently, use a cowpea-specific Rhizobium inoculant. Moisten seed lightly, dust with inoculant, and sow promptly out of direct sun. Good inoculation improves nodulation, vigor, and protein yield, especially in new ground.
4. Sow at the correct depth. Plant seeds 1-1.5 inches deep in medium soils, slightly shallower in heavy clay and slightly deeper in sandy soils where the surface dries quickly. Uneven depth causes uneven emergence, which complicates weeding and harvest.
5. Space properly. For bush types, sow seeds 2-4 inches apart in rows 24-36 inches apart. Thin to 4-6 inches apart if a dense stand emerges. For semi-vining types, allow 6-8 inches between plants and 30-36 inches between rows. Dense spacing may work in dry climates with low disease pressure, but excessively crowded canopies increase humidity and reduce airflow.
6. Water for establishment. After sowing, irrigate enough to moisten the seed zone without creating crusting. If surface crust forms after a hard rain or overhead irrigation on fine-textured soil, emergence can be reduced. A very light mulch after seedlings establish can help moderate crusting and heat, but do not bury young stems.
7. Control weeds early. The first 3-5 weeks are critical. Young black eyed peas are moderately competitive once rooted, but not during emergence. Shallow hoeing or flame-free stale seedbed techniques before emergence are useful. Avoid deep cultivation that severs roots or nodules.
8. Succession plant if desired. For extended fresh-shell harvests, sow every 2-3 weeks through early to midsummer in long-season climates. For dry beans, time the final planting so pods mature in warm, relatively dry weather.
Care & Maintenance regimes for Black Eyed Peas
Once established, this crop is lower maintenance than many vegetables, but professional results come from managing water, fertility, canopy balance, and field hygiene.
Water management should change by growth stage:
- Germination to emergence: Keep the top 1.5-2 inches consistently moist. Drying during this period leads to patchy stands.
- Vegetative growth: About 1 inch of water per week is often sufficient in moderate soils, though sandy soils may require split irrigations.
- Flowering and pod fill: Increase to 1-1.5 inches per week depending on heat and soil type. This is the most moisture-sensitive stage.
- Dry-down before harvest: Reduce irrigation once most pods have matured to improve drying and lower disease pressure.
Signs of underwatering include dull or bluish-green leaves, midday wilting that persists into evening, aborted flowers, short pods, and undersized seeds. Signs of overwatering include yellowing lower leaves despite wet soil, slow growth, edema-like blistering, root browning, and fewer active nodules. Healthy nodules, when cut open, are pink to reddish inside; pale green, white, or brown nodules are inactive or declining.
Fertilization should be restrained. Black eyed peas usually need little nitrogen if inoculated and grown after a moderately fertile crop. A soil test is best, but general guidance is:
- Avoid high-N fertilizers.
- Ensure adequate phosphorus for rooting and flowering.
- Supply potassium where soils are sandy or previously cropped hard.
- In poor soils, a balanced low-nitrogen preplant amendment works better than repeated feeding.
Excess nitrogen causes rank vegetative growth, delayed flowering, and soft tissue more attractive to Aphids. If plants are pale and growth is weak despite warm soil, verify nodulation before adding nitrogen. A small rescue application may help in truly deficient soils, but heavy feeding undermines the legume advantage.
Mulching can be useful once soil is warm. Apply a light organic mulch such as straw after seedlings are 4-6 inches tall. Keep mulch from touching stems to reduce collar rot. Mulch conserves moisture, suppresses weeds, and prevents soil splash that can spread disease.
Support is usually unnecessary for bush forms, but semi-vining or heirloom types may benefit from low netting or brush support to keep pods cleaner and improve airflow.
Weed management matters most early. After canopy closure, the crop shades soil reasonably well. Never hill soil heavily around stems as with potatoes; this can bury the crown and encourage disease.
Crop rotation is essential. Do not grow black eyed peas after other legumes in the same spot year after year. A 3-year rotation is ideal to reduce Root-knot nematodes, Fusarium, and bacterial issues. Rotating with cereals like Corn is particularly effective in diversified systems.
Pests, Diseases & Organic Management
Black eyed peas are comparatively rugged, but several pests and pathogens can limit yield, especially under heat stress, poor rotation, or dense canopies.
Aphids cluster on tender growth and flower stems, sucking sap and excreting honeydew. Heavy infestations curl leaves and can transmit Viruses. Encourage beneficial insects, avoid excess nitrogen, and knock colonies off with strong water sprays early in the day. In severe organic programs, insecticidal soap can work if sprayed directly on the pests and repeated as needed.
Cowpea curculio is a serious regional pest in parts of the southeastern United States. Adults puncture pods and larvae damage developing seed. Sanitation, timely harvest, field rotation, and destruction of crop residue are critical because once larvae are inside pods, control is difficult.
Thrips may scar flowers and reduce pod set, especially in hot, dry weather. Blue or yellow sticky cards help monitor populations, but field hygiene and habitat for predators are more useful long term than repeated sprays.
Spider mites appear under drought and heat stress, causing stippled leaves and webbing. Consistent irrigation and dust reduction around field margins help prevent outbreaks.
Root-knot nematodes are among the most important hidden problems. Plants become stunted, pale, and unresponsive to irrigation; roots show galls. Rotation with non-host crops, soil solarization in hot climates, resistant cultivars where available, and adding organic matter can reduce pressure. Nematode problems are often worse in sandy soils.
Damping-off and Seedling blights are favored by cool, wet soil and poor drainage. Prevention is better than cure: warm soil, quality seed, good spacing, and avoiding overwatering are the main tools.
Fusarium wilt and Root rots cause yellowing, vascular discoloration, and plant collapse. They are most common in compacted or repeatedly cropped soils. Rotate, improve drainage, and remove infected plants.
Powdery mildew may appear late in dry climates with cool nights, while Bacterial blights are more common after rain splash and overhead irrigation. Space plants properly, water at soil level when possible, and avoid handling foliage when wet.
Viruses can cause mosaic, leaf distortion, and stunting. There is no cure; rogue symptomatic plants early, manage insect vectors, and use clean seed.
Organic management works best as a layered system:
- Plant into warm, well-drained soil.
- Use crop rotation.
- Avoid excessive nitrogen.
- Maintain airflow.
- Irrigate deeply but not constantly.
- Remove and destroy badly diseased residues.
- Harvest promptly to reduce pest carryover.
Harvesting, Curing & Optimal Storage
This crop can be harvested at three different stages, and each stage requires different handling.
Snap stage harvest is uncommon but possible when pods are still slender and immature. Quality is best before fibers develop.
Fresh-shell stage is popular for kitchen use. Harvest when pods are fully sized and green to light yellow, and seeds inside are plump but not dry. Pods should feel full and slightly leathery rather than tender-flat. Shell immediately or refrigerate unshelled pods for a few days.
Dry bean stage is the standard for storage. Wait until most pods turn tan or straw colored and become papery. Seeds should be hard, and pods should rattle when shaken. If rainy weather threatens, pull whole plants or cut them at the base and finish drying under cover with strong airflow.
For hand harvest, pick mature dry pods every few days to prevent shattering and weather damage. In larger plots, once 80-90% of pods are dry, whole-plant harvest is efficient.
Curing is crucial for storage quality. Pods or shelled beans should be dried until seed moisture is about 12% or lower, and closer to 10% for long storage. A practical test: beans should be very hard, and a bitten seed should crack rather than dent. In humid climates, use screens, fans, and shaded dry rooms rather than direct hot sun for prolonged periods, which can cause seed coat splitting.
Threshing and cleaning can be done by hand shelling, gentle beating of dried plants in a clean sack, or small-scale pedal or drum threshers. Winnow out chaff thoroughly because debris retains moisture and harbors insects.
Storage conditions should be cool, dark, and dry. Ideal storage is below 60°F (16°C) with relative humidity below 50%. Use airtight jars or sealed food-safe containers only after beans are fully dry; sealing slightly damp beans traps moisture and leads to mold. For seed saving, select disease-free plants with desirable traits, dry well, and store under stable low-humidity conditions. Properly cured dry beans often remain usable for 1-2 years for food and somewhat less for best germination.
Common storage pests include bean weevils. Freezing thoroughly dried beans for 3-7 days before long-term storage can kill hidden eggs and larvae. After freezing, allow containers to return to room temperature before opening so condensation does not form on the seed.
Companion Planting for Black Eyed Peas
The best companions are crops that benefit from improved soil biology, tolerate summer heat, and do not compete aggressively for the same canopy space during establishment. Traditional intercropping with Corn works well because the cereal uses nitrogen later in the cycle while the legume helps diversify rooting and ground cover. Okra is another excellent partner in hot climates because it shares similar temperature preferences without forming an overly dense low canopy. Sunflower can function as a light shade and insect-support plant when spaced generously, and Cucumber can work nearby if moisture is managed carefully and airflow is preserved.
Avoid pairing black eyed peas directly with heavy-feeding, sprawling crops in cramped beds if they will smother seedlings before the cowpeas establish. Also avoid repeated legume-on-legume associations in the same space if disease or nematodes are already present.
A practical companion layout is alternating wide rows: one row of black eyed peas, one row of corn or okra, with border flowers or insectary strips beyond the main bed. Keep enough row width for light penetration and hand access. In home gardens, black eyed peas also function well as a rotational bridge between spring greens and late summer plantings, fixing nitrogen while covering bare soil during the hottest part of the season.