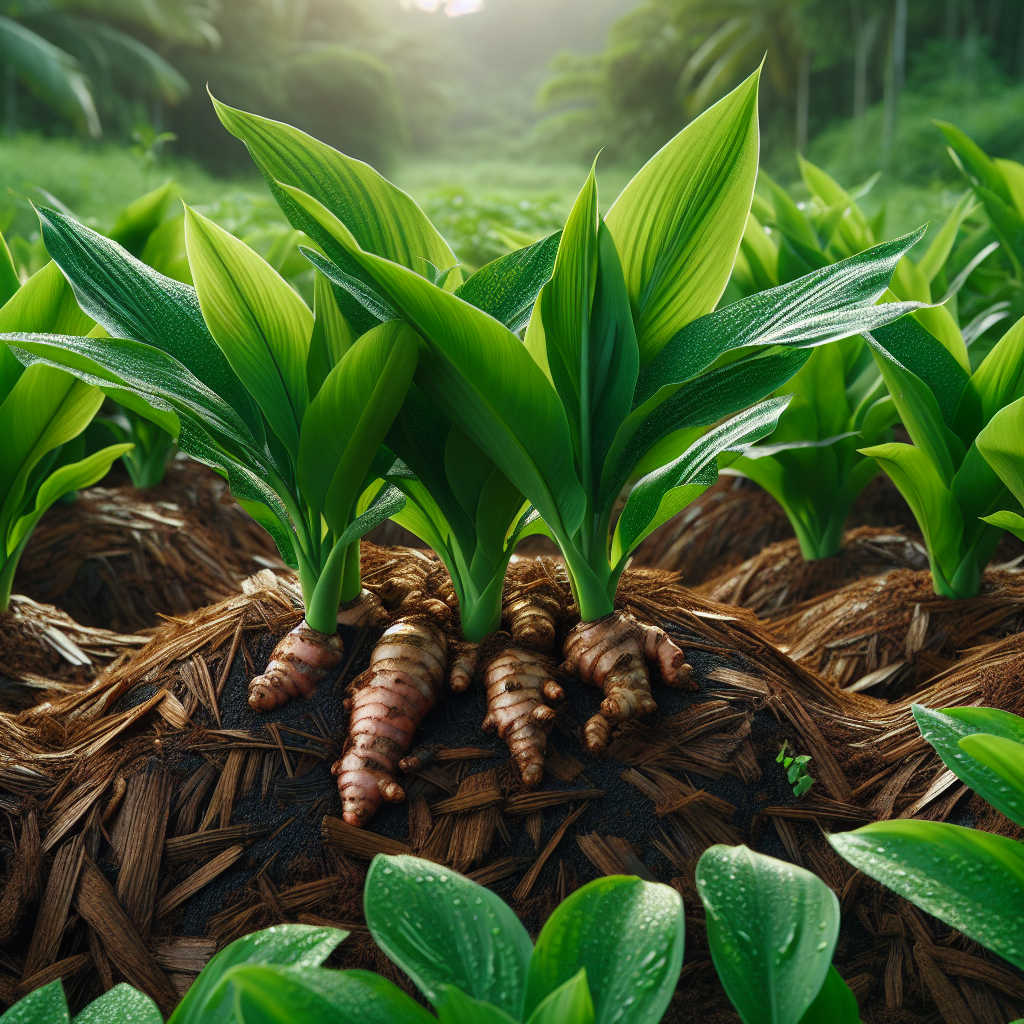
Introduction to Madras Turmeric
A classic South Indian turmeric type, this cultivar group is associated with the old Madras region and is grown primarily for its underground rhizomes, which are used fresh, dried, or processed into powder. Compared with some high-color export types, Madras selections are often recognized for balanced culinary quality, reliable field performance, and adaptability under monsoonal production systems.
Turmeric belongs to the ginger family, Zingiberaceae, and behaves as a warm-season perennial grown as an annual for rhizome harvest. In professional production, the crop is judged not just by yield, but by mother rhizome size, finger development, dry recovery percentage, color retention after boiling and drying, fiber content, and curcumin level. Madras Turmeric is especially well suited to growers who can provide steady warmth, high organic matter, and a long growing season of roughly 7 to 9 months.
Historically, turmeric has occupied an important place in South Asian agriculture, cuisine, ritual use, and traditional medicine. The Madras trade name became widely used in spice markets to distinguish regional curing and flavor profiles. For growers, this matters because market expectations may differ: some buyers want high dry matter and bright orange-yellow powder, while local culinary markets may prioritize aroma and fresh rhizome quality over pigment concentration alone.
If you are familiar with Turmeric generally, Madras types follow the same broad agronomy but benefit from careful attention to drainage, organic nutrition, and harvest timing to achieve good curing quality.
Botanical Profile of Madras Turmeric
This plant is a rhizomatous herb with a pseudostem formed by tightly rolled leaf sheaths. It typically reaches 60 to 100 cm in height under field conditions, though fertile soils and partial shade can push growth taller. Leaves are lanceolate to oblong-lanceolate, smooth, medium to deep green, and arranged alternately from the rhizome. The crop develops a central mother rhizome and lateral finger rhizomes, which are the main economic product.
Botanically, the underground structure is not a true root but a modified stem. The mother rhizome is thicker and more bulbous, while the fingers are cylindrical branches. Seed production is uncommon in cultivation; propagation is almost entirely vegetative through rhizome pieces bearing viable buds. This clonal propagation preserves cultivar traits but also increases the risk of carrying forward diseases such as rhizome rot, nematodes, and bacterial contamination if planting stock is poorly selected.
Growth proceeds through recognizable phases. First comes sprouting and root initiation, often 2 to 5 weeks after planting depending on temperature and moisture. Next is vigorous vegetative growth, during which leaves and feeder roots expand rapidly. Rhizome initiation follows once canopy establishment is strong, and then a long bulking period begins. As the crop matures, lower leaves yellow, top growth slows, and the plant reallocates reserves into underground rhizomes.
Madras Turmeric generally shows the typical turmeric flavor profile: warm, slightly bitter, earthy, and resinous. In field terms, desirable phenotypes include uniform sprouting, good tillering, strong leaf area without lodging, moderate disease tolerance, and well-filled fingers with smooth skin. Professional growers should rogue out weak, chlorotic, stunted, or off-type plants early because these often reduce field uniformity and may indicate latent disease.
Soil, pH, and Climate Requirements for Madras Turmeric
This crop thrives in deep, friable, humus-rich loam to sandy loam soils that hold moisture but never remain waterlogged. The ideal soil profile allows rhizomes to expand freely to at least 20 to 30 cm depth. Heavy clays can work only if they are heavily amended and formed into raised beds or ridges; otherwise, oxygen deprivation around the rhizomes leads to rot, poor finger formation, and difficult harvest.
A soil pH of 5.5 to 7.0 is ideal, with 6.0 to 6.8 being an excellent working range for nutrient availability and microbial activity. Below pH 5.2, aluminum stress and poor calcium-magnesium balance may reduce root vigor. Above pH 7.5, micronutrients such as iron and zinc can become less available, showing up as interveinal chlorosis on new leaves. Before planting, test for pH, organic matter, electrical conductivity, and major nutrient reserves. Turmeric is moderately sensitive to salinity; soils with persistently high soluble salt levels can suppress emergence and produce thin, undersized fingers.
Climate is the most important production factor after drainage. Madras Turmeric requires a frost-free tropical or subtropical environment with sustained warmth. Ideal temperature range is 20 to 35°C, with best vegetative growth around 25 to 30°C. Growth slows markedly below 18°C, and chilling injury may occur below 10 to 12°C. Frost can destroy top growth outright.
Rainfall or irrigation should support consistently moist soil during establishment and vegetative growth, followed by steady but not excessive moisture during bulking. Total seasonal water need is substantial, often 1200 to 2000 mm depending on soil type, evaporative demand, and mulch use. However, this does not mean saturated conditions are acceptable. The target is even moisture similar to a wrung-out sponge in the active root zone. In practice, the upper 10 to 15 cm of soil should remain lightly moist, not sticky, sour-smelling, or slick.
Signs the soil is too dry include slow emergence, rolled leaf margins, shorter pseudostems, reduced tillering, and early yellowing of older leaves. Signs of excess water include dull leaf color, soft pseudostem bases, stagnant growth despite adequate fertility, fungus gnat or algae presence in container culture, and a fermented odor from the soil. Rhizomes in overly wet ground often become brown, soft, and water-soaked internally.
Light requirements are flexible. The crop performs well in full sun where moisture and nutrition are adequate, but in very hot regions, 20 to 30% filtered shade can reduce leaf scorch and conserve soil moisture. It can also be integrated in multistory systems under Coconut, provided competition for water and nutrients is managed carefully.
For broader fertility strategies in intensive systems, growers may also benefit from principles outlined in soil health strategies.
Step-by-Step Planting & Propagation
Begin with disease-free seed rhizomes taken from vigorous, high-yielding mother plants. Select medium-sized, well-matured rhizome pieces weighing roughly 20 to 35 g each and carrying 1 to 3 healthy buds. Avoid shriveled pieces, darkened cut surfaces, soft spots, or any rhizome with tunneling, mildew, or rot odor. The best planting material is fully mature, not freshly harvested immature stock.
Prepare the field 3 to 6 weeks before planting. Deeply loosen the soil to 25 to 30 cm and incorporate large amounts of decomposed organic matter, ideally 20 to 40 tons per hectare of well-rotted farmyard manure or mature compost. Fresh manure should never be applied directly at planting because it can stimulate pathogenic activity and create excessive heat around sprouting rhizomes.
Form raised beds 1 to 1.2 m wide or ridges 20 to 30 cm high in high-rainfall zones. Good bed architecture is critical: if monsoon rain can stand around the rhizomes for even 48 to 72 hours repeatedly, rhizome rot pressure rises sharply. In lighter soils with drip irrigation, broad beds covered with mulch are especially effective.
Before planting, many professional growers treat seed rhizomes in a biological or botanical dip. A common organic approach is a suspension containing Trichoderma-based biocontrol, sometimes combined with neem seed kernel extract. Allow treated pieces to shade-dry briefly before planting. If cutting larger rhizomes into pieces, do so with sanitized tools and let the cut surfaces cure for a short period in a clean, airy, shaded place.
Plant when soil temperatures are reliably warm and moisture is available, usually just before or at the onset of rains. Set rhizome pieces 4 to 6 cm deep, buds facing upward where orientation is visible. Typical spacing is 30 x 20 cm for small-scale intensive beds or 45 x 20 to 30 cm in broader field systems. Closer spacing increases early canopy cover and weed suppression, but excessive density reduces airflow and can increase foliar disease.
After planting, mulch immediately with straw, dried leaves, sugarcane trash, or similar clean organic material. A 5 to 8 cm mulch layer stabilizes temperature, reduces crusting, moderates splash-borne disease, and sharply improves moisture retention. In hot, exposed fields, mulch can be the difference between irregular emergence and a uniform stand.
Container production is possible if volume is generous. Use pots at least 35 to 50 cm deep and wide, filled with a loose, rich medium containing compost and coarse drainage material. Never use compacted garden soil alone in containers, as it tends to stay too wet around the rhizomes.
Care & Maintenance regimes for Madras Turmeric
Nutrient management should prioritize steady, moderate feeding rather than large late nitrogen applications. Turmeric responds strongly to organic matter because its feeder roots benefit from biologically active, moisture-stable soil. A practical organic program includes basal compost or manure before planting, followed by 2 to 4 side-dressings of vermicompost, composted poultry manure, or oilseed cakes during the first 4 to 5 months.
Nitrogen is most important during canopy development, phosphorus supports rooting and early establishment, and potassium is essential for rhizome bulking, firmness, and postharvest quality. A common mistake is pushing lush top growth deep into the season with excess nitrogen; this often delays maturity, softens tissues, and can increase disease susceptibility. If leaves are very dark green, soft, and succulent while rhizome development seems weak, reduce nitrogen and improve potassium and calcium balance.
Water management should follow crop stage. During the first 6 weeks after planting, maintain evenly moist soil in the upper rooting zone, but avoid saturation before sprouting. During active vegetative growth, irrigation intervals may range from every 3 to 7 days in sandy soils and every 7 to 10 days in heavier loams, depending on rainfall and temperature. During rhizome bulking, avoid cycles of severe drying followed by flooding; these swings reduce uniformity and may cause cracking or internal stress. In the final weeks before harvest, gradually reduce irrigation to allow the field to dry enough for cleaner lifting and better skin set.
Earthing up is a key practice. At roughly 60 and 120 days after planting, pull loose soil around the plant bases if rhizomes are beginning to swell near the surface. This prevents greening, supports the clump, and encourages cleaner finger development. Perform this only when soil is moist but not sticky.
Weed pressure is most damaging in the first 10 to 12 weeks, before canopy closure. Hand weeding or shallow hoeing is safest because deep cultivation can damage feeder roots and young rhizomes. Thick mulch dramatically reduces weeding labor. Once the stand closes, healthy turmeric usually suppresses many annual weeds on its own.
In high-rainfall systems, ensure constant drainage maintenance. Open blocked furrows immediately. Even excellent soils fail if runoff ponds between rows. In protected or home garden settings, remove senescent, diseased leaves to improve air movement and reduce inoculum load.
Pests, Diseases & Organic Management
The most serious production issue is rhizome rot, commonly associated with Pythium and related water-mold pathogens. The earliest field symptoms are yellowing of lower leaves, reduced vigor, and a slight wilt during warm hours that does not recover normally. At the base, tissues may feel soft, and rhizomes become discolored, mushy, and foul-smelling. Management depends far more on prevention than cure: use clean planting stock, rotate away from susceptible rhizomatous hosts, maintain raised beds, avoid standing water, and apply beneficial antagonists such as Trichoderma to soil and seed rhizomes.
leaf blotch and leaf spot diseases may appear during humid weather as brown, tan, or irregular necrotic lesions, sometimes with yellow halos. Severe infection reduces photosynthetic area and can limit rhizome filling. Improve spacing, avoid overhead irrigation late in the day, remove badly infected foliage, and maintain potassium nutrition for stronger leaf tissue.
Shoot borer can attack pseudostems, causing dead hearts, bored holes, or frass accumulation. Affected shoots may yellow from the center outward. Remove and destroy infested shoots promptly. Neem-based sprays can help suppress early pest populations, especially when used preventively and timed to larval activity.
Rhizome scale insects and mealybugs may infest stored or field rhizomes, sucking sap and weakening planting material. Inspect seed rhizomes carefully before planting. Hot water treatment within safe crop limits, botanical dips, and clean storage conditions reduce carryover.
Root-knot nematodes can stunt plants, reduce feeder roots, and predispose rhizomes to secondary infection. In organic systems, rotation with non-host or suppressive cover crops, neem cake incorporation, and high-organic-matter management help lower pressure over time. Avoid repeatedly planting turmeric or Ginger in the same soil without a break, since both can harbor overlapping soilborne issues.
Integrated organic management works best when layered: clean seed rhizomes, sanitation, drainage, mulch, biologicals, balanced fertility, and regular scouting. Waiting until widespread yellowing appears usually means yield loss has already occurred.
Harvesting, Curing & Optimal Storage
Harvest timing depends on intended use. For fresh culinary turmeric, rhizomes can be lifted earlier when plump but still tender. For drying and powder production, wait until full maturity, typically 7 to 9 months after planting, when leaves and pseudostems yellow and begin drying back naturally. Premature harvest reduces dry recovery, color development, and storage life.
A mature crop usually shows 50% or more foliage senescence, firmer rhizomes, and a skin that is better set and less easily abraded. Stop irrigation 2 to 3 weeks before harvest if soil and weather allow. This helps reduce mud adhesion and lowers the risk of mechanical damage during lifting.
Lift clumps carefully with forks or digging tools to avoid cutting fingers. Separate mother rhizomes and fingers, trim roots, and wash thoroughly. For cured turmeric, the rhizomes are traditionally boiled or steamed before drying. Proper curing gelatinizes starch, reduces raw odor, improves color uniformity, and hardens the product.
Boiling must be controlled. Under-cured rhizomes dry unevenly and may retain a raw interior, while overcooking can dull color and reduce aroma. The rhizomes are typically cooked until they become slightly soft and froth appears, but not until they disintegrate. After curing, dry them in clean sun or under forced-air drying conditions until moisture falls to around 8 to 10%. Fully dried rhizomes should be hard, with no leathery interior when broken.
Polishing removes rough outer scales and improves appearance. This may be done manually or mechanically after drying. For powder production, store dried fingers whole as long as possible and grind closer to sale time to preserve aroma and color.
Fresh rhizomes store best at cool, not cold, temperatures with good ventilation and moderate humidity. For planting stock, keep rhizomes in a dry, shaded, well-aerated place protected from rodents and excess moisture. Condensation is dangerous: it encourages mold, bacterial decay, and premature sprouting. For dried turmeric, use airtight, moisture-proof packaging and keep it away from direct light, which degrades volatile compounds and color quality.
Companion Planting for Madras Turmeric
This crop fits well into humid tropical mixed systems where its shallow feeder roots and upright foliage can occupy the understory beneath taller species. The most useful companions are those that provide light shade, improve humidity moderation without causing waterlogging, or contribute biologically to soil function.
Banana is one of the best companions in warm climates. It creates broken shade, reduces hot wind stress, and helps maintain a favorable microclimate for tender turmeric foliage. The pairing works best when irrigation and fertility are generous, because both crops are nutrient-hungry. Keep enough spacing to avoid intense root competition and stagnant airflow.
Coconut supports traditional multistory spice gardens, where filtered light and leaf litter improve the soil environment. Turmeric can perform well in the outer drip zone if beds are well mulched and supplemental nutrients are provided.
Cardamom suits similar warm, humid conditions and can share management priorities in shaded systems, especially where organic mulches are plentiful and drainage is carefully engineered.
Clover can be useful as a managed living groundcover in some non-tropical or irrigated specialty systems, but it must be kept low and non-competitive. Its greatest value is soil cover and gradual organic contribution, not unchecked coexistence. In very wet climates, dense living covers can trap humidity and should be used cautiously.
Avoid pairing turmeric closely with aggressive root crops or sprawling vines that shade it excessively and complicate harvest. The best companion system is one that preserves airflow, allows easy earthing-up, and does not create long periods of saturated soil around the rhizomes.