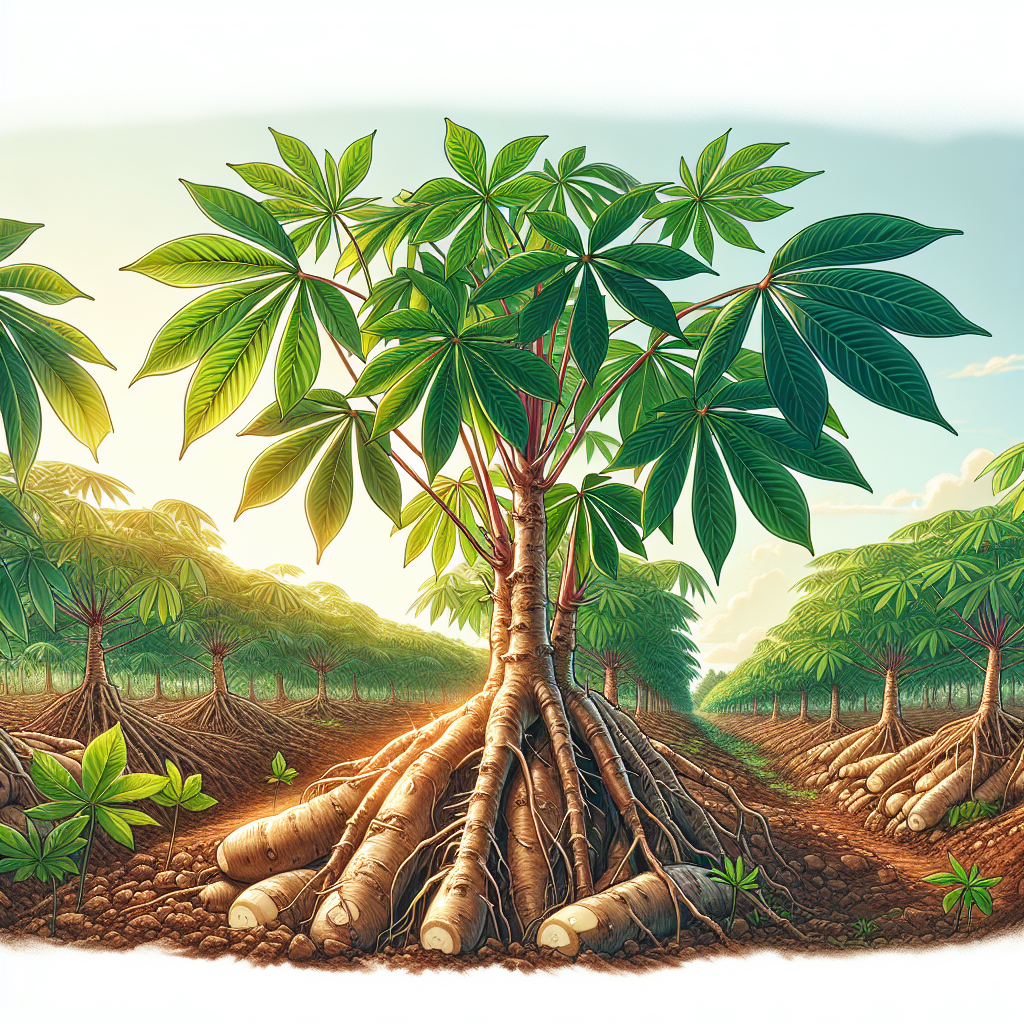
Introduction to Cassava
A staple crop for hundreds of millions of people across Africa, Latin America, the Caribbean, and parts of Asia, cassava is one of the world’s most important food-security plants. It is grown primarily for its enlarged underground storage roots, which are rich in starch and can be consumed fresh after proper preparation or processed into flour, gari, fufu, tapioca, chips, and industrial starch. Unlike many root crops, cassava is especially valued for its resilience: it can survive dry spells, continue producing in low-fertility soils, and remain in the ground for an extended harvest window.
Its history begins in tropical South America, where Indigenous peoples domesticated it long before global trade spread it widely. Portuguese and Spanish colonial networks later moved cassava to Africa and Asia, where it became deeply integrated into local farming systems. Today, it functions as both a subsistence staple and a commercial crop, with varieties bred for fresh eating, processing quality, starch content, disease resistance, and adaptation to distinct rainfall regimes.
Growers should understand one crucial fact from the outset: cassava is not a “plant and forget” crop if high yields are the goal. It is forgiving in survival terms, but profitable, high-quality production depends on careful selection of planting stakes, proper field establishment, weed suppression during the first three months, balanced nutrition, and timely harvest. Another non-negotiable point is food safety. Cassava tissues contain cyanogenic glucosides, especially in bitter cultivars. Proper peeling, soaking, fermenting, drying, or cooking is essential before consumption.
Botanical Profile of Cassava
Cassava belongs to the family Euphorbiaceae and is a perennial woody shrub usually cultivated as an annual or short-duration perennial crop. Depending on cultivar and environment, plants commonly reach 1.5 to 3 meters tall, though some can exceed that under favorable conditions. The stem is segmented and somewhat brittle, with visible nodes that make vegetative propagation straightforward.
Leaves are palmately lobed, borne on long petioles, and vary in color from light green to dark green, sometimes with reddish petioles or stems depending on the variety. Leaf architecture can influence canopy closure, light interception, and weed suppression. Cassava’s flowers are relatively small and not the main focus in production because commercial planting is almost always by stem cuttings rather than by seed.
The crop’s economic product is the swollen storage root, which develops from adventitious roots that enlarge as carbohydrates accumulate. Not every root on a cassava plant becomes marketable. A vigorous plant may produce 5 to 15 substantial storage roots, with shape ranging from cylindrical to tapered. Root skin may be white, cream, brown, or reddish externally, while the flesh is usually white or cream, though some yellow-fleshed biofortified cultivars contain elevated provitamin A carotenoids.
Cassava cultivars are often grouped informally into sweet and bitter types, though this distinction is relative rather than absolute. Sweet cultivars generally contain lower cyanogenic potential and are preferred for boiled fresh consumption, while bitter cultivars often offer advantages in pest resistance, field holding ability, or processing suitability. Even so-called sweet cassava must still be properly cooked before eating.
The crop follows a typical growth sequence: establishment from stem cuttings, sprouting from nodes, canopy development, root initiation, root bulking, and a maturation phase in which dry matter and starch concentration increase. Early top growth is critical because weak canopy establishment usually means weak root yield later. Once the canopy closes and roots begin bulking, cassava becomes markedly more resilient to intermittent drought. For comparison with another major tropical starch crop, see Sweet Potato.
Soil, pH, and Climate Requirements for Cassava
Cassava performs best in warm tropical to warm subtropical climates with a long frost-free season. Ideal average temperatures range from 25 to 29°C, though growth can continue reasonably from about 18 to 35°C. Below 18°C, growth slows sharply; prolonged chilling can stunt plants and reduce root bulking. Frost is highly damaging and can kill top growth or entire plants. In marginal subtropical regions, cassava should only be planted once soil has thoroughly warmed and no cold snaps are expected.
Rainfall of 1000 to 1500 mm annually is excellent for rainfed production, especially when distributed during the first 4 to 6 months after planting. However, cassava can still survive and produce under lower rainfall because of its drought tolerance. Survival, though, is not the same as maximum yield. The most critical period for moisture is establishment and early vegetative growth. If drought hits immediately after planting, sprouting is patchy, root initiation is delayed, and final yields drop substantially.
The best soils are well-drained sandy loams to loams with good depth, moderate organic matter, and loose structure that allows roots to expand evenly. Deep friable soils encourage long, well-shaped roots that are easier to harvest and more marketable. Heavy clay soils often produce misshapen roots, waterlogging, and harvest difficulty. Stony ground causes forking and deformation. Very compacted soils restrict root expansion and lower starch yield.
Soil drainage is one of the most important factors in cassava culture. The crop tolerates drought far better than saturated soil. In poorly drained ground, oxygen depletion around the root zone leads to root rot, reduced microbial balance, poor nutrient uptake, and blackened or decaying storage roots. If water stands in the field for more than 24 to 48 hours after heavy rain, the site is risky unless ridges or mounds are used.
The preferred soil pH is about 5.5 to 6.5, though cassava can tolerate a broader range, roughly 4.5 to 7.5. It is more acid-tolerant than many staples, but strong acidity can still create aluminum toxicity and depress calcium, magnesium, and phosphorus availability. On alkaline soils, micronutrient deficiencies may appear, especially iron and zinc. A soil test before planting is strongly advised because cassava’s reputation as a low-input crop often leads growers to underestimate nutrient mining.
Cassava removes significant potassium, and root bulking is particularly responsive to adequate K supply. It also needs sufficient phosphorus for early root development and nitrogen in moderation for canopy establishment. Excessive nitrogen can produce luxuriant leaf growth at the expense of storage root development, especially on fertile soils.
For growers working on degraded land, improving structure and biology pays off. Incorporating compost, crop residues, green manures, or cover crops can enhance water infiltration, reduce crusting, and improve nutrient retention. Raised ridges 20 to 40 cm high are often beneficial in heavier soils. For broader fertility concepts, read soil health strategies.
Step-by-Step Planting & Propagation
Cassava is propagated almost exclusively from stem cuttings, commonly called stakes. Use only healthy, mature stems from vigorous mother plants that are free from mosaic symptoms, excessive dieback, cankers, and insect damage. The best stems are typically taken from plants 8 to 14 months old, depending on the variety and production cycle. Avoid very green immature stems because they dry out quickly and sprout weakly.
Select the middle, woody portion of the stem whenever possible. The basal section can be too old and less physiologically active, while the uppermost section may be immature. Cut stakes 20 to 25 cm long for most systems, ensuring each piece contains 5 to 7 viable nodes. In drier conditions, slightly longer stakes can improve establishment because they store more moisture and energy reserves.
Prepare land by plowing or digging deeply enough to loosen the top 20 to 30 cm of soil. In mechanized systems, form ridges or beds if drainage is less than ideal. In smallholder systems, mounds are common and can improve root shape and ease of harvest. Remove perennial weeds before planting; cassava is a weak competitor during its first 8 to 12 weeks.
Plant at the beginning of the rainy season or when reliable irrigation is available. Soil should be moist but not waterlogged. If planting into dry soil with uncertain rain, establishment losses can be severe because stem cuttings dehydrate before rooting.
Planting orientation matters. Stakes may be inserted vertically, slanted at about 45 degrees, or laid horizontally in shallow furrows. Vertical or slanted planting is often preferred where drainage is a concern and where easier harvesting is desired. Horizontal placement can increase root number in some soils but may also produce more scattered roots. In most commercial and practical settings, slanted planting offers a good balance.
Insert about two-thirds of the stake into the soil, leaving 2 to 3 nodes above ground if using vertical or slanted placement. Ensure at least 10 cm of stake is in consistently moist soil. Poor soil contact leads to delayed rooting and uneven emergence.
Spacing depends on variety, soil fertility, and whether the crop is sole-planted or intercropped. Common spacings include:
- 1.0 x 1.0 m for standard production
- 0.9 x 0.9 m for denser stands on fertile land
- 1.2 x 1.0 m where plants are vigorous or intercropping is planned
A spacing of 1 x 1 m gives about 10,000 plants per hectare, a reliable benchmark. Dense stands may increase total root yield per area but can reduce average root size. Wider spacing usually produces larger roots and facilitates field operations.
After planting, inspect the field at 2 to 4 weeks. Replace missing plants promptly to maintain uniformity. Late gaps reduce overall productivity and complicate harvest timing.
Care & Maintenance regimes for Cassava
The first 90 days largely determine success. During this stage, cassava needs freedom from weed competition, moderate but consistent moisture, and enough nutrients to build a photosynthetically active canopy. Once established, it becomes much more tolerant of stress.
Water management should be precise. Cassava prefers moist, aerated soil rather than constant wetness. During establishment, aim to keep the root zone lightly and evenly moist, roughly comparable to 60 to 80% field capacity in practical agronomic terms. In the field, this means the soil should form a weak ball when squeezed by hand but should not smear, glisten, or release water. If the top 3 to 5 cm dries completely and stays dry while cuttings are still rooting, sprouting can fail. After plants are established, cassava can tolerate intervals of drying, but prolonged drought during the first 3 to 4 months reduces root initiation and canopy expansion.
Signs of underwatering include delayed sprouting, curled young leaves, short internodes, and thin stems. Severe stress causes leaf shedding and arrested bulking. Signs of overwatering include yellowing despite adequate fertility, blackened stem bases, foul-smelling soil, soft roots, and wilting even when the soil is wet because roots are oxygen-starved.
Fertilization should be based on soil tests, but a general program for moderate-yield targets often includes balanced basal nutrition with emphasis on phosphorus and potassium. Nitrogen is useful early, especially on poor soils, but should not be excessive. As a broad example, many systems perform well with moderate N, moderate P, and relatively high K. Where organic amendments are used, apply well-rotted compost before planting rather than fresh manure, which can stimulate excessive vegetative growth and increase disease risk.
A common professional strategy is:
- Incorporate compost or decomposed manure before planting
- Apply phosphorus near planting time if soils test low
- Split nitrogen and potassium applications, with the first side-dress at 4 to 6 weeks and the second at 8 to 12 weeks
- Avoid late heavy nitrogen applications after canopy establishment
Potassium is especially important for starch accumulation, drought tolerance, and root quality. Deficiency often appears as marginal leaf scorching on older leaves, weak stems, and poor root filling. Magnesium deficiency can show as interveinal chlorosis on older leaves, particularly in acid sandy soils.
Weed control is essential until canopy closure. The critical weed-free period is usually the first 8 to 12 weeks after planting. Two to three timely weedings during this interval can dramatically influence yield. Mulching with dry plant residues helps conserve moisture and suppress weeds, but keep mulch a short distance away from young stems to reduce rot and pest harborage.
Pruning is generally not recommended in root production systems because leaves are the engine driving carbohydrate accumulation. However, if plants lodge badly or excessive branching develops due to damage, selective management may be needed. Frequent leaf stripping for fodder can lower root yield if done aggressively.
In windy sites, earthing up around the base of plants improves anchorage and covers exposed roots. This also helps on sloping land where erosion might uncover developing storage roots.
Pests, Diseases & Organic Management
Cassava is hardy, but several pests and diseases can seriously reduce yield and planting material quality. The best defense is integrated management based on clean stakes, resistant varieties, field sanitation, healthy soil, and regular scouting.
Cassava mosaic disease is among the most destructive viral problems. Symptoms include mottled, distorted, reduced leaves and severe stunting. Plants infected early often yield poorly. Because viruses are commonly spread through infected planting material and insect vectors such as Whiteflies, the single most effective control is to start with disease-free stakes from healthy mother plants. Rogue severely infected plants early if incidence is low.
Cassava brown streak disease, where present, can be even more devastating because roots may look externally normal but develop internal brown necrotic corky patches that make them unusable. Again, clean planting material and resistant or tolerant varieties are essential.
Bacterial blight causes angular leaf spots, wilting, dieback, and stem lesions. It spreads more readily in wet conditions and through contaminated tools or infected stakes. Sanitation, resistant varieties, and avoiding mechanical damage help limit outbreaks.
Cassava anthracnose can affect stems, causing cankers, dieback, and poor stake quality. Stem health matters not only for the current crop but also for the next planting cycle.
Among insect pests, Cassava mealybug and Cassava green mite are notorious in many regions. Mealybugs cluster on tender shoots and leaf axils, sucking sap and distorting growth. Green mites cause stippling, bronzing, and reduced leaf area, especially in hot dry weather. Whiteflies are important both for direct feeding and as vectors of viral disease.
Organic and low-chemical management principles include:
- Plant only vigorous, symptom-free stakes
- Use locally adapted resistant or tolerant cultivars whenever available
- Maintain field hygiene by removing volunteer cassava and severely diseased plants
- Encourage beneficial insects with diversified borders and reduced broad-spectrum pesticide use
- Avoid excess nitrogen, which can encourage soft, pest-prone growth
- Rotate with non-host crops when disease pressure is chronic
- Destroy crop residues from heavily diseased fields rather than carrying them forward as planting material
For mealybugs and Whiteflies, strong jet sprays are impractical at scale, but in small plots neem-based sprays or insecticidal soaps may reduce populations when directed to shoot tips and undersides of leaves. Applications should be made during cooler parts of the day to limit leaf burn. Predatory insects and parasitoids can provide excellent control where ecological balance is preserved.
Root rots are typically linked to poor drainage, waterlogging, or injured roots. Preventive management is far more effective than rescue treatment: use raised beds, avoid compacted soils, and handle fields carefully during weeding and earthing up.
Rodents and wild animals may also damage roots near harvest. Field sanitation, perimeter management, and timely harvest reduce losses.
Harvesting, Curing & Optimal Storage
Cassava harvest timing depends on variety, intended use, and climate. Early-maturing cultivars may be ready in 7 to 9 months, while many main-season varieties are harvested at 10 to 14 months. Some can remain in the ground longer, but overextended field holding may lead to woody texture, declining culinary quality, increased fiber, or greater pest pressure.
A mature crop usually shows a combination of signals: lower leaves begin to yellow and drop naturally, stem growth slows, and sample roots have reached expected size and starch content. The most reliable method is to lift a few representative plants and evaluate root diameter, number, dry matter, and internal quality.
Harvesting is usually manual in small and medium systems. First cut the stems back to about 20 to 40 cm above ground, especially if stems will be saved for new planting material. Then loosen the soil around the base with a fork, hoe, or digging tool and pull the stump steadily. In lighter soils, whole root clusters can often be lifted by hand; in compacted soils, breakage is common unless the soil is loosened first.
Handle roots gently. Cassava has notoriously poor postharvest shelf life because physiological deterioration begins rapidly, often within 24 to 72 hours of harvest. Vascular streaking, blue-black discoloration, and internal quality loss can develop even before obvious rot. Bruising accelerates this process.
Unlike onions or some other storage crops, cassava is not traditionally cured in a long, dry sense, but short-term postharvest handling can still improve outcomes. Keep harvested roots shaded, cool, and clean. Do not leave them exposed to direct sun, which increases dehydration and deterioration. If roots are destined for fresh market, wash gently only if they can be dried and sold quickly; excess surface moisture without airflow encourages decay.
For short storage, several strategies help:
- Leave roots unwashed and keep them in a cool shaded place
- Pack in slightly moist sawdust, sand, or perforated liners to reduce moisture loss
- Seal peeled pieces only under proper refrigeration and hygiene conditions
- Process promptly into chips, flour, starch, gari, or fermented products for longer preservation
If stem cuttings are being saved for propagation, select healthy, mature stems from disease-free plants at harvest. Tie and store them upright or in bundles in shade with good ventilation for a limited period, protecting them from desiccation and rain. Planting stakes lose vigor if stored too long or under very hot dry conditions.
For food use, remember that roots must be peeled and properly cooked or processed. Leaves, though edible in some cuisines, also require correct preparation to reduce cyanogenic compounds.
Companion Planting for Cassava
Cassava is often integrated into mixed cropping systems rather than grown alone, especially by smallholders managing risk, labor, and land efficiency. Because it establishes slowly and occupies the field for many months, companion planting can make good use of light and space during the early growth phase.
Suitable intercrops are usually short-duration species that mature before cassava canopy closure becomes too dense. Good options include legumes such as cowpea, peanuts, and beans, which help suppress weeds, diversify farm output, and in some systems contribute nitrogen to overall soil fertility. Maize is commonly intercropped in many regions, though spacing must be adjusted so cassava is not excessively shaded during establishment.
Ground-covering legumes are especially useful because cassava’s early weed vulnerability is one of its biggest management bottlenecks. A well-planned intercrop can reduce hand weeding needs while protecting soil from erosion. However, companions should not be so aggressive that they outcompete young cassava for light, water, or nutrients in the first 6 to 10 weeks.
Practical companion principles include:
- Use low to medium stature, fast-maturing intercrops
- Avoid dense sprawling species that smother newly planted stakes
- Increase cassava spacing slightly when intercropping
- Provide enough fertility for both crops, especially potassium
- Harvest companion crops early enough to preserve cassava root bulking potential
Cassava also fits well into broader rotations with cereals and legumes. Rotating away from continuous cassava reduces disease buildup, interrupts pest cycles, and slows nutrient depletion. After cassava, growers often follow with legumes or green manures to rebuild soil structure and fertility.
In agroforestry or home-garden systems, cassava can serve as a temporary filler crop during establishment of slower perennial species, but it should not be placed where heavy shade will develop. Cassava is fundamentally a full-sun crop; root yield declines significantly under persistent shading.
The best companion strategy is therefore not simply planting another crop nearby, but designing a system where cassava gets a clean start, adequate sun, and strong early growth while companion species provide income, food, weed suppression, or soil benefits without sacrificing root production.