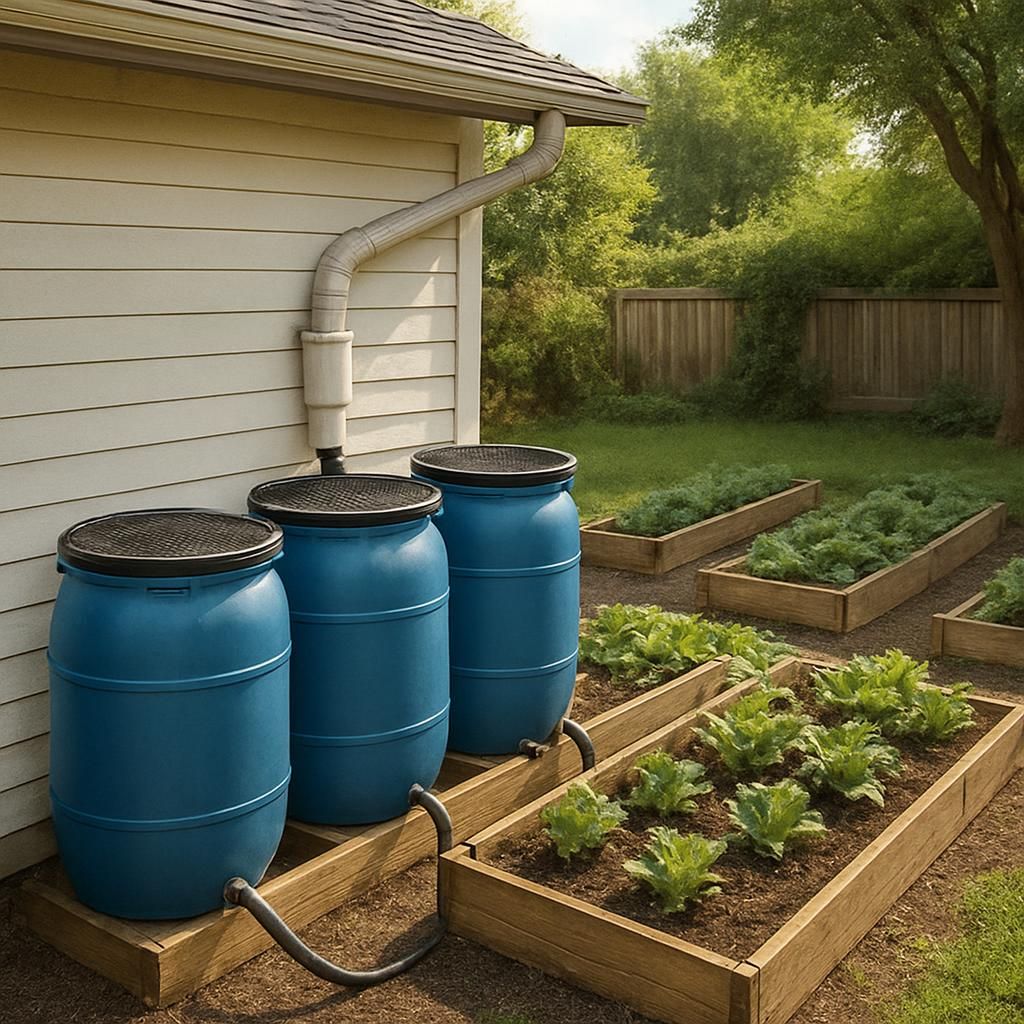
Introduction
Homesteaders and gardeners often seek reliable ways to manage water resources efficiently, especially in areas with seasonal rainfall or water restrictions. A DIY rainwater harvesting system captures precipitation from rooftops and other surfaces, storing it for later use in irrigating crops like Tomato and Lettuce. This approach reduces reliance on municipal supplies while providing chemical-free water that benefits soil health and plant growth.
Implementing such a system requires careful planning around collection surfaces, filtration, storage, and distribution. With basic materials and organic principles in mind, anyone can create a functional setup that supports year-round gardening needs.
Common Challenges
Several factors commonly affect the success of rainwater collection efforts. Understanding these helps avoid common pitfalls during installation.
| Challenge | Description | Impact on System |
|---|---|---|
| Roof Material | Asphalt shingles or metal surfaces | Potential contamination from debris or chemicals |
| Storage Capacity | Limited barrel or tank size | Overflow during heavy rains or shortages in dry periods |
| Filtration Needs | Absence of screens or first-flush diverters | Sediment buildup affecting water quality |
| Local Regulations | Permit requirements or usage limits | Legal restrictions on collection volume |
| Climate Variability | Inconsistent rainfall patterns | Inadequate supply during droughts |
These issues often stem from overlooking site-specific conditions such as roof slope, average annual precipitation, and proximity to garden beds.
Step-by-Step Organic Solutions
Follow this structured process to construct an effective system using natural and low-impact materials wherever possible.
1. Assess Your Collection Area
Calculate potential yield by measuring roof square footage. Multiply by average rainfall inches and a collection efficiency factor of 0.8 to estimate gallons available. Focus on clean roof sections free from overhanging trees.
2. Install Gutters and Downspouts
Use galvanized steel or aluminum gutters with leaf guards. Slope gutters slightly toward downspouts to ensure smooth flow. Connect to a first-flush diverter made from PVC pipe to discard initial dirty runoff.
3. Add Filtration Components
Incorporate a simple screen filter at the barrel inlet. For finer cleaning, layer gravel, sand, and activated charcoal in a separate filter barrel before water enters storage. This keeps the system organic and free from synthetic additives.
4. Set Up Storage Tanks
Choose food-grade plastic barrels or IBC totes. Elevate them on stable platforms for gravity-fed distribution. Multiple barrels connected in series increase capacity without high costs.
5. Create Distribution Lines
Run food-safe hoses from storage to garden beds. Add a simple spigot or drip irrigation attachment for precise watering of plants such as Cucumber and Potato. Include an overflow pipe directing excess water to a swale or compost area.
6. Test and Adjust
After the first rain, check for leaks and water clarity. Monitor pH levels to confirm suitability for sensitive crops. Adjust diverter length or add more screening as needed.
Prevention Tips
Regular maintenance keeps the system operating efficiently and prevents contamination.
- Clean gutters and screens quarterly to remove leaves and debris.
- Inspect tanks for cracks or algae growth, especially during warmer months.
- Cover storage containers tightly to deter mosquitoes and animals.
- Flush the first-flush diverter after each significant rainfall event.
- Rotate stored water use to avoid stagnation, applying it first to established beds.
By following these practices, your rainwater system will provide consistent, sustainable irrigation support for years while aligning with organic gardening standards.