Introduction
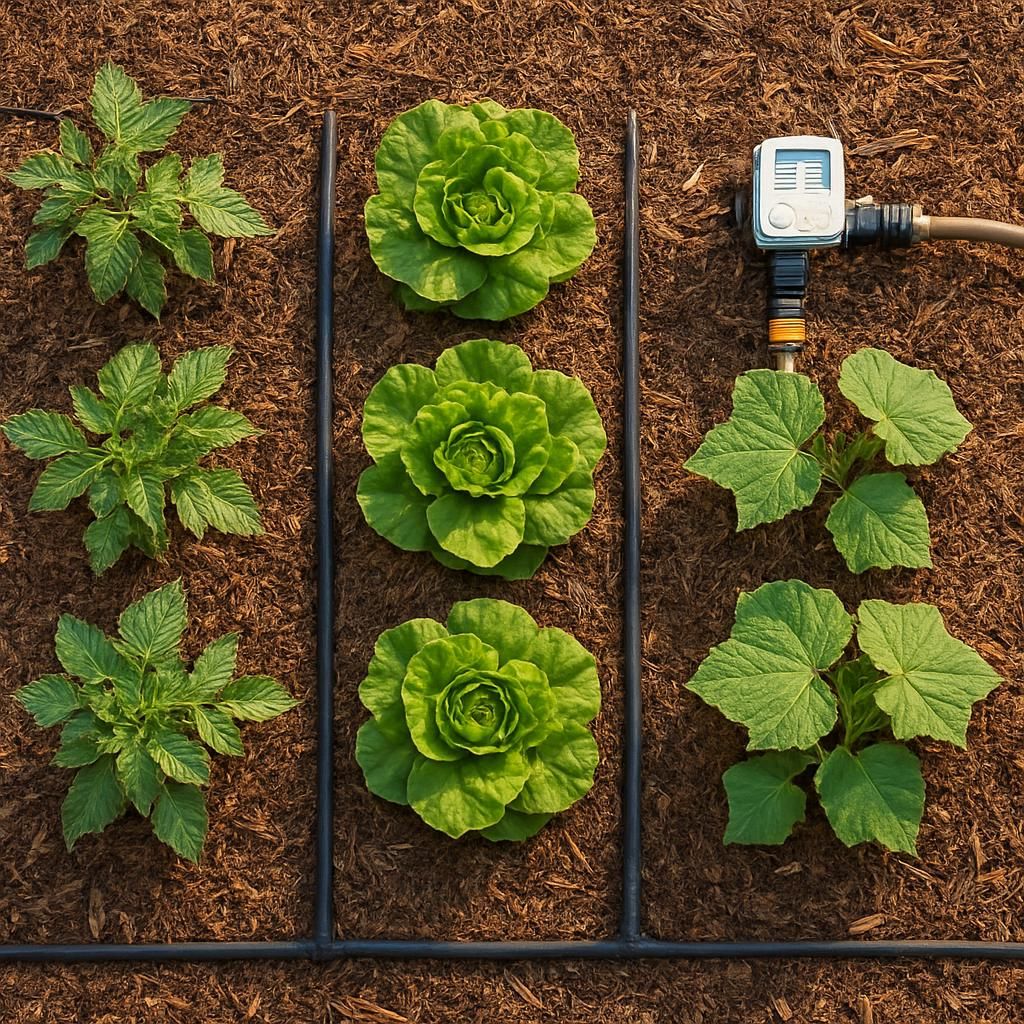
Many gardeners struggle with inconsistent watering that leads to stressed plants, uneven growth, and wasted resources. Whether caused by busy schedules, weather fluctuations, or well-intentioned but incorrect manual interventions, unreliable watering quickly damages crops such as Tomato, Lettuce, and Cucumber. An automated system removes daily guesswork and ensures each plant receives the right amount of water at the right time.
Common Causes of Watering Problems
Several factors contribute to poor garden hydration:
| Cause | Impact on Plants | Typical Result |
|---|---|---|
| Manual hose or can use | Inconsistent volume and timing | Wilting, blossom end rot, or root rot |
| Seasonal rainfall changes | Over- or under-watering | Shallow roots or fungal issues |
| Soil type variation | Uneven moisture retention | Patchy growth across beds |
| Human error or forgetfulness | Missed or excessive sessions | Stressed crops and higher disease pressure |
These issues are especially noticeable in raised beds and container gardens where soil dries faster than in-ground plantings.
Step-by-Step Organic Solutions
1. Assess Your Garden Layout and Water Needs
Begin by mapping zones according to plant water requirements. Group Tomato and Cucumber together in one zone and leafy greens such as Lettuce in another. Measure bed dimensions and note sun exposure to calculate daily water demand.
2. Choose an Efficient Delivery Method
Drip irrigation or soaker hoses deliver water directly to the root zone, reducing evaporation and foliar disease. Install 1/2-inch drip tubing with 1/4-inch micro-tubing branches for containers. Use pressure-compensating emitters rated at 0.5-1.0 gallons per hour for most vegetables.
3. Add a Smart Timer or Controller
Select a battery-powered or Wi-Fi timer with multiple programs. Set separate schedules for morning deep watering (preferred for disease prevention) and shorter afternoon top-ups only when needed. Include a rain sensor or soil-moisture probe to skip cycles after precipitation.
4. Incorporate Organic Water-Retention Practices
Apply 2-3 inches of organic mulch around all plants to slow evaporation. Amend beds with compost to improve soil structure and increase water-holding capacity. These steps complement automated systems by extending intervals between irrigation events.
5. Test and Fine-Tune the System
Run each zone for 15-20 minutes and check soil moisture at 4-6 inches depth the following morning. Adjust emitter spacing or run times until the top 6-8 inches of soil remain evenly moist but never soggy.
Prevention Tips
- Inspect emitters and filters monthly to prevent clogs from mineral deposits or organic debris.
- Flush the entire system at the start and end of each growing season.
- Keep a simple garden journal noting rainfall, run times, and plant response to refine future schedules.
- Position valves and timers in sheltered, accessible locations to simplify seasonal maintenance.
- Use food-grade, UV-resistant components to ensure long-term durability and safety around edible crops.
By combining targeted drip delivery, programmable controls, and soil-health practices, gardeners can create a watering scheme that performs reliably season after season with minimal ongoing intervention.